Social Media Management
Complete guide to connecting social accounts, creating and scheduling posts, running campaigns, and tracking engagement
1. Feature Overview
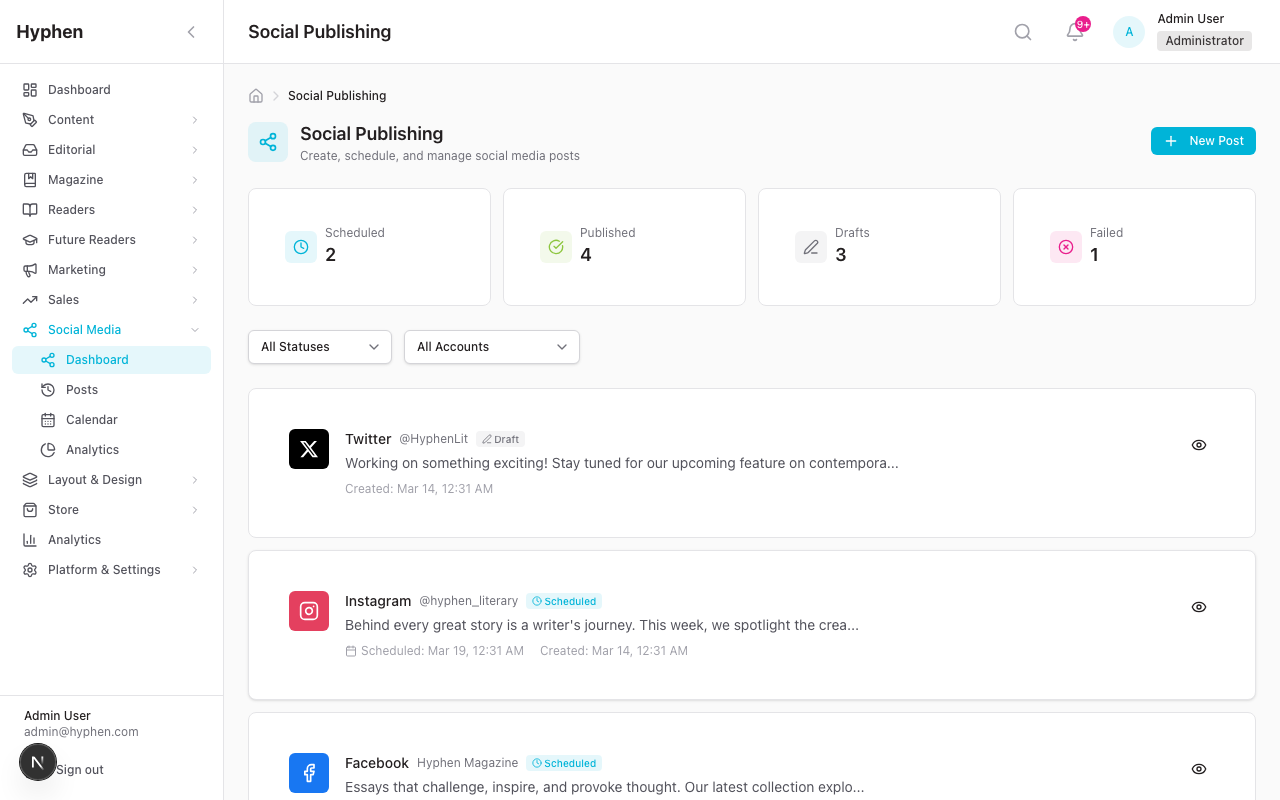
The Social Media Management module lets your team create, schedule, and publish social media posts to Facebook, Instagram, and X (Twitter) directly from the Hyphen Admin Console. You can manage all your social accounts in one place, schedule posts in advance, run multi-platform campaigns, track performance with built-in analytics, and retry posts that fail to publish.
What you can do:
- Connect your organisation's Facebook Pages, Instagram Business accounts, and X (Twitter) accounts
- Create posts for a single platform or multiple platforms at once
- Add images, hashtags, links, and UTM tracking parameters
- Schedule posts for future dates and times, or publish immediately
- View and manage your publishing queue on a visual calendar
- Organise posts into campaigns and track campaign goals
- View posting history and retry any posts that failed
- Analyse engagement metrics, top-performing content, best posting times, and hashtag performance
- Export analytics data as CSV or JSON
- Access an executive dashboard with high-level KPIs and period comparisons
Automation: The system automatically publishes scheduled posts every 5 minutes and syncs engagement metrics from each platform every hour. You do not need to do anything manually for these — they run in the background.
2. Who Should Use This Feature
| Role | What You Can Do |
|---|---|
| Admin | Full access — connect/disconnect accounts, create/edit/delete/publish posts, manage campaigns, view all analytics including the Executive Dashboard |
| Editor | Full access — same as Admin for social media features, including connecting accounts, publishing, campaigns, and Executive Dashboard |
| Publishing Team | Create, edit, publish, and schedule posts. Create and edit campaigns. View analytics. Cannot disconnect accounts or delete campaigns |
| Marketing Manager | Create, edit, and schedule posts (cannot directly publish). Create and edit campaigns. View analytics. Cannot connect/disconnect accounts |
| Chief Editor | Read-only — can view posts and analytics but cannot create, edit, or publish |
Roles without social media access: Moderator, Sub-Editor, Designer, Author, Sales Manager. If you need access, ask your Admin to update your role.
3. Before You Begin
Before you can use Social Media features, the following must be in place:
3.1 Platform Credentials (Admin/DevOps Responsibility)
Social publishing requires API credentials from each platform. These are configured as environment variables by your technical team:
| Platform | Required Credentials | Where to Get Them |
|---|---|---|
| Facebook & Instagram | META_APP_ID, META_APP_SECRET | Meta for Developers — create a Business app |
| X (Twitter) | X_API_KEY, X_API_SECRET | X Developer Portal — create a project with OAuth 2.0 |
Additionally, an ENCRYPTION_KEY environment variable must be set to securely store account tokens.
No credentials yet? The platform has a Demo Mode (
SOCIAL_DEMO_MODE=true) that lets you test the full workflow with simulated accounts and publishing. Ask your technical team to enable it.
3.2 Check Configuration Status
- Navigate to Social Publishing (sidebar menu)
- If credentials are not configured, you will see a configuration notice indicating which providers are not set up
- You can also check
/api/social/configwhich shows the setup status for each provider
3.3 Cron Jobs Must Be Active
Two automated jobs power the social media system:
| Job | Runs Every | What It Does |
|---|---|---|
| Publish Social | 5 minutes | Publishes posts that have reached their scheduled time |
| Sync Social Metrics | 1 hour | Fetches engagement data (likes, comments, shares, impressions) from each platform |
These are configured in vercel.json and need to be triggered by your hosting platform (e.g., Vercel Cron). Confirm with your technical team that these are running.
Known issue: The
vercel.jsonfile references/api/cron/social-metricsbut the actual route is/api/cron/sync-social-metrics. Your technical team should verify this is correctly mapped.
3.4 Permissions
Confirm your user role has the necessary social media permissions (see Section 2). If you see an "Access Restricted" message on any social page, contact your Admin.
4. Key Terms in Simple Language
| Term | What It Means |
|---|---|
| Social Account | A Facebook Page, Instagram Business account, or X (Twitter) account that you have connected to the platform |
| Post | A piece of content (text, images, hashtags, link) that gets published to a social platform |
| Multi-Platform Post | A single piece of content published to multiple platforms at once, with optional per-platform customisations |
| Post Group | A set of posts created together in a multi-platform batch — they share a postGroupId so you can track them as a unit |
| Draft | A post that has been saved but not yet scheduled or published |
| Scheduled | A post set to automatically publish at a specific future date and time |
| Published | A post that has been successfully sent to the platform |
| Failed | A post that the system tried to publish but could not — you can retry it |
| Cancelled | A scheduled post that was cancelled before it published |
| Publishing | A transitional state — the system is actively sending the post to the platform right now |
| Campaign | A named grouping of related posts (e.g., "Spring Launch 2026") with optional goals for impressions, engagements, and clicks |
| UTM Parameters | Tracking tags added to links so you can measure which social posts drive website traffic |
| Engagement Rate | A percentage showing how many people who saw your post interacted with it (engagements ÷ reach × 100) |
| Staggered Scheduling | Publishing the same content to different platforms at different times, spaced apart by a set number of minutes |
| Token Expiry | Social platform credentials expire after a period (Meta: ~60 days, X: hours). When expired, the account cannot publish until refreshed |
| Demo Mode | A testing mode where accounts and publishing are simulated — no real posts go to social platforms |
| Retry | Re-attempting to publish a failed post (maximum 3 retries allowed) |
5. Step-by-Step Setup Guide
5.1 Connecting a Facebook Page
Prerequisites: Meta App credentials configured, you have Admin or Editor role, you are an admin of the Facebook Page you want to connect.
- Go to Social Publishing from the sidebar menu
- Look for the account connection area or navigate to your social accounts settings
- Click Connect Facebook (or the Facebook option)
- You will be redirected to Facebook's authorisation screen
- Log in with the Facebook account that manages the Page
- Grant all requested permissions — the platform requests:
pages_show_list— to see your Pagespages_manage_posts— to publish postsinstagram_basic— to see linked Instagram accountsinstagram_content_publish— to publish to Instagraminstagram_manage_insights— to read Instagram metricsbusiness_management— to manage business assets
- Select the Facebook Page(s) you want to connect
- Click Continue / Done on Facebook's screen
- You will be redirected back to the Admin Console
- Your Facebook Page should now appear with status Connected
What happens behind the scenes: The platform exchanges the short-lived token for a long-lived token (~60 days), fetches your managed Pages and any linked Instagram Business accounts, and stores the encrypted credentials.
5.2 Connecting an Instagram Business Account
Prerequisites: Your Instagram account must be a Business or Creator account linked to a Facebook Page. Instagram connections come through the Meta (Facebook) OAuth flow.
- Follow the same steps as connecting a Facebook Page (Section 5.1)
- During the Facebook authorisation, ensure you grant Instagram permissions
- After the callback, the platform automatically detects Instagram Business accounts linked to your Facebook Pages
- Connected Instagram accounts will appear alongside your Facebook Pages
Important: Personal Instagram accounts cannot be connected. Only Instagram Business or Creator accounts linked to a Facebook Page are supported.
5.3 Connecting an X (Twitter) Account
Prerequisites: X API credentials configured, you have Admin or Editor role.
- Go to Social Publishing from the sidebar menu
- Click Connect X (Twitter) (or the X/Twitter option)
- You will be redirected to X's authorisation screen
- Log in with the X account you want to connect
- Authorise the application — the platform requests:
tweet.read— to read tweetstweet.write— to post tweetsusers.read— to read profile informationoffline.access— to maintain access via refresh tokens
- Click Authorize app on X's screen
- You will be redirected back to the Admin Console
- Your X account should now appear with status Connected
Note on token expiry: X tokens expire after a few hours, but the platform automatically uses a refresh token to get new access tokens. If you see an "Expired" status, use the Refresh action on the account.
5.4 Understanding Account Connection Status
| Status | What It Means | What to Do |
|---|---|---|
| Connected (green) | Account is active and ready to publish | Nothing — you're good to go |
| Expired (yellow/warning) | The access token has expired | Click Refresh on the account to renew the token. If that fails, disconnect and reconnect the account |
| Disconnected | Account was manually disconnected | Reconnect if you want to use it again |
| Error (red) | Something went wrong with the connection | Check the error message. Usually requires disconnecting and reconnecting |
5.5 Refreshing an Account Token
- Find the account in your social accounts list
- Click the Refresh button/action on the account
- For X: The platform uses the stored refresh token to get a new access token
- For Meta: The platform validates the current token is still valid
- The status should update to Connected with a new expiry date
5.6 Disconnecting an Account
- Find the account you want to remove
- Click Disconnect or the delete action
- If the account has scheduled or publishing posts, you will see a confirmation warning with the count of affected posts. You must confirm with Force Disconnect to proceed — this will delete all associated posts
- If there are no pending posts, the account is removed immediately
6. Day-to-Day Operations
6.1 Creating a Single-Platform Post
- Navigate to Social Publishing → Posts (or click New Post / Create Post from the dashboard)
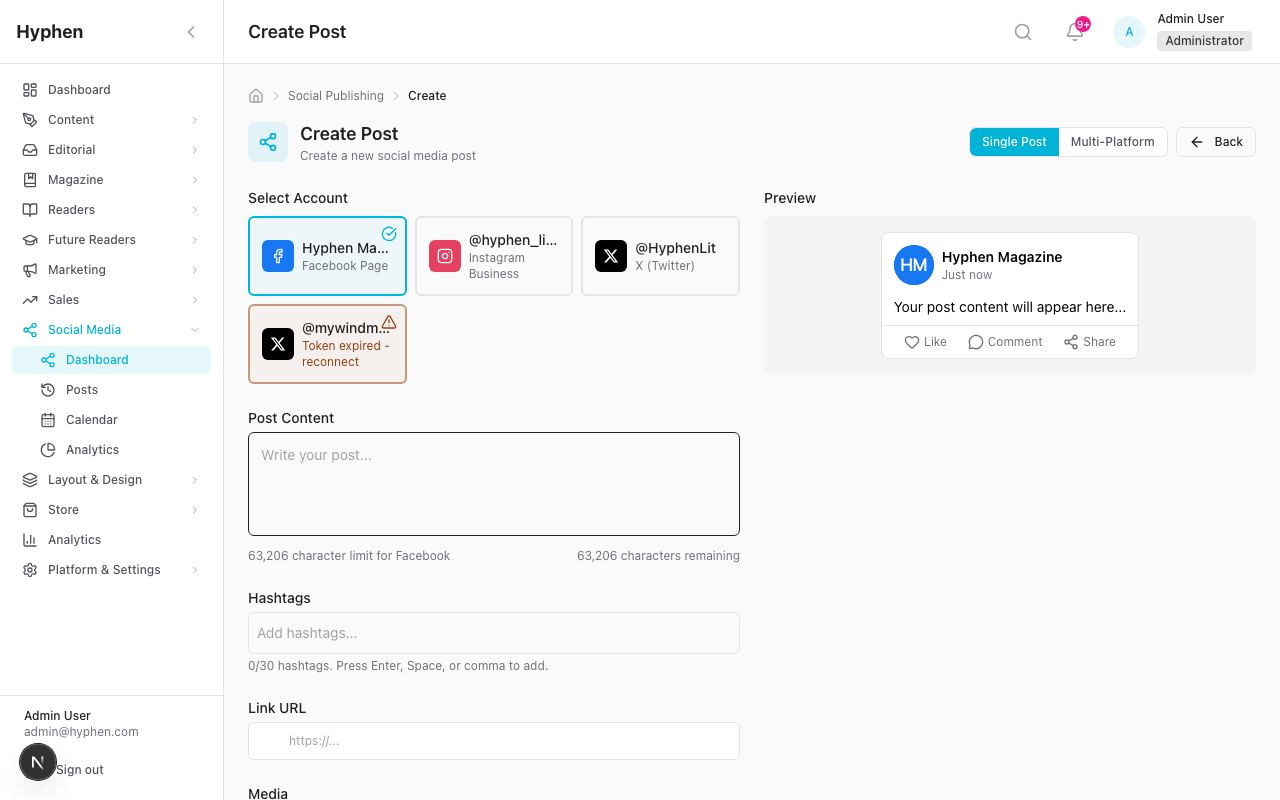
- You will land on the Compose page in Single Post mode
Left Column — Post Content:
- Select Platform — Choose the social account you want to post to (e.g., "Facebook — Brand Page"). Each account shows its platform icon and name
- Write Your Post — Type your content in the text area. A character counter shows your remaining characters
- Twitter/X: Maximum 280 characters
- Facebook/Instagram: Up to 63,206 characters
- Add Hashtags — Type hashtags in the Hashtags input field. Each platform has a maximum tag limit
- Add a Link (optional) — Enter a URL in the Link URL field
- Check "Add UTM tracking parameters" to automatically append tracking tags
- Optionally enter a Campaign name for UTM tracking
- Add Media (optional) — Click "Select from Media Library" or "Add Image URL"
- You can add up to 4 images
- Instagram requires at least one image or video — you cannot create a text-only Instagram post
- Twitter/X allows a maximum of 4 media attachments
- Choose When to Post:
- Leave the schedule picker empty to save as a Draft
- Set a future date and time to Schedule the post
- Click "Publish Now" to publish immediately
Right Column — Preview:
- A Platform Preview shows how your post will look on the selected platform (sticky, scrolls with you)
Bottom Actions:
- Click "Save Draft" to save without publishing
- Click "Schedule Post" if you set a scheduled date
- Click "Publish Now" to publish immediately
6.2 Creating a Multi-Platform Post
- Navigate to Social Publishing → Posts → Create Post
- Switch to Multi-Platform mode (toggle at the top)
Main Content (left side):
- Select Accounts — Use the MultiPlatformSelector to check multiple accounts (e.g., Facebook Brand Page + Instagram + X account)
- Write Base Copy — Enter your main post text in the base copy tab
- Customise Per Platform (optional) — Click the platform-specific tabs (Facebook, Instagram, X) to override the base copy for each platform. This is useful when you need shorter text for X or different hashtags for Instagram
- Additional Options:
- Hashtags — Shared across all platforms (or override per platform)
- Link URL — Shared link with optional UTM tracking
- Campaign — Select a campaign from the dropdown (if campaigns exist)
Sidebar (right side):
- Choose Schedule Type:
- Immediate — Publish to all selected accounts right now
- Scheduled — Pick a date and time, all posts go out at the same moment
- Staggered — Pick a start date/time and a stagger interval (in minutes, 1–1440). Posts go out one by one, spaced by the interval. Example: 3 accounts with 15-minute stagger = posts at 10:00, 10:15, 10:30
- Review the Summary card showing: account count, character count, hashtag count, and campaign
- Review the Platform Previews for each selected account
- Click "Publish Now" (for immediate) or "Schedule X Posts" (for scheduled/staggered)
After Creation:
- A success screen shows "Posts Created Successfully" with the count of posts created
- Click "Create More" to compose another post, or "View Dashboard" to return to the posts list
- All posts in the batch share a post group ID so you can track them together
6.3 Adding Media to Posts
- Click "Select from Media Library" to choose from previously uploaded images
- Click "Add Image URL" to enter a direct image URL
- Images display in a grid (up to 4)
- Remove an image by clicking its remove button
- Instagram: At least one image or video is required
- X (Twitter): Maximum 4 media attachments. Supports images, videos, and GIFs (the system auto-detects the type)
6.4 Adding Hashtags
- Type hashtags in the Hashtags input field
- Hashtags appear as badge pills with a
#prefix - Each platform may have a maximum tag limit
- Hashtag performance is tracked in analytics (see Section 6.13)
6.5 Adding Links and UTM Tracking
- Enter a URL in the Link URL field
- Check "Add UTM tracking parameters" to enable tracking
- The platform automatically generates UTM parameters:
utm_source— the platform name (e.g., facebook, instagram, twitter)utm_medium— "social"utm_campaign— optional, you can enter a custom campaign nameutm_content— optional
- The tracked URL is stored with the post and used when publishing
- You can view UTM performance in the Attribution tab of Analytics
6.6 Scheduling Posts
- When creating or editing a post, use the Schedule Picker (calendar + time picker)
- Select a future date and time
- The post status changes to Scheduled
- The publish-social cron job runs every 5 minutes and automatically publishes posts when their scheduled time arrives
- Edit lock: Posts cannot be edited within 15 minutes of their scheduled publish time (cancellation is still allowed)
6.7 Managing the Publishing Queue
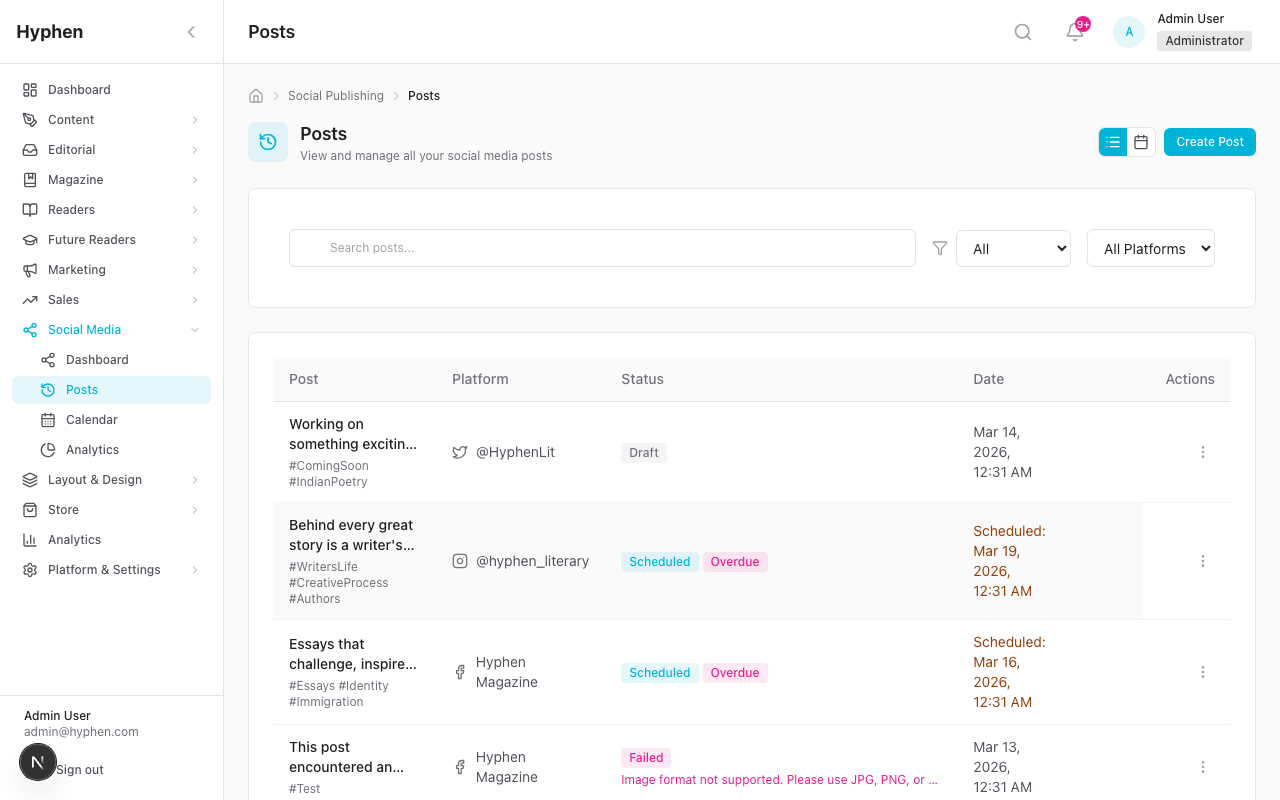
- Go to Social Publishing → Posts
- Use the List View (default) to see all posts in a table
Filters available:
- Search box — Search post content
- Status dropdown — Filter by: All, Published, Scheduled, Draft, Failed, Cancelled
- Platform dropdown — Filter by: All Platforms, Facebook, Instagram, X (Twitter)
- Campaign dropdown — Filter by campaign (if campaigns exist)
Table columns:
- Post — Content preview with hashtags, plus campaign badge if linked
- Platform — Platform icon and name
- Status — Status badge (colour-coded). Failed posts show error message. Overdue posts show an "Overdue" badge
- Date — Published, scheduled, or created date
- Metrics — Impressions (eye icon), Likes (heart icon), Comments (message icon)
- Actions menu:
- View Details — Open full post detail page
- Edit — Edit draft or scheduled posts
- Publish Now — Immediately publish a scheduled post
- Retry — Retry a failed post
- Delete — Delete the post
Pagination: "Showing X – Y of Z" with Previous/Next buttons.
6.8 Calendar View
- Go to Social Publishing → Posts
- Click the Calendar button (next to the List button) to switch views
Calendar Controls:
- View Toggle: Switch between Month, Week, and Day views (CalendarDays, LayoutGrid, Clock icons)
- Platform Filter: Filter posts by platform
- Campaign Filter: Filter by campaign
Calendar Features:
- Posts appear on their scheduled/published date as coloured dots
- Colour coding by platform: Facebook (blue), Instagram (pink/red), X (dark)
- Status dots: Scheduled (blue/primary), Published (green/success), Failed (red/error)
- Drag and drop — Drag a post to a new date to reschedule it (draft and scheduled posts only; cannot reschedule to a past date)
- Quick Create — Click on a day to open the Quick Create Modal and create a post directly from the calendar
Legend: A legend at the bottom of the calendar shows the platform colours and status dot meanings.
6.9 Creating Posts from the Calendar
- In Calendar view, click on a date
- The Quick Create Modal opens
- Fill in the post details (platform, copy, media, hashtags)
- Set the time for that date
- Save — the post appears on the calendar
6.10 Managing Social Campaigns
Campaigns let you group related posts together and set performance goals.
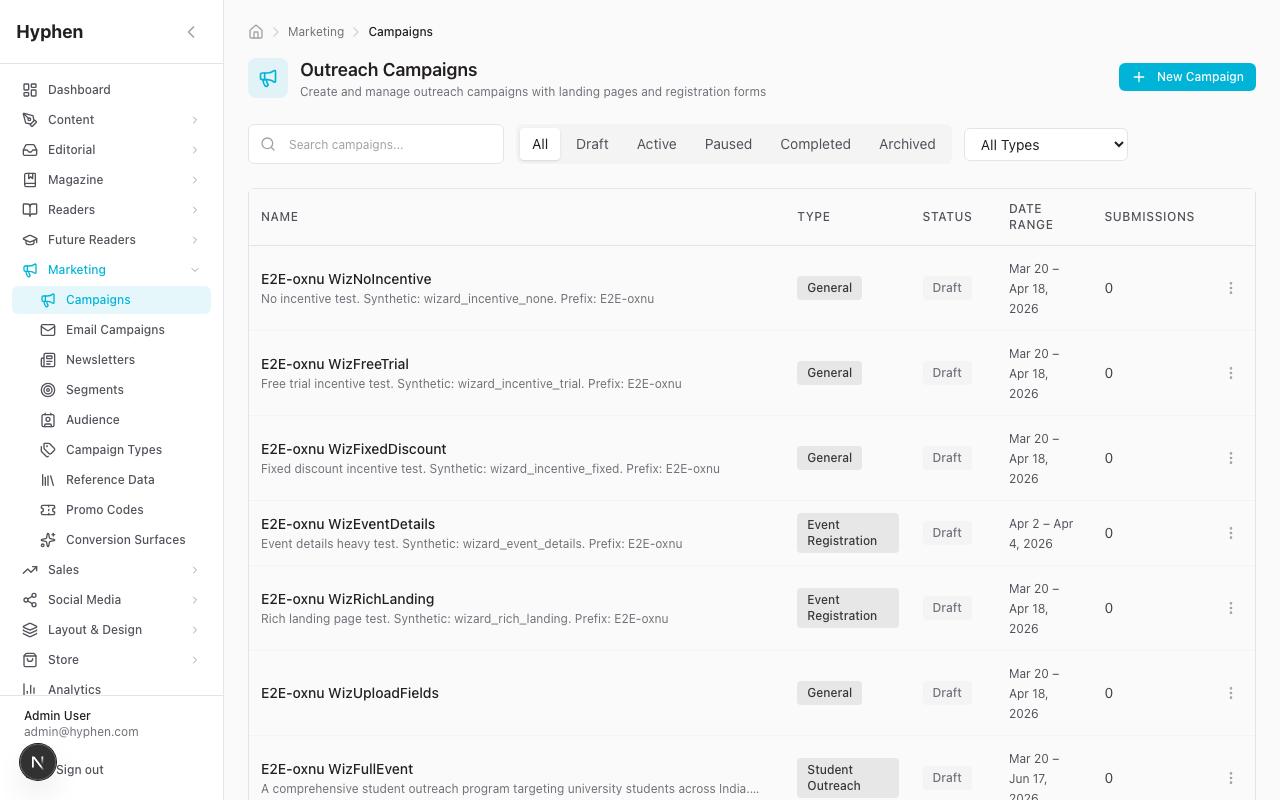
Note: Campaign pages under
/social/campaignsredirect to Marketing → Campaigns (/marketing/campaigns). Campaign management is centralised in the Marketing module.
Creating a Campaign:
- Go to Marketing → Campaigns (or click through from Social)
- Click Create Campaign
- Fill in:
- Name (required, max 200 characters)
- Description (optional)
- Start Date and End Date (optional; end date must be after start date)
- Goals (optional):
- Target Impressions
- Target Engagements
- Target Clicks
- Status defaults to Draft
- Click Save
Campaign Statuses:
- Draft — Not yet active
- Active — Currently running
- Paused — Temporarily stopped
- Completed — Finished
- Archived — Archived for reference
Status Rules:
- Archived campaigns can only go back to Draft
- Completed campaigns can only move to Archived or Active
- Active campaigns cannot be deleted — pause or archive first
Linking Posts to Campaigns:
- When creating a post (single or multi-platform), select a campaign from the Campaign dropdown
- Posts linked to a campaign show a campaign badge in the posts list
- Campaign detail pages show the most recent 10 posts and total post count
6.11 Viewing Posting History
- Go to Social Publishing → History (
/social/history) - This page shows all posts in a simplified table view
- Use Search, Status filter, and Platform filter to find specific posts
- The table shows: Post content, Platform, Status, Date, Metrics, and Actions
- Pagination is available at the bottom
6.12 Viewing Post Details
- Click View Details on any post (from the posts list, history, or calendar)
- The Post Details page (
/social/posts/[id]) shows:
Header:
- Post title/reference
- Status badge (colour-coded)
- Action buttons (vary by status):
- Draft: "Publish Now"
- Scheduled: "Cancel Schedule"
- Failed: "Retry" (with spinner while retrying)
- Draft/Failed/Cancelled: "Delete"
- Published: "View on Platform" (external link to the live post)
Left Column — Post Content:
- Full post text
- Hashtags as badge pills
- Link URL
- Media grid (2-column layout)
- Details card: Platform, Created date, Published date, Scheduled date, Created By, Platform Post ID
Right Column:
- Platform Preview (sticky)
- Performance Metrics (for published posts only):
- 6 metric boxes: Impressions, Likes, Comments, Shares, Saves, Clicks
- Engagement Rate (larger box, highlighted)
- "Last updated" timestamp
6.13 Retrying Failed Posts
- Find the failed post in the Posts list (filter by Status → Failed) or on the Post Details page
- Check the error message to understand why it failed (e.g., token expired, content rejected by platform, API error)
- If the issue is a token expiry, refresh the account token first (see Section 5.5)
- Click "Retry" from the action menu or the post detail page
- The system will attempt to publish the post again
- Maximum 3 retries are allowed (with exponential backoff: 1 second, 5 seconds, 15 seconds between attempts)
- After 3 failed retries, the post is permanently marked as Failed and must be cloned or recreated
Cloning a Failed Post:
If retrying is not possible (e.g., content needs to change, or you want to target a different account):
- Open the failed post's detail page
- Use the Clone action to create a duplicate as a new Draft
- Optionally select a different account for the clone
- Edit the cloned post as needed and publish
6.14 Social Analytics
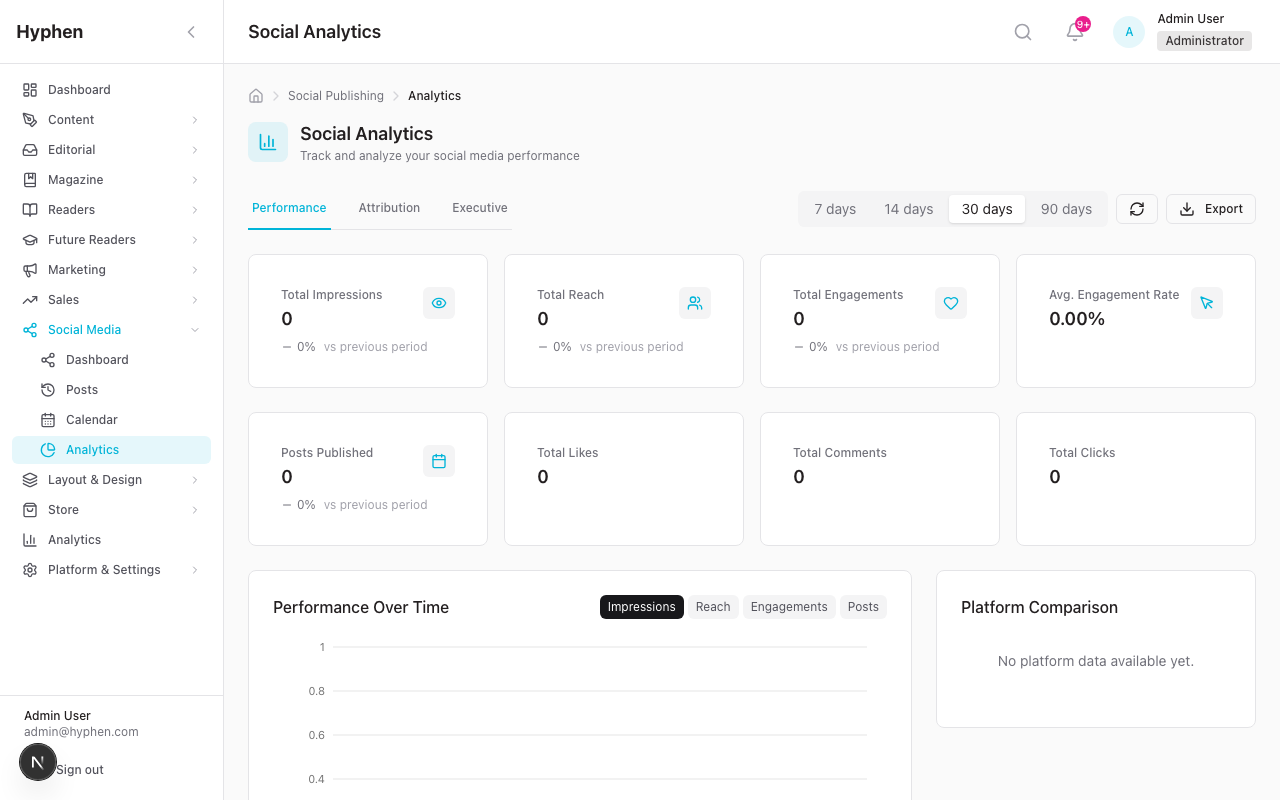
Navigate to Social Publishing → Analytics (/social/analytics).
Three tabs are available:
Performance Tab (default)
Date Range Selector: Quick buttons for 7 days, 14 days, 30 days, 90 days, plus a Refresh button.
Metric Cards (Row 1):
| Card | Icon | What It Shows |
|---|---|---|
| Total Impressions | Eye | How many times your posts were shown |
| Total Reach | Users | How many unique people saw your posts |
| Total Engagements | Heart | Total interactions (likes + comments + shares + saves + clicks) |
| Avg. Engagement Rate | Mouse Pointer | Average engagement rate across all posts |
Metric Cards (Row 2):
| Card | What It Shows |
|---|---|
| Posts Published | Number of posts published in the period |
| Total Likes | Sum of all likes |
| Total Comments | Sum of all comments |
| Total Clicks | Sum of all link clicks |
Charts and Tables:
- Engagement Chart — Line chart showing performance over time (2/3 width)
- Platform Comparison — Pie chart comparing platforms (1/3 width)
- Follower Growth Chart — Line chart of follower count over time (full width)
- Content Type Breakdown — Distribution of content types: image, video, text, link, mixed (1/2 width)
- Best Times Heatmap — 7×24 grid showing average engagement rate by day of week and hour of day. Helps you identify the best times to post (1/2 width)
- Top Posts Table — Your best-performing posts ranked by engagement
- Hashtag Performance — Which hashtags drive the most engagement, impressions, and usage
Export: Click the Export button to download analytics as CSV or JSON. You can specify a date range.
Attribution Tab
Shows how social posts drive website traffic:
- Total Posts, Total Impressions, Total Clicks, Overall Click Rate
- Click data broken down by platform
- Click data broken down by UTM campaign (sorted by clicks)
This tab is useful for understanding which platforms and campaigns are driving the most traffic to your website.
Executive Tab
Permission required: Only users with
SOCIAL_EXECUTIVE_READpermission (Admin, Editor) can see this tab.
Filters:
- Period dropdown: Last 7 days, Last 14 days, Last 30 days, Last 90 days
- Account dropdown: All Accounts or a specific account
KPI Cards:
- Total Impressions, Total Engagements, Total Clicks, Posts Published
- Engagement Rate
- Per-platform breakdown (Impressions, Engagements, Posts for each connected platform)
Additional Components:
- Period Comparison Card — Compare current period vs. previous period (e.g., last 30 days vs. the 30 days before that)
- Top Campaigns Widget — Shows your best-performing campaigns
6.15 Executive Dashboard (Standalone)
A dedicated page is also available at Social Publishing → Executive Dashboard (/social/executive).
This is a standalone version of the Executive tab with:
- Full KPI grid (Impressions, Engagements, Clicks, Posts Published)
- Engagement Rate card
- Platform breakdown cards
- Period Comparison
- Top Campaigns
- Export button for executive reports
- Same period and account filters
6.16 How Automated Publishing Works
You do not need to take any action for automated publishing. Here is what happens in the background:
- Every 5 minutes, the
publish-socialcron job runs - It finds all posts with status Scheduled where the scheduled time has arrived or passed
- It processes up to 10 posts per run
- For each post:
- Checks the account is Connected and the token is not expired
- If the token is expired, marks the account as expired and the post as failed
- Sends the post to the platform API (Facebook Graph API, Instagram Graph API, or X API v2)
- On success: marks the post as Published with the platform's post ID and URL
- On failure: increments the retry count and marks as Failed (after 3 retries, permanently failed)
- In Demo Mode: simulates publishing with fake post IDs and URLs
6.17 How Metrics Sync Works
Engagement metrics update automatically. Here is the schedule:
| Post Age | Sync Frequency |
|---|---|
| 0–24 hours after publishing | Every hour |
| 1–7 days after publishing | Once per day |
| After 7 days | No longer synced (metrics are stable) |
What gets synced:
- Impressions, Reach, Engagements, Likes, Comments, Shares, Saves, Clicks, Video Views
- Engagement Rate (calculated as: Engagements ÷ Reach × 100)
- Follower count snapshots (recorded daily for each connected account, used for the Follower Growth chart)
In Demo Mode: The system generates realistic-looking random metrics instead of calling real platform APIs.
6.18 Notifications and Email Dependencies
The social media module does not directly send emails or in-app notifications. However, related modules may notify you about:
- Campaign status changes — If a campaign linked to social posts changes status, you may receive notifications through the Marketing module
- Cron failures — The Daily Ops Summary cron (if configured) sends Slack alerts about anomalies including social publishing failures
Social post status changes (published, failed) are visible in the Social Publishing dashboard and Post Details pages.
6.19 Bulk Operations
Bulk Delete:
- Select multiple posts from the posts list
- Click the bulk action to delete
- Only non-published posts can be bulk deleted (max 50 at a time)
Bulk Status Update:
- Select multiple posts
- Change status to Draft or Cancelled in bulk
- Cannot change published or publishing posts
7. Worked Examples
Example 1: Connecting a New Instagram Account and Verifying It Is Ready to Publish
Scenario: Your marketing team just created a new Instagram Business account for a product line. You need to connect it so the team can start scheduling posts.
Steps:
- Confirm the Instagram account is set up as a Business or Creator account (not Personal) in the Instagram app settings
- Confirm the Instagram account is linked to a Facebook Page (required by Meta's API)
- Log in to the Admin Console with an Admin or Editor role
- Go to Social Publishing from the sidebar
- Click Connect Facebook (Instagram connections come through Meta OAuth)
- Log in with the Facebook account that manages the linked Page
- Grant all requested permissions (make sure Instagram permissions are included)
- Complete the authorisation flow
- Back in the Admin Console, verify:
- The Facebook Page appears with status Connected
- The Instagram Business account also appears with status Connected
- The account shows a follower count and profile info
- Test it: Create a Draft post selecting the new Instagram account, add an image (required for Instagram), and click Publish Now
- Open Instagram and verify the post appears on the account's feed
- Back in the Admin Console, the post status should show Published with a "View on Platform" link
Verification Checklist:
- Instagram account shows as Connected in the accounts list
- Token expiry date is approximately 60 days from now
- A test post with an image published successfully
- The post is visible on the real Instagram account
- Metrics begin appearing within 1 hour (after the metrics sync cron runs)
Example 2: Creating and Scheduling a Single Post with Image and CTA
Scenario: You want to announce a new article going live next Tuesday at 9 AM, with an eye-catching image and a link to read the article.
Steps:
- Go to Social Publishing → Posts → Create Post
- Select Single Post mode
- Choose your Facebook — Brand Page account
- In the text area, write your post:
Our latest deep-dive is live! Explore how independent publishers are reshaping digital media. Don't miss the insights from industry leaders. Read now and join the conversation. - In Hashtags, add:
#IndependentMedia,#Publishing,#DigitalMedia - In Link URL, paste the article URL:
https://hyphen.co/articles/reshaping-digital-media - Check "Add UTM tracking parameters"
- Enter Campaign name:
spring-content-push - Click "Select from Media Library" and choose the article's hero image
- In the Schedule Picker, select next Tuesday and set the time to 9:00 AM
- Review the Platform Preview on the right — confirm the post looks correct
- Click "Schedule Post"
- The post now appears in your posts list with status Scheduled and the date "Tue, [date] 9:00 AM"
After Publishing (next Tuesday):
- The cron job automatically publishes the post at 9:00 AM (within the 5-minute window)
- Check the post in the Admin Console — status should change to Published
- Click "View on Platform" to see it live on Facebook
- After 1 hour, check the post detail page — engagement metrics (impressions, likes, comments) should begin appearing
- In Analytics → Attribution, you should see clicks attributed to the
spring-content-pushcampaign
Example 3: Creating a Multi-Platform Campaign Post and Checking Results
Scenario: You are launching a "Women in Publishing" campaign and want to post simultaneously across Facebook, Instagram, and X with platform-specific messaging.
Steps:
-
Create the Campaign first:
- Go to Marketing → Campaigns → Create Campaign
- Name: "Women in Publishing 2026"
- Description: "Celebrating women in independent publishing throughout March"
- Start Date: March 1, 2026
- End Date: March 31, 2026
- Goals: 50,000 impressions, 5,000 engagements, 1,000 clicks
- Status: Active
- Click Save
-
Create the Multi-Platform Post:
- Go to Social Publishing → Posts → Create Post
- Switch to Multi-Platform mode
- Select all three accounts: Facebook Brand Page, Instagram Business, X account
- Base Copy:
Meet the women who are reshaping independent publishing. Our new series spotlights their stories, challenges, and triumphs. - Click the X (Twitter) tab and override the copy (to fit 280 chars):
Meet the women reshaping independent publishing. New series spotlights their stories and triumphs. - Click the Instagram tab and add:
Link in bio for the full story.at the end - Add hashtags:
#WomenInPublishing,#IndependentMedia,#HyphenMag - Add Link URL with UTM tracking, campaign name:
women-in-publishing-2026 - Select Campaign: "Women in Publishing 2026" from the dropdown
- Add the campaign hero image from Media Library
-
Schedule with Stagger:
- Choose Staggered schedule type
- Set start date/time to March 8, 2026 at 8:00 AM
- Set stagger interval to 30 minutes
- This means: Facebook at 8:00 AM, Instagram at 8:30 AM, X at 9:00 AM
-
Click "Schedule 3 Posts"
-
Success screen shows "Posts Created Successfully — 3 posts created"
Checking Results (after March 8):
- Go to Social Publishing → Posts and filter by Campaign: "Women in Publishing 2026"
- All 3 posts should show status Published with their respective published times
- Click into each post to verify:
- Facebook post has the full copy
- X post has the shortened copy
- Instagram post has the "Link in bio" addition and the image
- Go to Analytics → Performance and select 7-day range
- Check the Platform Comparison pie chart to see engagement distribution
- Check the Attribution tab to see clicks by platform for the campaign
- Go to Executive Dashboard and check the Top Campaigns Widget — "Women in Publishing 2026" should appear with its metrics and goal progress
Example 4: Handling a Failed Post and Retrying It
Scenario: A scheduled post failed to publish. You need to diagnose the issue and get it published.
Steps:
- Go to Social Publishing → Posts
- Filter by Status → Failed
- You see a post with a red Failed badge and an error message like: "Account token expired"
Diagnose:
- Click View Details to see the full error
- The error message says: "Cannot publish — account token has expired"
- Note which account the post was assigned to
Fix the Account:
- Go to your social accounts list
- Find the account — it shows status Expired
- Click Refresh on the account
- If refresh succeeds, the account returns to Connected
- If refresh fails (e.g., token too old), disconnect and reconnect the account through OAuth
Retry the Post:
- Go back to the failed post's detail page
- Click "Retry"
- The button shows a spinner while the system attempts to publish
- If successful, the status changes to Published and a "View on Platform" link appears
- If it fails again, check the new error message — the retry count is shown (e.g., "Retry 2 of 3")
If All 3 Retries Fail:
- The post is permanently marked as Failed
- Click Clone to create a duplicate as a new Draft
- Optionally choose a different account for the clone
- Edit the cloned post if needed
- Publish the new post
Example 5: Reviewing Analytics to Identify Top-Performing Content
Scenario: At the end of the month, your marketing lead wants to know which posts performed best and what patterns to repeat.
Steps:
-
Go to Social Publishing → Analytics
-
Click the 30 days date range button
-
Review the summary metric cards for an overview:
- How many impressions, how much reach, total engagements, average engagement rate
- How many posts were published, total likes, comments, clicks
-
Identify Top Posts:
- Scroll down to the Top Posts Table
- Posts are ranked by engagement
- Note what these posts have in common (topic, media type, posting time, hashtags)
-
Check Best Times to Post:
- Look at the Best Times Heatmap (7×24 grid)
- Darker cells = higher average engagement rate at that day/hour
- Note the best day+hour combinations for future scheduling
-
Analyse Hashtag Performance:
- Scroll to the Hashtag Performance section
- See which hashtags have the highest average engagement rate (not just the most usage)
- Consider retiring low-performing hashtags and doubling down on high performers
-
Compare Platforms:
- Check the Platform Comparison pie chart
- Identify which platform drives the most engagement
- Check the Attribution tab to see which platform drives the most clicks to your website
-
Check Follower Growth:
- Review the Follower Growth Chart to see trends
- Correlate growth spikes with specific posts or campaigns
-
Export the Data:
- Click the Export button
- Choose CSV format
- Select 30-day range
- Download the file and share with your marketing lead
-
Executive Summary:
- Go to the Executive Dashboard (
/social/executive) - Use the Period Comparison Card to compare this month vs. last month
- Check the Top Campaigns Widget to see which campaigns hit their goals
- Click the Export button to generate an executive report
- Go to the Executive Dashboard (
8. Common Mistakes and How to Fix Them
8.1 "I can't connect my Instagram account"
Likely cause: Instagram account is a Personal account, not a Business/Creator account, or it is not linked to a Facebook Page.
Fix:
- In the Instagram app, go to Settings → Account → Switch to Professional Account → Choose Business
- Link the Instagram account to a Facebook Page via Instagram Settings → Account → Linked Accounts → Facebook
- Try the connection flow again through the Meta OAuth flow
8.2 "My scheduled post didn't publish at the right time"
Likely cause: The publish-social cron runs every 5 minutes, so there may be up to a 5-minute delay. If the post is much later or never published:
Check:
- Is the post still in Scheduled status? → The cron may not be running. Contact your technical team to verify cron jobs are active
- Is the post in Failed status? → Check the error message. Common reasons: token expired, platform rejected the content
- Is the account in Expired status? → Refresh the token and retry the post
8.3 "I'm trying to create an Instagram post but it won't save"
Likely cause: Instagram requires at least one image or video. Text-only posts are not allowed on Instagram.
Fix: Add at least one image before saving.
8.4 "My X (Twitter) post was rejected"
Likely causes:
- Post exceeds 280 characters (including links)
- More than 4 media attachments
- Duplicate content (X rejects exact duplicate tweets)
Fix: Shorten your text, reduce media count, or modify the wording slightly.
8.5 "I see 'Account token expired' errors"
Likely cause: Social platform tokens expire periodically:
- Meta (Facebook/Instagram): ~60 days
- X (Twitter): Several hours (but auto-refreshes via refresh token)
Fix:
- Go to your accounts list
- Click Refresh on the expired account
- If refresh fails, disconnect and reconnect through OAuth
- Then retry any failed posts
8.6 "I can't edit a scheduled post"
Likely cause: Posts are locked for editing 15 minutes before their scheduled publish time.
Fix: You can still Cancel the scheduled post and create a new one with the updated content.
8.7 "I can't delete a campaign"
Likely cause: Active campaigns cannot be deleted.
Fix: First change the campaign status to Paused or Archived, then delete it.
8.8 "Analytics show zero metrics for a published post"
Likely cause: Metrics sync runs hourly. If the post was published less than an hour ago, metrics haven't been fetched yet.
Fix: Wait for the next metrics sync cycle (up to 1 hour). You can also click the Refresh button on the analytics page. If metrics are still zero after several hours, check with your technical team that the sync-social-metrics cron is running correctly.
8.9 "I don't see the Executive tab in Analytics"
Likely cause: Your role does not include the SOCIAL_EXECUTIVE_READ permission.
Fix: Contact your Admin to upgrade your role. Only Admin and Editor roles have Executive Dashboard access by default.
8.10 "I disconnected an account and lost all my posts"
Likely cause: Disconnecting an account with the force option deletes all associated posts.
Prevention: The system warns you if there are scheduled or publishing posts. Always review the warning before confirming.
Recovery: Unfortunately, deleted posts cannot be recovered. Always ensure scheduled posts are moved to a different account or published before disconnecting.
Use this checklist to validate the Social Media module is working correctly.
- META-01: Connect a Facebook Page via Meta OAuth — account appears as Connected
- META-02: Instagram Business account is automatically detected when connecting via Meta OAuth
- META-03: Token expiry date is set to approximately 60 days from connection
- X-01: Connect an X (Twitter) account via OAuth — account appears as Connected
- X-02: X refresh token is stored and can be used to refresh the access token
- ACCT-01: Refresh an expired Meta account token — status returns to Connected
- ACCT-02: Refresh an expired X account token — status returns to Connected
- ACCT-03: Disconnect an account with no posts — account is removed
- ACCT-04: Disconnect an account with scheduled posts — warning shown with post count, force option required
- ACCT-05: Account status shows correctly: Connected (green), Expired (warning), Error (red)
- POST-01: Create a single-platform Facebook post with text only — saves as Draft
- POST-02: Create a single-platform Instagram post with image — saves as Draft
- POST-03: Instagram post without image is rejected with validation error
- POST-04: X post over 280 characters is rejected with validation error
- POST-05: X post with more than 4 media attachments is rejected
- POST-06: Add hashtags — they appear as badge pills, are stored, and appear in the published post
- POST-07: Add link URL with UTM tracking — tracked URL is generated correctly
- POST-08: Add up to 4 images from Media Library — all display in grid
- POST-09: Character counter shows correct count and enforces limits
- MULTI-01: Select 3 accounts (FB, IG, X) — all show as selected
- MULTI-02: Base copy applies to all platforms
- MULTI-03: Per-platform override on X tab shows different copy for X
- MULTI-04: Immediate publish creates and publishes all posts
- MULTI-05: Scheduled publish creates all posts with same scheduled time
- MULTI-06: Staggered publish creates posts with offset times (e.g., 15 min apart)
- MULTI-07: All posts in a batch share the same postGroupId
- SCHED-01: Schedule a post for a future time — status shows Scheduled
- SCHED-02: Cron publishes the post within 5 minutes of scheduled time
- SCHED-03: Published post shows status Published with platformPostId and platformUrl
- SCHED-04: "View on Platform" link opens the actual post on the social platform
- SCHED-05: Cannot schedule a post in the past
- SCHED-06: Edit lock prevents editing within 15 minutes of scheduled time
- SCHED-07: Cancel a scheduled post — status changes to Cancelled
- CAL-01: Calendar view shows posts on correct dates with platform colours
- CAL-02: Switch between Month, Week, Day views
- CAL-03: Drag and drop a scheduled post to a new date — reschedule works
- CAL-04: Cannot drag to a past date — error shown
- CAL-05: Quick Create Modal opens when clicking a date
- CAL-06: Platform and Campaign filters work in calendar view
- CAL-07: Legend correctly shows platform colours and status dots
- RETRY-01: A post that fails to publish shows status Failed with error message
- RETRY-02: Click Retry — post is re-attempted
- RETRY-03: After successful retry, status changes to Published
- RETRY-04: After 3 failed retries, post is permanently Failed
- RETRY-05: Clone a failed post — new Draft is created with same content
- RETRY-06: Clone to a different account works correctly
- CAMP-01: Create a campaign with name, dates, and goals
- CAMP-02: Link a post to a campaign — campaign badge appears on post
- CAMP-03: Campaign detail shows linked posts and count
- CAMP-04: Cannot delete an active campaign — error shown
- CAMP-05: Archived campaign can only transition to Draft
- CAMP-06: End date must be after start date — validation works
- ANALYTICS-01: Performance tab shows correct metric totals for selected date range
- ANALYTICS-02: Date range buttons (7d, 14d, 30d, 90d) correctly filter data
- ANALYTICS-03: Engagement chart displays time-series data
- ANALYTICS-04: Platform Comparison chart shows correct distribution
- ANALYTICS-05: Top Posts table ranks posts by engagement
- ANALYTICS-06: Best Times heatmap shows data in 7×24 grid
- ANALYTICS-07: Hashtag Performance shows per-hashtag metrics
- ANALYTICS-08: Follower Growth chart shows trend over time
- ANALYTICS-09: Attribution tab shows clicks by platform and campaign
- ANALYTICS-10: Export as CSV downloads correct data
- ANALYTICS-11: Export as JSON downloads correct data
- ANALYTICS-12: Executive tab shows KPIs, period comparison, top campaigns
- ANALYTICS-13: Executive tab only visible to users with SOCIAL_EXECUTIVE_READ permission
- SYNC-01: Metrics appear on published posts within 1 hour
- SYNC-02: Metrics update hourly for posts less than 24 hours old
- SYNC-03: Metrics update daily for posts 1–7 days old
- SYNC-04: Metrics stop syncing for posts older than 7 days
- SYNC-05: Follower count snapshots are recorded daily
- SYNC-06: Demo mode generates simulated metrics (not real API calls)
- RBAC-01: Admin has full social media access
- RBAC-02: Editor has full social media access
- RBAC-03: Publishing Team can create, edit, publish, schedule posts and view analytics
- RBAC-04: Marketing Manager can create, edit, schedule posts but cannot publish directly
- RBAC-05: Chief Editor can only view posts and analytics (read-only)
- RBAC-06: Moderator / Author / Designer see "Access Restricted" on social pages
- RBAC-07: Executive Dashboard is only visible to Admin and Editor roles
- RBAC-08: Analytics Export requires SOCIAL_ANALYTICS_READ permission
- DEMO-01: With SOCIAL_DEMO_MODE=true, can connect demo accounts
- DEMO-02: Demo publishing simulates success with fake post IDs
- DEMO-03: Demo metrics sync generates plausible random metrics
- DEMO-04: Demo accounts are identified by platformId starting with
demo_
| # | Limitation | Impact | Workaround |
|---|---|---|---|
| 1 | Cron path mismatch in vercel.json — The configuration references /api/cron/social-metrics but the actual route is /api/cron/sync-social-metrics | Metrics sync may not run automatically in production | Ask your technical team to verify and fix the cron path in vercel.json |
| 2 | Metrics stop syncing after 7 days | Posts older than 7 days will not have updated metrics | This is by design to reduce API usage. For long-term tracking, export data regularly |
| 3 | Maximum 3 retries per post | After 3 failures, a post cannot be retried further | Clone the post and try again with a new post |
| 4 | X (Twitter) token expiry | X tokens expire quickly (hours), requiring frequent refresh | The platform uses refresh tokens automatically, but if both expire, a manual reconnection is needed |
| 5 | Instagram requires a Business/Creator account linked to a Facebook Page | Cannot connect personal Instagram accounts | Convert to Business account and link to a Facebook Page first |
| 6 | Instagram text-only posts not supported | All Instagram posts must include at least one image or video | Always add media for Instagram posts |
| 7 | X (Twitter) 280-character limit | Long-form content must be significantly shortened for X | Use the per-platform copy override in multi-platform mode |
| 8 | Edit lock 15 minutes before publish | Cannot make last-minute edits to scheduled posts | Cancel the scheduled post and create a new one instead |
| 9 | Campaign management lives in Marketing module | Social campaign links redirect to /marketing/campaigns | Navigate to Marketing → Campaigns for campaign CRUD |
| 10 | Maximum 10 posts per cron run | If many posts are scheduled for the same time, some may be delayed by a few minutes | The cron runs every 5 minutes, so backlog clears quickly |
| 11 | 5 pre-existing unit test failures | Twitter client test assertions use wrong style (not code bugs) | Tests need updating from expect().toBe() to expect().rejects.toThrow() |
| 12 | 1 pre-existing integration test failure | X OAuth PKCE cookie mock issue | Cookie mock infrastructure needs updating for Next.js cookies() |
| 13 | Video publishing to Instagram | Carousel (multi-image) publishing is supported, but video processing may have platform-specific delays | Check Instagram's media status before assuming failure |
| 14 | No push or email notifications for social post status changes | Users must check the dashboard to see if posts published or failed | Check the Social Publishing dashboard regularly, especially after scheduled posts |
| Page | URL Path | Purpose |
|---|---|---|
| Social Dashboard | /social | Overview with quick stats and recent posts |
| Posts List | /social/posts | Full post list with filters (list + calendar views) |
| Compose (Single) | /social/compose | Create a single-platform post |
| Compose (Multi) | /social/compose-multi or /social/create | Create a multi-platform post |
| Post Details | /social/posts/[id] | View a specific post with metrics and actions |
| Post History | /social/history | Historical view of all posts |
| Analytics | /social/analytics | Performance, Attribution, and Executive analytics |
| Executive Dashboard | /social/executive | High-level KPI dashboard with export |
| Campaigns | /social/campaigns → /marketing/campaigns | Campaign management (redirects to Marketing) |
| Permission | Admin | Editor | Publishing Team | Marketing Manager | Chief Editor |
|---|---|---|---|---|---|
| View Accounts | Yes | Yes | Yes | — | — |
| Connect/Disconnect Accounts | Yes | Yes | — | — | — |
| View Posts | Yes | Yes | Yes | Yes | Yes |
| Create Posts | Yes | Yes | Yes | Yes | — |
| Edit Posts | Yes | Yes | Yes | Yes | — |
| Delete Posts | Yes | Yes | — | — | — |
| Publish Posts | Yes | Yes | Yes | — | — |
| Schedule Posts | Yes | Yes | Yes | Yes | — |
| View Analytics | Yes | Yes | Yes | Yes | Yes |
| Executive Dashboard | Yes | Yes | — | — | — |
| View Campaigns | Yes | Yes | Yes | Yes | — |
| Create/Edit Campaigns | Yes | Yes | Yes | Yes | — |
| Delete Campaigns | Yes | Yes | — | — | — |
  Draft ──────────► Scheduled ──────────► Publishing ──────────► Published
    │                   │                                            │
    │                   ▼                                            ▼
    │              Cancelled                                    (Metrics sync
    │                                                           for 7 days)
    │                   │
    ▼                   ▼
  Publish Now     Cron publishes ──► Failed ──► Retry (max 3) ──► Published
                  at scheduled                      │
                  time                               ▼
                                               Clone as Draft
This manual is based on the Social Media Management module as implemented in the Hyphen Admin Console (March 2026). All 22 features are fully implemented and operational. For technical architecture details, refer to the module status report and architecture documentation.