E-Commerce Store
Complete guide to the Shopify-integrated e-commerce store including product catalog, inventory, orders, and checkout
1. Feature Overview
The Hyphen Ecommerce Store lets your publication sell physical products — books, print magazines, and literary merchandise — directly through the Reader Portal storefront. The store is powered by Shopify behind the scenes.
Here is how it works at a high level:
- Products are managed in Shopify. You create and manage your products (titles, descriptions, images, prices, variants, inventory) in your Shopify store.
- Products sync to Hyphen. Products are pulled from Shopify into the Hyphen Admin Console either manually (using the "Sync from Shopify" button) or automatically (through Shopify webhooks whenever a product is created, updated, or deleted).
- Your team controls editorial settings. In the Admin Console, you can mark products as "Featured" and set a display priority to control how products appear in the storefront.
- Readers browse and shop in the Reader Portal. The Reader Portal has a full storefront with product browsing, search, filtering, product detail pages, a shopping cart, and collections.
- Checkout happens on Shopify. When a reader clicks "Proceed to Checkout," they are redirected to your Shopify checkout page where they complete payment and shipping.
- Order history is available to logged-in readers. Readers can view their past orders, order details, shipping status, and tracking information in the Reader Portal.
What is fully working today:
| Capability | Status |
|---|---|
| Product sync from Shopify (manual + webhook) | Fully working |
| Product browsing, search, filtering in storefront | Fully working |
| Product detail pages with images, variants, pricing | Fully working |
| Featured products and display priority (admin) | Fully working |
| Inventory overview dashboard (admin) | Fully working |
| Shopping cart (add, remove, update quantity) | Fully working |
| Checkout redirect to Shopify | Fully working |
| Product collections | Fully working |
| Order history for logged-in readers | Fully working |
| Order detail with shipping and tracking | Fully working |
| Shopify webhook handling (product + order events) | Fully working |
| Returns/refunds visibility (admin) | Fully working |
| RBAC permissions for product management | Fully working |
2. Who Should Use This Guide
| Role | What You Will Use |
|---|---|
| Ecommerce / Store Manager | Shopify product setup, syncing products, managing featured products, monitoring inventory, verifying storefront display |
| Admin / Operations | Shopify integration setup, product sync, permissions, monitoring webhooks, reviewing returns |
| Marketing Team | Featuring products, setting display priority, verifying how products appear to readers |
| QA Team | End-to-end store testing — sync, browse, cart, checkout, orders |
| Customer Support | Understanding what readers see, helping with order questions, troubleshooting product display |
| Editorial Team | Read-only product viewing, understanding what products are available in the store |
3. Before You Begin
3.1 Prerequisites
Before the Ecommerce Store can work, the following must be in place:
-
A Shopify store with products. You need an active Shopify store with at least one published product. This is where all product data originates.
-
Shopify API credentials. You need the following from your Shopify store:
- Shop Domain — Your Shopify store URL (e.g.,
your-shop.myshopify.com) - Storefront Access Token — Used to fetch products and manage carts (public-facing)
- Admin API Access Token — Used for product sync, order retrieval, and webhook verification
- API Version — The Shopify API version to use
- Shop Domain — Your Shopify store URL (e.g.,
-
Shopify integration configured in Hyphen. An Admin must enter the Shopify credentials in the Admin Console (see Section 5.1).
-
Shopify webhooks registered. For automatic product and order sync, Shopify must be configured to send webhooks to your Hyphen instance. The webhook topics needed are:
products/updateproducts/deleteorders/createorders/updated
-
Webhook secret configured. The
SHOPIFY_WEBHOOK_SECRETmust be set for Hyphen to verify incoming webhook requests from Shopify. -
Admin permissions. The user performing setup must have the Admin role, which has full access to all product and settings permissions.
3.2 Required Permissions
| Permission | What It Allows | Who Has It by Default |
|---|---|---|
products:read | View products, inventory, and product details in Admin Console | Admin, Editor |
products:update | Edit editorial settings (Featured toggle, Priority) | Admin only |
products:sync | Trigger manual product sync from Shopify | Admin only |
| Settings access | Configure Shopify integration credentials | Admin only |
Note: Editors can view products but cannot sync products, edit featured settings, or configure the Shopify integration. If an Editor needs these capabilities, an Admin must update their role or grant additional permissions.
4. Key Terms
| Term | What It Means |
|---|---|
| Product Sync | The process of pulling product data from your Shopify store into Hyphen. This copies titles, descriptions, images, prices, variants, and inventory status. |
| Webhook | An automatic notification from Shopify to Hyphen. When you update or delete a product in Shopify, Shopify sends a message to Hyphen so the change is reflected automatically. |
| Featured Product | A product that your team has marked as important. Featured products can be sorted to the top of the storefront. |
| Priority | A number (0 or higher) that controls the display order of featured products. Higher priority = shown first when sorting by "Featured." |
| Variant | A version of a product with specific options — for example, a book in hardcover vs. paperback, or a t-shirt in size small vs. large. Each variant can have its own price and availability. |
| Handle | A URL-friendly version of the product name, created automatically by Shopify (e.g., "the-great-novel" for a product titled "The Great Novel"). Used in product page URLs. |
| Availability | The stock status of a product: In Stock, Out of Stock, or Pre-order. |
| Collection | A curated group of products in Shopify (e.g., "New Releases," "Best Sellers," "Poetry Books"). Collections appear as browsable categories in the storefront. |
| Cart | A temporary list of products a reader wants to buy. The cart is stored in the reader's browser and connects to Shopify for checkout. |
| Checkout | The final step of a purchase. Readers are redirected to Shopify's secure checkout page to enter shipping and payment details. |
| Compare-at Price | The original or suggested retail price, shown with a strikethrough when a product is on sale. The actual selling price appears next to it. |
| Storefront | The public-facing shop pages in the Reader Portal where readers browse and buy products. |
5. Step-by-Step Setup Guide
5.1 Configure Shopify Integration
This step connects your Hyphen platform to your Shopify store. An Admin must do this before any products can be synced.
-
Log in to the Admin Console with an Admin account.
-
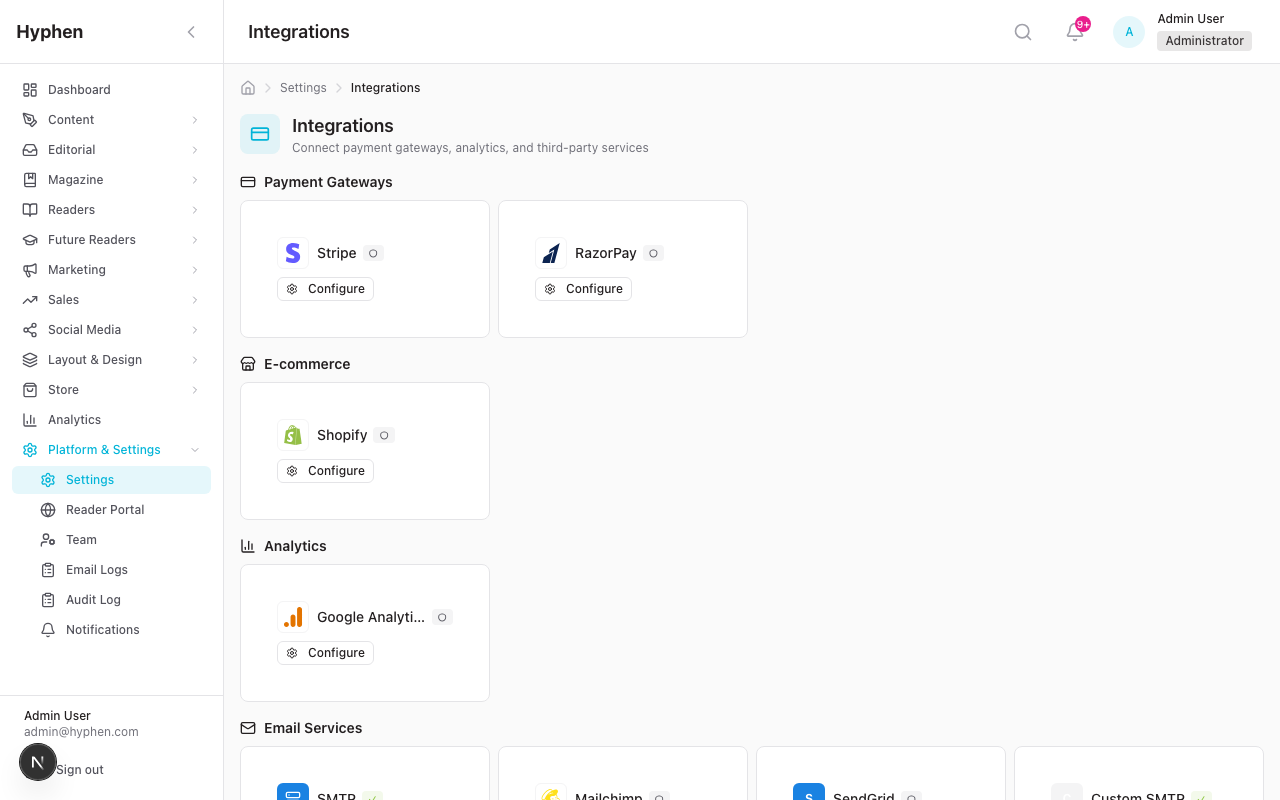
In the left sidebar, click Settings.
-
Click Integrations.
-
Scroll down to the E-Commerce section.
-
Find the Shopify integration card and click Configure.
-
A configuration modal will open with these fields:
Field What to Enter Shop Domain Your Shopify store URL (e.g., your-shop.myshopify.com)Storefront Access Token The token from your Shopify Storefront API credentials Admin API Access Token The token from your Shopify Admin API credentials API Version The Shopify API version (e.g., 2024-01) -
Click Save to store the configuration.
-
The Shopify integration card should now show as Connected.
Where to find these credentials in Shopify:
- Log in to your Shopify Admin → Settings → Apps and sales channels → Develop apps → Select or create an app → API credentials tab.
- The Storefront Access Token is under the "Storefront API" section.
- The Admin API Access Token is under the "Admin API" section.
5.2 Register Shopify Webhooks
For automatic sync when products change in Shopify, you need to register webhooks in your Shopify store pointing to your Hyphen instance.
-
In your Shopify Admin, go to Settings → Notifications → Webhooks (or configure via the Shopify API).
-
Create the following webhooks:
Event Webhook URL Product update https://your-hyphen-domain.com/api/webhooks/shopifyProduct deletion https://your-hyphen-domain.com/api/webhooks/shopifyOrder creation https://your-hyphen-domain.com/api/webhooks/shopifyOrder updated https://your-hyphen-domain.com/api/webhooks/shopify -
Set the format to JSON.
-
Copy the Webhook signing secret from Shopify — this must be configured as the
SHOPIFY_WEBHOOK_SECRETenvironment variable in your Hyphen deployment.
Note: Without webhooks, products will only update when you manually click "Sync from Shopify" in the Admin Console. With webhooks, updates happen automatically within seconds of a change in Shopify.
5.3 Sync Products for the First Time
Once Shopify is connected, sync your products into Hyphen:
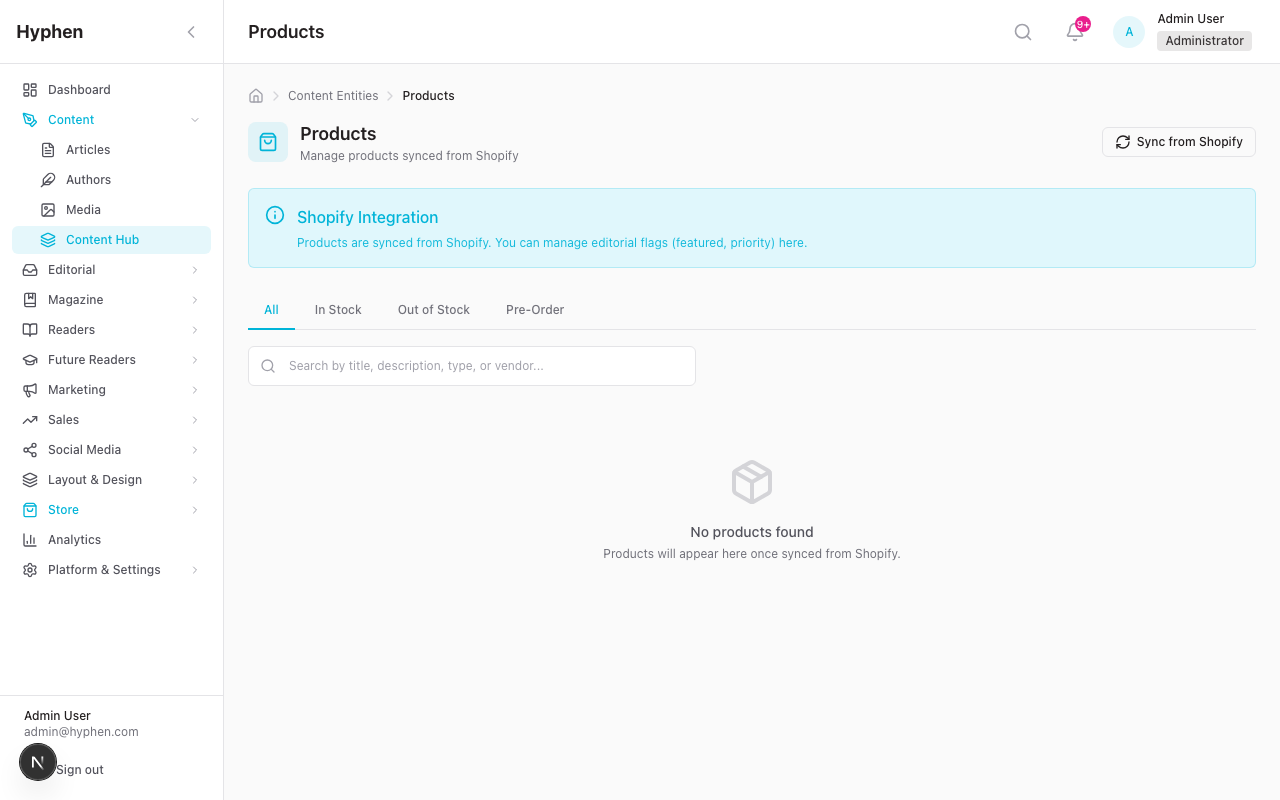
- In the Admin Console, go to the left sidebar and click Content Entities → Products.
- You will see the Products page. If this is your first time, the page will be empty.
- Click the Sync from Shopify button (top-right area of the page).
- Wait for the sync to complete. A notification will confirm how many products were synced.
- The product grid will now show your Shopify products with their images, titles, prices, and availability status.
What gets synced: Product title, description, images, price, compare-at price, product type, vendor, tags, variants (with individual pricing and availability), handle, and inventory count.
What does NOT get synced: Shopify checkout settings, shipping rules, tax settings, or payment methods. Those remain in Shopify.
5.4 Set Featured Products and Display Priority
After syncing, you can control which products are highlighted in the storefront:
- On the Products page, click on a product to open its detail page.
- On the right side, you will see the Editorial Settings section.
- Toggle Featured to "on" to mark the product as featured.
- Enter a Priority number. Higher numbers appear first when readers sort by "Featured."
- Click Save to apply changes.
Example: You want "Spring Poetry Collection" to appear at the top of the storefront when readers sort by Featured. Set it as Featured with Priority = 10. Set other featured products to Priority 5 or lower.
5.5 Monitor Inventory
To check stock levels across all products:
- In the Admin Console, go to Content Entities → Inventory (in the left sidebar under Products).
- The Inventory page shows:
- Summary cards at the top: total In Stock, Out of Stock, and Pre-Order product counts.
- Low Stock / Out of Stock alerts — products that need attention.
- Inventory table — all products with their type, price, variant count, status, and last sync time.
Note: Inventory data comes from Shopify. To update inventory, make changes in Shopify and either wait for the webhook to sync or manually trigger a sync.
6. How to Verify It Worked
After completing setup, verify the end-to-end flow:
6.1 Verify Products Appear in Admin Console
- Go to Content Entities → Products in the Admin Console.
- Confirm your products appear with correct images, titles, and prices.
- Use the availability tabs (All, In Stock, Out of Stock, Pre-Order) to filter.
- Use the Search bar to find specific products by name.
- Click into a product and verify:
- Images display correctly (gallery with thumbnails)
- Price and compare-at price are correct
- Variants are listed with their individual prices and availability
- Product type, vendor, and tags are accurate
- Shopify Product ID is shown in the Shopify Info section
- "Last Synced" timestamp is recent
6.2 Verify Products Appear in Reader Portal Storefront
- Open the Reader Portal in a browser.
- Navigate to the Shop page.
- Confirm products appear in the product grid with:
- Product image
- Product type label (e.g., "Book," "Magazine," "Merchandise")
- Title
- Vendor name (if applicable)
- Price (with compare-at price shown as strikethrough if on sale)
- Availability badges ("Sold Out" for out-of-stock, "Pre-order" for pre-order items, "Sale" for discounted items)
- Test the search bar — type part of a product name and confirm results appear.
- Test the type filters — click "Book," "Magazine," "Merchandise," or "Print" to filter.
- Test the sort options — try "Newest," "Price: Low to High," "A-Z," and "Featured."
- Test pagination — if you have more than 12 products, click "Next" and "Previous."
6.3 Verify Product Detail Pages
- From the Shop page, click on any product.
- The product detail page should show:
- Breadcrumb navigation at the top (Shop > Product Type > Product Name)
- Image gallery with clickable thumbnails and next/previous arrows
- Product title, vendor/author name, and price
- Sale badge and strikethrough compare-at price (if applicable)
- Variant selector (if the product has multiple options like size or format)
- "Add to Cart" button (or "Sold Out" if unavailable, or "Pre-order Now" for pre-order items)
- Product description (full text)
- Tags displayed below the description
6.4 Verify Cart Behavior
- On a product detail page, click Add to Cart.
- The button should briefly show "Added to Cart!" as confirmation.
- The cart icon in the header should update to show the item count (e.g., "1").
- Click the cart icon to open the Cart Drawer (slides in from the right).
- In the Cart Drawer, verify:
- Product image, title, and price appear correctly
- Quantity can be adjusted with + and − buttons
- Items can be removed
- Subtotal updates when quantity changes
- Checkout button is present
- Alternatively, navigate to
/shop/cartto see the full Cart Page with:- All cart items listed
- Quantity controls
- Line totals for each item
- Order Summary sidebar showing subtotal
- "Shipping and taxes calculated at checkout" notice
- "Proceed to Checkout" button
6.5 Verify Checkout
- From the Cart Page or Cart Drawer, click Proceed to Checkout (or Checkout).
- You should be redirected to your Shopify checkout page.
- The Shopify checkout should show the same items that were in your cart.
- Complete a test purchase (use Shopify's test mode if available).
6.6 Verify Order History (Logged-In Reader)
- Log in to the Reader Portal as a reader who has placed an order.
- Navigate to Shop → Orders (or
/shop/orders). - The Order History page should show:
- Order number (e.g., "#1001")
- Order date
- Total price
- Financial status badge (Paid, Pending, Refunded, etc.)
- Fulfillment status badge (Fulfilled, Partial, Unfulfilled)
- Item count
- Click on an order to view the Order Detail page:
- Line items with images, titles, quantities, and prices
- Order totals: Subtotal, Shipping, Tax, Total
- Shipping address (if available)
- Tracking information with tracking number and link (if fulfilled)
6.7 Verify Collections
- Navigate to Shop → Collections (or
/shop/collections) in the Reader Portal. - Confirm collection cards appear with image, title, description, and product count.
- Click a collection to see its products filtered in the shop view.
7. Worked Examples
Example 1: Syncing a New Product from Shopify and Verifying It in the Storefront
Scenario: Your team has added a new book, "Monsoon Verses," to the Shopify store and you need to verify it appears in the Reader Portal.
Steps:
-
In Shopify: Go to your Shopify Admin → Products → confirm "Monsoon Verses" is created with:
- Title: "Monsoon Verses"
- Description: Poetry collection about the monsoon season
- Product type: "Book"
- Price: ₹499
- Compare-at price: ₹699 (optional, if on sale)
- At least one image uploaded
- Status: Active
- Inventory: In stock
-
In Admin Console: Go to Content Entities → Products.
-
If webhooks are set up: The product should already appear in the list (webhooks auto-sync within seconds). Look for "Monsoon Verses" in the product grid.
-
If webhooks are NOT set up: Click Sync from Shopify and wait for the sync to complete. A success message will confirm the sync results.
-
Verify in Admin Console: Click on "Monsoon Verses" to open the product detail page. Confirm:
- Title: "Monsoon Verses"
- Price: ₹499 (displayed as ₹4.99 × 100 = 499 cents internally, but shown as ₹499)
- Product type: Book
- Images display correctly
- Availability: In Stock
-
Mark as Featured (optional): In the Editorial Settings panel on the right, toggle Featured on and set Priority to 8. Click Save.
-
Verify in Reader Portal: Open the Reader Portal → Shop page.
- Search for "Monsoon" — the product should appear.
- Filter by "Book" — the product should appear.
- Sort by "Featured" — if you set it as Featured, it should appear near the top.
- Click on the product to verify the detail page shows correct images, price (₹499 with ₹699 strikethrough if compare-at price was set), and description.
- The "Sale" badge should appear since the compare-at price is higher than the selling price.
Example 2: Checking Product Details, Price, and Availability in the Storefront
Scenario: A customer contacts support saying a product shows "Sold Out" but you believe it should be in stock.
Steps:
- In Admin Console: Go to Content Entities → Products.
- Search for the product name.
- Click the product to view its detail page.
- Check the Availability field — it will show "In Stock," "Out of Stock," or "Pre-order."
- Check the Total Inventory count (if available from Shopify).
- Check the Variants section — each variant shows its individual availability status. A product may show as "Sold Out" if all its variants are unavailable, even if some were recently restocked.
- Check the Last Synced timestamp. If it is old (e.g., hours ago), the stock may have been updated in Shopify but not yet synced.
To fix:
- In Shopify: Go to the product and confirm the inventory is updated and the product status is "Active."
- In Admin Console: Click Sync from Shopify to pull the latest data.
- After the sync completes, refresh the product detail page and confirm the availability has updated.
- In Reader Portal: Refresh the Shop page and confirm the product no longer shows "Sold Out."
Example 3: Adding a Product to Cart and Completing Checkout
Scenario: You want to test the full purchase flow from browsing to checkout.
Steps:
- Open the Reader Portal and navigate to the Shop page.
- Browse the products or search for a specific item (e.g., "Literary Tote Bag").
- Click on the product to open the Product Detail page.
- If the product has variants (e.g., Color: Black, Navy), select your preferred option from the variant selector.
- Click Add to Cart. The button will briefly show "Added to Cart!" and the cart icon in the header will update to show "1."
- Click the Cart Icon in the header to open the Cart Drawer.
- Verify the item appears with the correct title, variant, price, and quantity.
- Click Checkout in the Cart Drawer.
- Alternatively, click View Cart to go to the full Cart Page, then click Proceed to Checkout.
- You will be redirected to the Shopify Checkout page.
- On the Shopify Checkout page:
- Enter shipping address
- Select shipping method
- Enter payment details
- Click Pay now (or complete with test payment if using Shopify's test mode)
- After successful payment, Shopify displays an order confirmation.
To verify the order:
- Go back to the Reader Portal → Shop → Orders.
- Your new order should appear in the list with status "Paid" and "Unfulfilled" (until the seller ships it).
Example 4: Verifying Order History for a Logged-In Reader
Scenario: A reader contacts support saying they cannot see their order history. You need to verify it works correctly.
Steps:
-
Confirm the reader is logged in. Order history requires authentication. If the reader is not logged in, they will be redirected to the sign-in page when they try to access Orders.
-
In the Reader Portal: Log in as the reader (or use a test account that has placed orders).
-
Navigate to Shop → Orders (accessible from the shop navigation or directly at
/shop/orders). -
The Orders page should display:
- All orders associated with the reader's email address
- Each order shows: order number, date, total price, financial status, fulfillment status, and item count
-
If no orders appear:
- Confirm the reader's email address in the Reader Portal matches the email used for the Shopify checkout.
- Orders are fetched from Shopify by email address — the emails must match exactly.
-
Click on an order to view the Order Detail page. Verify:
- Line items list with correct products, quantities, and prices
- Order totals (Subtotal, Shipping, Tax, Total)
- Shipping address (if provided)
- Fulfillment and tracking information (if the order has been shipped)
-
If tracking information is available, click the tracking link to verify it opens the carrier's tracking page.
Example 5: Troubleshooting a Product Update Not Reflected in the Platform
Scenario: You updated a product's price in Shopify 30 minutes ago, but the Reader Portal still shows the old price.
Steps:
-
Check the Admin Console first.
- Go to Content Entities → Products.
- Find the product and click to open its detail page.
- Check the Last Synced timestamp.
- If the "Last Synced" time is before your Shopify update, the change has not synced yet.
-
Check if webhooks are working:
- If webhooks are configured, product updates should appear within seconds.
- If the "Last Synced" time is old, the webhook may not have fired or may have failed.
- Check your server logs for webhook errors (ask your technical team for this).
-
Manually sync:
- On the Products page, click Sync from Shopify.
- Wait for the sync to complete.
- Refresh the product detail page.
- Confirm the price has updated to the new value.
-
Verify in Reader Portal:
- Open the Reader Portal → Shop page.
- Find the product and confirm the new price appears on the product card.
- Click into the product detail page and confirm the price is updated there too.
-
If the price still does not update after manual sync:
- Confirm the product is "Active" in Shopify (draft or archived products may not sync).
- Confirm the price change was saved in Shopify (check Shopify Admin → Products → the product).
- Check that the Shopify API credentials in Settings → Integrations are still valid and connected.
Example 6: Setting Up a Seasonal Sale and Verifying Storefront Display
Scenario: Your marketing team wants to run a summer sale. You need to update prices in Shopify, feature the sale products, and verify the storefront reflects the sale.
Steps:
-
In Shopify: For each sale product:
- Set the Compare-at price to the original price (e.g., ₹999).
- Set the Price to the sale price (e.g., ₹599).
- Save each product.
-
In Admin Console:
- If webhooks are active, wait a few seconds for the sync.
- If not, go to Content Entities → Products and click Sync from Shopify.
-
Feature the sale products:
- Click on each sale product.
- In the Editorial Settings panel, toggle Featured to on.
- Set Priority to a high number (e.g., 10) so these appear first.
- Click Save for each product.
-
Verify in Reader Portal:
- Open the Shop page.
- Sort by Featured — sale products should appear at the top.
- Each sale product should show:
- The sale price (e.g., ₹599)
- The original price with a strikethrough (e.g.,
₹999) - A "Sale" badge on the product card
- Click into a sale product to verify the detail page shows the discount correctly.
Example 7: Reviewing Returns and Refunds
Scenario: A customer has requested a refund through Shopify and you want to verify it is reflected in the platform.
Steps:
-
In Shopify: Process the refund through Shopify Admin → Orders → select the order → Refund.
-
In Admin Console:
- The returns/refunds data is accessible through the admin API.
- Returns can be filtered by status: Open, Closed, or All.
-
Verify the order status update:
- In the Reader Portal, the reader can go to Shop → Orders and view the order.
- The Financial Status badge should update to "Refunded" (shown in gray).
- The order detail page will still show the original line items and totals for reference.
-
If the status does not update:
- Remember that order data is fetched directly from Shopify in real-time — there is no sync delay for orders.
- If the status still shows "Paid," the refund may not have been fully processed in Shopify yet. Check Shopify Admin for the refund status.
8. Common Mistakes and How to Fix Them
8.1 "No products appear in the Admin Console"
Possible causes:
- Shopify integration is not configured. Go to Settings → Integrations and verify Shopify is connected.
- Products have never been synced. Click Sync from Shopify on the Products page.
- Shopify API credentials are incorrect or expired. Re-enter them in the Shopify integration configuration.
Fix: Configure the integration (Section 5.1), then click Sync from Shopify (Section 5.3).
8.2 "Products appear in Admin Console but not in the Reader Portal"
Possible causes:
- Products are marked as "Out of Stock" — the public storefront hides out-of-stock products by default.
- The Reader Portal Shopify environment variables are not configured correctly.
Fix:
- Check product availability in the Admin Console. If out of stock, update inventory in Shopify and re-sync.
- Ask your technical team to verify the Reader Portal environment variables:
NEXT_PUBLIC_SHOPIFY_DOMAIN,NEXT_PUBLIC_SHOPIFY_STOREFRONT_TOKEN, andNEXT_PUBLIC_ADMIN_API_URL.
8.3 "Product prices look wrong (showing very small or very large numbers)"
Possible cause: Prices are stored in the smallest currency unit (e.g., paise for INR, cents for USD). A product priced at ₹499 is stored as 49900 internally.
Fix: This is normal internal behavior. If the display is wrong, it means the price conversion is not working correctly. Report it to the technical team. In the storefront, prices should display correctly with the currency symbol (e.g., ₹499.00).
8.4 "Clicking 'Add to Cart' does nothing"
Possible causes:
- The product or selected variant is sold out.
- The Shopify Storefront API token is invalid or misconfigured.
- Browser localStorage is full or blocked.
Fix:
- Check if the button shows "Sold Out" — if so, the product is unavailable.
- Try clearing your browser cache and cookies, then refresh the page.
- If the issue persists, ask the technical team to verify the Storefront API token.
8.5 "Checkout redirects to a broken page or error"
Possible causes:
- The Shopify Storefront API is not generating a valid checkout URL.
- The Shopify store is in maintenance mode or paused.
- Cart has expired (Shopify carts expire after 30 days of inactivity).
Fix:
- Try adding items to a fresh cart and checking out again.
- Verify the Shopify store is active and accepting orders.
- Check the Shopify integration credentials in Settings → Integrations.
8.6 "Order history shows no orders even though the reader has purchased items"
Possible cause: The email address the reader uses to log in to the Reader Portal does not match the email used during Shopify checkout. Orders are looked up by email address.
Fix: Confirm that the reader used the same email for both their Reader Portal account and the Shopify checkout. If different emails were used, the orders will not appear.
8.7 "Sync from Shopify button is not visible"
Possible cause: Your account does not have the products:sync permission. Only Admin users have this permission by default.
Fix: Ask an Admin to either perform the sync or grant you the necessary permission.
8.8 "Product images are not displaying"
Possible causes:
- The product has no images uploaded in Shopify.
- Images were removed from Shopify after the last sync.
Fix: Upload or restore images in Shopify, then trigger a sync.
- Shopify integration is configured in Settings → Integrations
- Shopify integration card shows "Connected" status
- Shopify webhook secret is configured in environment variables
- Webhooks are registered in Shopify pointing to the correct URL
- Sync from Shopify button is visible for Admin users
- Sync from Shopify button is hidden for users without
products:syncpermission - Clicking Sync from Shopify fetches and displays products from Shopify
- Sync result shows correct counts (created, updated, deleted)
- Product data matches Shopify: title, description, images, price, variants, tags, product type, vendor
- Availability is correctly set: In Stock, Out of Stock, or Pre-order
- Re-syncing updates changed products without creating duplicates
- Deleting a product in Shopify removes it from Hyphen after sync/webhook
- Creating a product in Shopify automatically creates it in Hyphen
- Updating a product in Shopify automatically updates it in Hyphen
- Deleting a product in Shopify automatically removes it from Hyphen
- Invalid webhook signatures are rejected (no unauthorized data changes)
- Products display in a grid with image, title, price, availability badge, type, and vendor
- Search filters products by name
- Availability tabs (All, In Stock, Out of Stock, Pre-Order) filter correctly
- Pagination works (12 products per page)
- Clicking a product opens the detail page
- Featured products show a star icon on their card
- Empty state displays when no products exist
- Image gallery displays all product images with thumbnails
- Product information is read-only (title, description, price, variants, etc.)
- Featured toggle can be turned on and off
- Priority field accepts numeric input
- Save button updates featured/priority settings
- Reset button reverts unsaved changes
- Shopify Product ID is displayed
- Last Synced timestamp is accurate
- Users without
products:updatepermission cannot edit editorial settings
- Summary cards show correct counts for In Stock, Out of Stock, Pre-Order
- Low stock/out of stock alert section highlights relevant products
- Inventory table shows product name, type, price, variant count, status, last synced
- Product names in the table link to the product detail page
- Products display in a responsive grid (1-4 columns based on screen size)
- Search bar filters products in real-time
- Type filter buttons (All, Book, Magazine, Merchandise, Print) work correctly
- Sort options (Newest, Price Low-High, A-Z, Featured) reorder products correctly
- Pagination displays when there are more than 12 products
- Out-of-stock products are hidden from the public storefront
- Product cards show: image, type label, title, vendor, price, and availability badges
- "Sale" badge appears when compare-at price is higher than selling price
- "Sold Out" badge appears for out-of-stock items (if displayed)
- "Pre-order" badge appears for pre-order items
- Loading skeleton displays while products are loading
- Empty state displays when no products match filters
- Breadcrumb navigation shows: Shop > Product Type > Product Name
- Image gallery with thumbnail strip works (click thumbnails, next/previous arrows)
- Product title, vendor, and description display correctly
- Price displays in correct currency format
- Sale discount shows compare-at price with strikethrough
- Variant selector appears when product has multiple variants
- Selecting a variant updates the price and availability
- Add to Cart button works and shows "Added to Cart!" feedback
- Button shows "Sold Out" when product/variant is unavailable
- Button shows "Pre-order Now" for pre-order products
- Tags display below the description
- 404 page displays for invalid product handles
- Cart Icon in header shows correct item count
- Cart Drawer opens from the right when cart icon is clicked
- Cart Drawer shows items with image, title, price, and quantity
- + and − buttons adjust quantity
- Remove button removes items from cart
- Subtotal updates correctly when quantity changes
- Checkout button in drawer redirects to Shopify checkout
- Cart Drawer closes on Escape key or clicking outside
- Cart Page (
/shop/cart) shows all items with controls - Order Summary sidebar shows subtotal and "calculated at checkout" message
- Proceed to Checkout button redirects to Shopify checkout
- Empty cart state shows "Your cart is empty" with link to shop
- Cart persists across page navigation (stored in browser)
- Clicking checkout redirects to Shopify checkout page
- Cart items appear correctly in Shopify checkout
- Fallback redirect link appears if auto-redirect fails
- Empty cart redirects back to shop instead of checkout
- Orders page requires authentication (redirects to sign-in if not logged in)
- Orders display for the authenticated reader's email
- Each order shows: order number, date, total, financial status, fulfillment status, item count
- Financial status badges display correct colors:
- Paid → Green
- Pending → Yellow
- Refunded → Gray
- Voided → Pink
- Fulfillment status badges display correct colors:
- Fulfilled → Green
- Partial → Yellow
- Unfulfilled → Gray
- Clicking an order opens the Order Detail page
- Empty state displays when reader has no orders
- Order header shows order number, date, and financial status
- Line items show product image, title, quantity, and price
- Order totals show: Subtotal, Shipping, Tax, Total
- Shipping address displays when available
- Tracking information displays with clickable tracking link
- Back link returns to Order History page
- Collections page displays all Shopify collections
- Collection cards show image, title, description, and product count
- Clicking a collection filters the Shop page to show collection products
- Empty state displays when no collections exist
- Admin users can: view products, edit featured/priority, sync products, configure Shopify
- Editor users can: view products only (no edit, sync, or configure)
- Moderators and other roles: cannot access Products pages
- Sync button is hidden for users without
products:sync - Edit controls are disabled for users without
products:update
-
Products are read-only in Hyphen. You cannot create, edit prices, update descriptions, or manage inventory within the Admin Console. All product data must be managed in Shopify. The only editable fields in Hyphen are the Featured toggle and Priority number.
-
Checkout happens entirely on Shopify. The platform does not have its own checkout page. Readers are redirected to Shopify's hosted checkout. This means checkout customization (shipping options, payment methods, discount codes) must be configured in Shopify.
-
Orders are not stored locally. Order data is fetched from Shopify's API in real-time. If Shopify is unreachable, order history will not be available. There is no offline cache of order data.
-
Order lookup is by email address. The reader's email in the Reader Portal must match the email used at Shopify checkout for orders to appear in their history. If a reader uses a different email at checkout, those orders will not be linked.
-
Cart is browser-based. The shopping cart is stored in the reader's browser (localStorage). If a reader clears their browser data or switches devices, the cart is lost. Carts are not synced to a reader's account.
-
Shopify carts expire after 30 days. If a reader adds items to their cart but does not check out within 30 days, the cart is automatically expired by Shopify.
-
Guest checkout is handled by Shopify. Whether guest checkout is available depends on your Shopify store settings, not Hyphen. If Shopify allows guest checkout, it will work. The Reader Portal itself does not require login to browse or add to cart — only the Order History page requires authentication.
-
Return/refund requests cannot be submitted through the Reader Portal. Returns and refunds must be processed through Shopify directly. The Admin Console provides read-only visibility into returns/refunds processed in Shopify.
-
Currency is INR by default. The storefront formats prices in Indian Rupees (₹). The currency is determined by the Shopify store configuration.
-
No real-time inventory updates in the storefront. Inventory shown in the storefront reflects the last sync or webhook update. If inventory changes rapidly in Shopify, there may be a brief delay before the storefront reflects the change.
This guide covers the Ecommerce Store as implemented in the Hyphen platform as of March 2026. For questions about Shopify-specific configuration, refer to Shopify's Help Center. For platform support, contact your Admin or Operations team.