Marketing Operations Guide
Operations perspective on campaign lifecycle, team coordination, approval workflows, and day-to-day marketing management
1. What the Marketing Module Does
The Marketing module is your central hub for growing your readership and engaging your audience. Think of it as a complete marketing toolkit built into your publishing platform.
Here is what you can do with it:
- Run outreach campaigns — Create landing pages with registration forms for student programs, events, contests, or lead generation. Readers can register, upload documents, and receive promo codes.
- Build and manage your audience — Import contacts from CSV files, collect them automatically from campaign registrations and newsletter signups, and organize them with tags.
- Create targeted segments — Group your readers and contacts by subscription status, activity, tags, campaign participation, and more. Use these segments to send targeted emails or invitations.
- Send email campaigns — Design emails using templates, choose a segment, and send immediately or schedule for later.
- Manage newsletters — Create newsletter editions, publish them to a public archive, and send them as email campaigns to your subscribers.
- Create promo codes — Offer percentage discounts, fixed discounts, or free trial periods. Promo codes can be created manually or generated automatically when you approve a campaign registration.
- Set up conversion surfaces — Show pop-up modals, banners, slide-in panels, and sticky notifications on your Reader Portal to encourage readers to subscribe, register, or redeem a coupon. You control exactly when, where, and to whom these appear.
- Track everything — See submission counts, email open and click rates, and conversion surface performance all from the Admin Console.
Implementation status: All 24 marketing features are fully implemented and working. This guide covers the current system as-built.
2. Who Should Use This Guide
| If you are... | You will use this guide for... |
|---|---|
| A Marketing team member | Creating campaigns, building audience segments, sending emails, managing promo codes, setting up conversion surfaces |
| A Publishing operations lead | Understanding end-to-end campaign workflows, reviewing submissions, monitoring campaign performance |
| A QA tester | Validating that campaigns publish correctly, forms submit properly, emails send on time, and conversion surfaces appear as configured |
| A Customer admin (new to the platform) | Learning where everything is, what to set up first, and how to run your first campaign |
| An Editor or content manager | Viewing campaign details, understanding how campaigns interact with the Reader Portal |
3. Before You Begin — Setup Checklist
Several things must be configured before the marketing features work properly. If you skip these steps, campaigns may publish but emails will not send, files will not upload, or newsletters will not load.
Must-Have Setup Items
| # | What Needs to Be Set Up | Where to Check | Why It Matters |
|---|---|---|---|
| 1 | Email sending (SendGrid or SMTP) | Admin Console → Settings → Email → check SMTP Status | Without this, no emails will be sent — no campaign invitations, no approval notifications, no email campaigns. This is the single most critical dependency. |
| 2 | Email templates | Admin Console → Settings → Email Templates → look for 4 templates starting with campaign_ | These templates are used for approval emails, rejection emails, campaign invitations, and "new campaign" notifications. If they are missing, those emails will fail silently. Ask your technical team to run the email template seeder if they are not there. |
| 3 | Email branding (logo, colors, footer) | Admin Console → Settings → Email Preferences | This controls how your outgoing emails look — your logo, colors, footer text, and the unsubscribe link. Without it, emails will look unbranded or may not include required unsubscribe links. |
| 4 | Your role permissions | Admin Console → Settings → Roles & Permissions → select your role → check "Marketing" permissions | If you cannot see the Marketing pages or certain buttons are missing, your role may not have the right permissions. You need permissions for Campaigns, Segments, Email Campaigns, and Submissions at minimum. |
| 5 | Scheduled task runner (cron jobs) | Ask your technical team | Scheduled email campaigns, automatic campaign expiration, and invitation sending all depend on background jobs running on a schedule. If these are not set up, scheduled sends will never fire. |
Nice-to-Have Setup Items
| # | What Needs to Be Set Up | Why It Matters |
|---|---|---|
| 6 | File storage (S3 or equivalent) | Required only if your campaign forms include file uploads, selfie photos, or ID card uploads. Without it, those fields will not work. |
| 7 | Newsletter CMS (Strapi) | Required only if you plan to use the Newsletter Editions feature. Without it, the Newsletters page will show errors. |
| 8 | Email engagement webhooks (SendGrid or Mailchimp) | Required only if you want to see open rates, click rates, and bounce rates for your email campaigns. Without it, emails will still send, but you will not see engagement metrics. |
| 9 | Analytics (Google Analytics 4) | Required only if you want conversion surface events to appear in your GA4 reports. Internal analytics will still work without it. |
How to Verify Email Is Working
- Go to Admin Console → Settings → Email
- Look for the SMTP Status indicator
- It should say "configured" with a green status
- If it says "not configured", contact your technical team to set up the email provider
4. Key Terms in Plain Language
| Term | What It Means |
|---|---|
| Outreach Campaign | A marketing initiative with its own landing page, registration form, and optional incentives. Examples: a student discount program, a literary event registration, a writing contest. |
| Campaign Type | A label that categorizes your campaign — such as "Student Outreach", "Event Registration", "Lead Generation", "Institutional", or "General". You can create custom types too. |
| Landing Page | The public-facing page that readers see when they visit your campaign. It shows your hero image, campaign details, registration form, and call-to-action. The URL looks like: yoursite.com/campaigns/campaign-name |
| Segment | A group of readers and/or contacts defined by filters. For example: "All active subscribers" or "Contacts tagged as students". Segments are used to target emails and invitations. |
| Audience Contact | A person in your contact database who may or may not be a registered reader. Contacts come from CSV imports, campaign registrations, or newsletter signups. |
| Email Campaign | A one-time or scheduled email sent to everyone in a segment. Unlike transactional emails (like password resets), these are marketing emails you compose and send on purpose. |
| Newsletter Edition | A single issue of your newsletter. You write it, optionally publish it to a public archive, and can send it as an email campaign to a segment. |
| Promo Code | A discount or free trial code that readers can redeem. Can be created manually (like WELCOME20) or generated automatically when you approve a campaign submission. |
| Conversion Surface | A promotional overlay that appears on the Reader Portal — such as a pop-up modal, a banner at the top or bottom of the page, a slide-in panel from the corner, or a sticky notification. You configure when it appears, who sees it, and what it promotes. |
| Submission | When a reader fills out and submits a campaign registration form, that creates a submission. Submissions can be approved, rejected, or put on hold for more information. |
| Invitation | An email sent to people in a segment inviting them to participate in a campaign. Different from a general email campaign because it is specifically tied to one outreach campaign. |
| Draft | A campaign, email, or surface that has been created but is not yet live. Only you can see it in the Admin Console. Readers cannot see drafts. |
| Active / Published | The campaign or surface is live and visible to readers on the Reader Portal. |
| Paused | Temporarily taken offline. The landing page shows a "temporarily unavailable" message. |
| Completed | The campaign has finished (usually because its end date passed). The landing page may show a recap with gallery, winners, and resources. |
| Archived | Permanently hidden. No longer accessible to readers. Analytics are preserved. |
5. Getting Around — The Marketing Hub
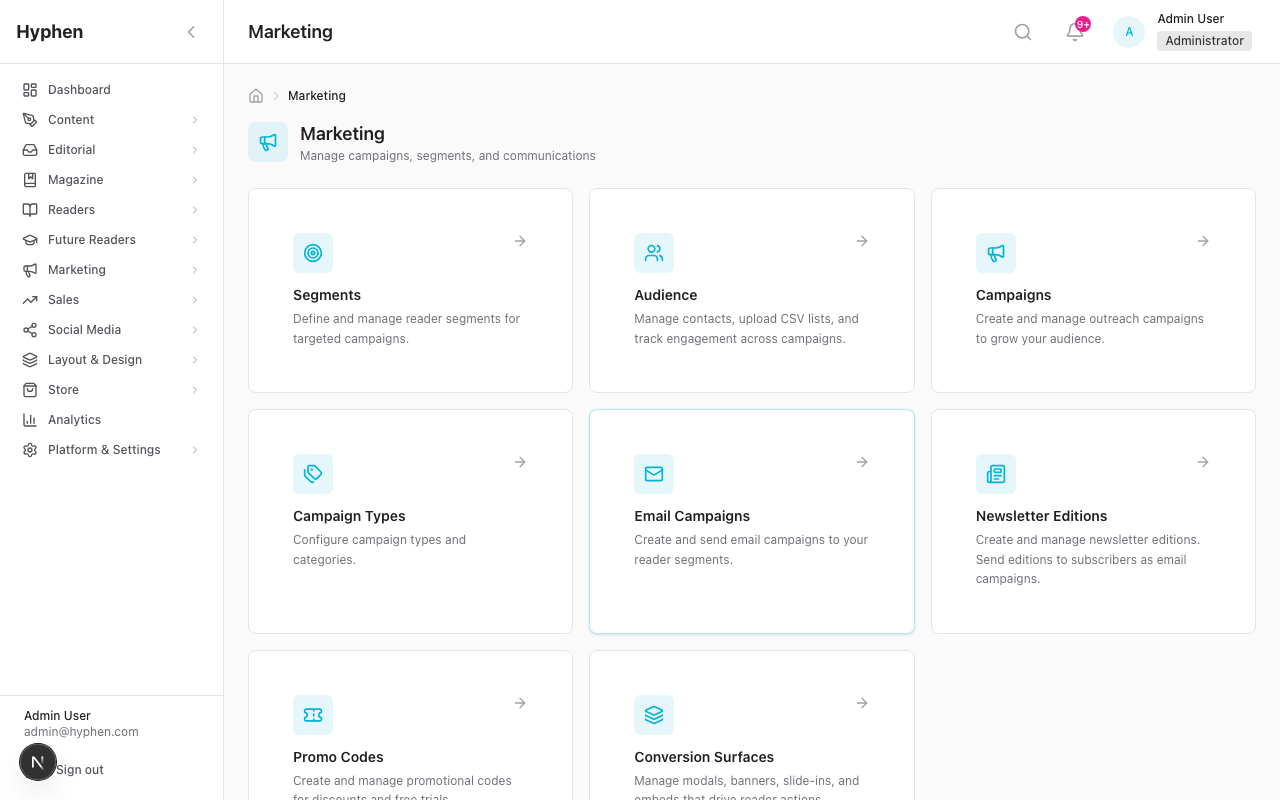
When you navigate to Marketing in the Admin Console sidebar, you land on the Marketing Hub — an overview page with cards for each sub-module.
Hub Cards
| Card | What It Opens | What You Do There |
|---|---|---|
| Segments | Segments & Contacts page | Build audience segments using filters; manage contacts |
| Audience | Same page, Contacts tab | Manage individual contacts, import CSV, export data |
| Campaigns | Outreach Campaigns list | Create, edit, publish, and manage outreach campaigns |
| Campaign Types | Campaign Types page | Add, edit, or deactivate campaign type categories |
| Email Campaigns | Email Campaigns list | Create, schedule, and send email campaigns to segments |
| Newsletter Editions | Newsletters list | Create newsletter issues, publish to archive, send as emails |
| Promo Codes | Promo Codes page | Create and manage discount/trial codes |
| Conversion Surfaces | Conversion Surfaces list | Create and manage pop-ups, banners, and notifications |
Each card is only visible if you have the relevant permissions. If a card is missing, check with your admin about your role's permissions.
6. Campaign Types — What They Are and When to Use Them
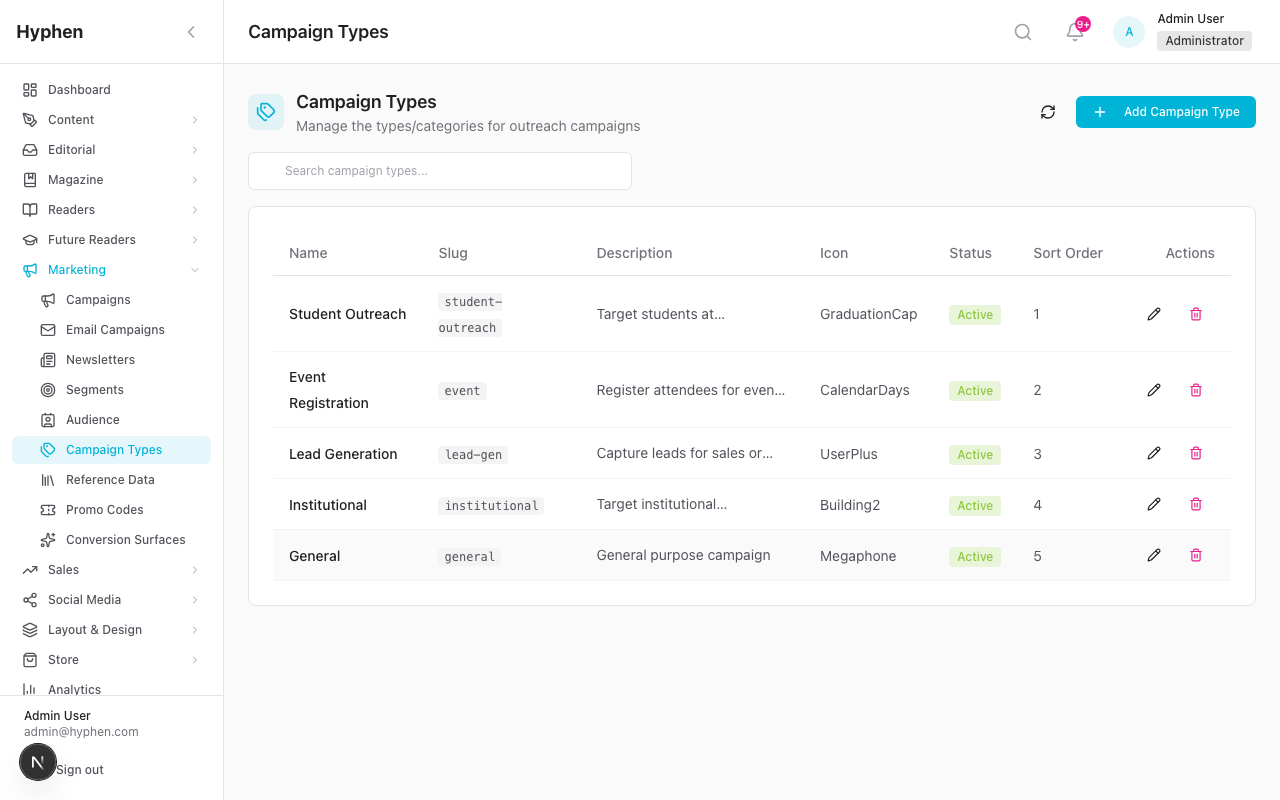
Where to Find It
Admin Console → Marketing → Campaign Types
What Campaign Types Do
Campaign types are labels that help you categorize your outreach campaigns. When you create a new campaign, you choose a type from a dropdown. Types also affect how the campaign landing page renders on the Reader Portal (event-type campaigns get special sections like Speakers, Schedule, and Venue).
Default Types (Pre-Loaded)
| Type | When to Use It |
|---|---|
| Student Outreach | Programs targeting students at schools, colleges, or universities. Typically includes institution verification, student ID upload, and discount incentives. |
| Event Registration | Conferences, webinars, workshops, readings, book launches, and similar events. Gets special landing page sections for speakers, schedule, venue, live stream, and post-event content (gallery, winners, resources). |
| Lead Generation | Campaigns designed to collect contact information from potential readers, subscribers, or partners. |
| Institutional | Campaigns targeting institutional partners — libraries, universities, corporations — often for bulk or institutional subscriptions. |
| General | Any campaign that does not fit the other categories. |
How to Add a New Campaign Type
- Go to Marketing → Campaign Types
- Click "Add Campaign Type" (top right)
- Fill in:
- Name: e.g., "Writing Contest"
- Slug: auto-fills from the name (e.g., "writing-contest")
- Description: "Contests for reader-submitted fiction and poetry"
- Icon: Enter a Lucide icon name (e.g., "Trophy")
- Sort Order: Lower numbers appear first in the dropdown (e.g., 0 = first)
- Active: Toggle on — inactive types will not appear as options when creating campaigns
- Click "Create"
The new type now appears in the dropdown when creating or editing a campaign.
7. Building Your Audience — Contacts and Segments
7A. Managing Audience Contacts
Where to Find It
Admin Console → Marketing → Segments → click the "Contacts" tab (Or: Marketing → Audience, which goes to the same place)
What Are Audience Contacts?
Audience contacts are people in your database who you want to reach with marketing. They may or may not have reader accounts on your platform. Contacts can come from three sources:
- CSV import — You upload a spreadsheet of contacts
- Campaign submissions — When someone registers through a campaign form, they are automatically added as a contact
- Newsletter signups — When someone subscribes to your newsletter on the Reader Portal, they are automatically added as a contact
How to Import Contacts from a CSV File
- Go to the Contacts tab
- Click "Upload CSV"
- Drag and drop your CSV file (or click to browse)
- Map your columns: The system shows you the columns it found in your file. For each column, select which contact field it maps to:
- Email (required — every contact must have an email)
- Name, Phone, Institution, Designation, City, State, Country, Tags
- Preview the data: The system shows you the first few rows so you can verify the mapping looks correct
- Click "Upload"
- The system processes the file and reports:
- How many contacts were created (new)
- How many were updated (email already existed)
- How many were skipped (errors)
Important: If you upload a CSV with emails that already exist in the system, those contacts are updated with the new data — they are not duplicated.
How to Add a Single Contact
- Go to the Contacts tab
- Click "Add Contact"
- Fill in: Email (required), Name, Phone, Institution, Designation, City, State, Country, Tags
- Click "Save"
How to Edit or Delete Contacts
- Edit: Click on any contact in the table to open the edit modal
- Delete: Select one or more contacts with the checkboxes, then click "Delete" in the bulk actions bar
- Bulk tag: Select contacts and use the bulk tag action to add tags to multiple contacts at once
How to Export All Contacts
Click the "Export" button to download a CSV of all active contacts.
7B. Creating User Segments
Where to Find It
Admin Console → Marketing → Segments → "Segments" tab
What Is a Segment?
A segment is a saved set of filters that defines a group of people. When you send an email campaign or invitation, you choose a segment as your audience. The system figures out who matches the filters at the time of sending.
Segments can include both registered readers (people with accounts on your platform) and audience contacts (people you imported or who submitted through campaigns).
How to Create a Segment
- Go to the Segments tab
- Click "New Segment"
- Give it a Name (e.g., "Active Subscribers Without Newsletter") and optionally a Description
- Build your filters using the filter panel on the left side. Available filters:
| Filter | What It Does |
|---|---|
| Contact Source | Choose "Readers" (registered users), "Audience Contacts" (imported contacts), or "All" (both) |
| Campaign | People who participated in a specific campaign |
| User Tier | Free, Basic, Premium, or other subscription tiers |
| Account Status | Active, Inactive, or Banned readers |
| Subscription Status | Active, Expired, Cancelled, or Trial subscriptions |
| Email Verified | Whether the reader has verified their email |
| Newsletter Opt-In | Whether the reader has opted into the newsletter |
| Audience Tags | Tags you have assigned to audience contacts |
| Registration Date | When the reader signed up (date range) |
| Last Active Date | When the reader was last active (date range) |
- As you add filters, the member count updates in real-time on the right sidebar. This tells you how many people currently match your filters.
- Click "Preview Members" to see a sample of who is in the segment
- Click "Save Segment"
How Filters Work Together
- Filters from different groups are combined with AND (all must be true)
- Choices within the same filter are combined with OR (any can be true)
Example: If you select User Tier = "Free" AND Newsletter Opt-In = "Not subscribed", the segment will include people who are on the free tier AND have not opted into the newsletter.
When to Use Segments
- Email campaigns: Choose a segment as the audience when sending an email campaign
- Campaign invitations: Target a segment with email invitations to a specific campaign
- Planning: Use the member count to gauge the size of an audience before committing to a campaign
8. Creating and Managing Outreach Campaigns
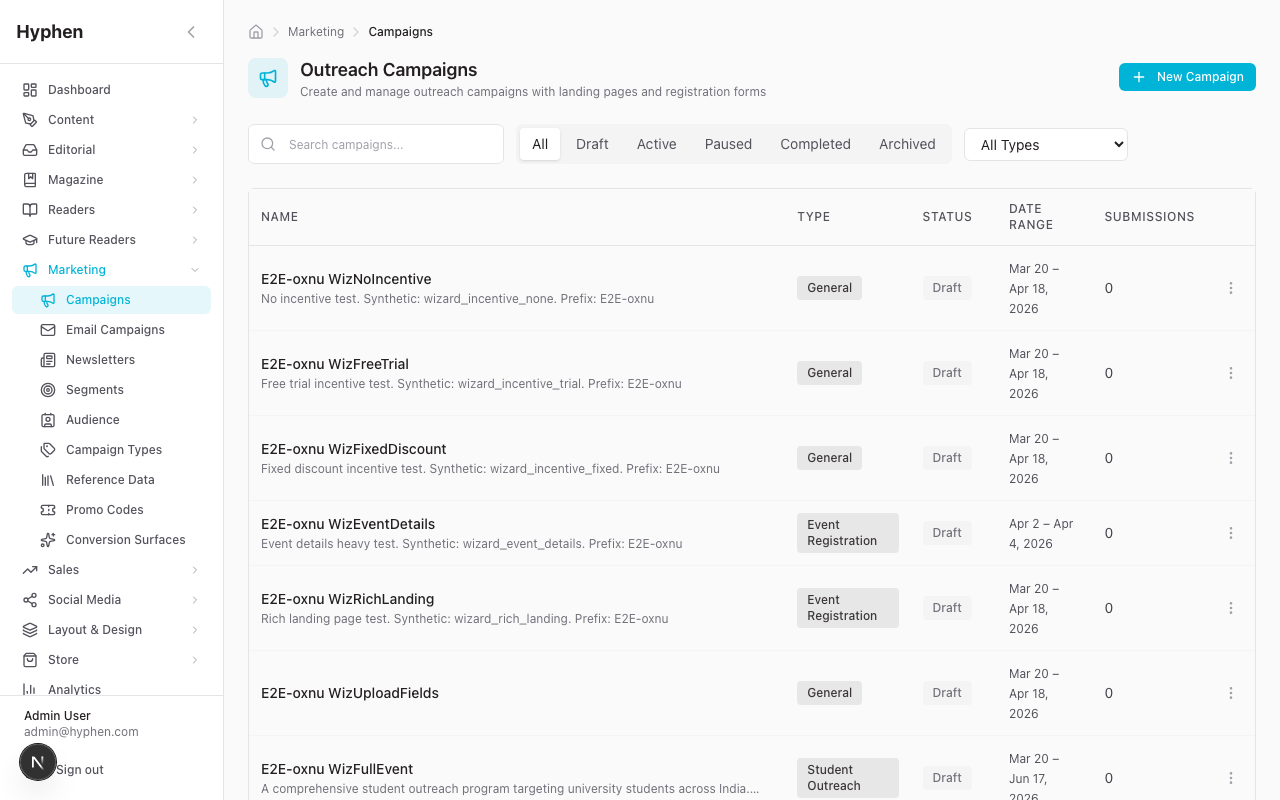
Where to Find It
Admin Console → Marketing → Campaigns
The Campaign List Page
When you open the Campaigns page, you see a list of all your campaigns. You can:
- Search by campaign name using the search bar
- Filter by status using the tabs at the top: All, Draft, Active, Paused, Completed, Archived
- Create a new campaign by clicking "New Campaign" (top right)
- View, Edit, Archive, or Delete a campaign using the action menu on each row
Creating a New Campaign — The 7-Step Wizard
Click "New Campaign" to open the creation wizard. The wizard has 7 steps:
Step 1: Basics
| Field | What to Enter | Required? |
|---|---|---|
| Campaign Name | A descriptive name (e.g., "Student Outreach Program 2026") | Yes |
| URL Slug | The URL path for the landing page (auto-generated from the name, e.g., "student-outreach-2026"). The full URL will be: yoursite.com/campaigns/student-outreach-2026 | Yes |
| Campaign Type | Select from the dropdown (Student Outreach, Event Registration, etc.) | Yes |
| Description | A brief description of the campaign purpose | No |
| Start Date | When the campaign begins accepting registrations | Yes |
| End Date | When the campaign stops accepting registrations | Yes |
| Require manual verification | Check this if you want to review every submission before it counts as approved | No |
Click "Next" to continue.
Step 2: Form Fields
This is where you design the registration form that readers will fill out on your campaign landing page.
Click fields to add them to your form. Available field types:
| Field Type | What It Does |
|---|---|
| Text | A single-line text input |
| An email address field with validation | |
| Phone | A phone number field with validation |
| URL | A web address field |
| Number | A numeric input |
| Date | A date picker |
| Textarea | A multi-line text area for longer responses |
| Select | A dropdown with predefined options |
| Radio | Single-choice radio buttons |
| Checkbox | Multi-choice checkboxes |
| Photo Selfie | A selfie camera/upload field — on mobile, it can open the front camera |
| Photo ID Card | An ID card camera/upload field — on mobile, it opens the rear camera |
| File Upload | A file upload for documents (PDF, DOC, DOCX, XLS, etc.) |
| Institution Picker | A searchable dropdown of institutions |
For each field, you can configure:
- Label: The field name shown to readers
- Placeholder: Hint text shown inside the empty field
- Required: Whether readers must fill it in
- Help Text: Additional guidance shown below the field
- Validation: Minimum/maximum length, allowed patterns
You can reorder fields by dragging them and remove fields by clicking the delete icon.
You can also configure Notify Form fields at the bottom — these are shown on the "Get Notified" form that appears when a campaign is upcoming, paused, or expired. If you leave this empty, the system uses a default Name + Email form.
Step 3: Landing Page
| Field | What to Enter |
|---|---|
| Hero Image | Click to select from the Media Library. Recommended size: 1920×800px or larger. This is the large banner image at the top of your campaign page. |
| Page Title | The main heading displayed over the hero image (e.g., "Join Our Student Outreach Program"). Falls back to the campaign name if empty. |
| Subtitle | A line of text below the title |
| Campaign Content | The detailed description that appears in the "About" section. Supports rich formatting (bold, links, lists). |
| Testimonials | Add quotes from participants or supporters. Each testimonial has: Avatar, Quote, Name, Role, Location, Rating (1-5 stars). Click "Add Testimonial" for each one. |
| Success Title | Heading shown after someone submits the form (e.g., "Registration Successful!") |
| Success Message | Message shown after form submission (e.g., "Thank you for registering. We will be in touch soon.") |
| Expired Title | Heading shown when the campaign has ended |
| Expired Message | Message shown when the campaign has ended |
Step 4: Event Details
This step is especially relevant for event-type campaigns but is available for all types. If you are running a conference, webinar, or workshop, this is where you add the event-specific content.
| Section | What to Enter |
|---|---|
| Speakers | For each speaker: Photo (from Media Library), Name, Role, Talk Title, Bio, Twitter, LinkedIn, Website. Click "Add Speaker" for each one. |
| Schedule | Organize by day. Click "Add Day", give it a label (e.g., "Day 1 — March 15"). Then add sessions: Time, Title, Type (Keynote/Panel/Workshop/Break/Networking), Speaker (dropdown from speakers you added), Location, Description. |
| Partners | For each partner: Logo (from Media Library), Name, Tier (Title Sponsor/Partner/Supporter/Media Partner), Website URL. |
| Why Attend | Key reasons to attend. For each: Title, Icon name, Description. |
| Venue Information | Venue Name, City, Address, Map URL (Google Maps link), Directions. |
| Live Stream | Stream URL and Type (YouTube, Vimeo, or Custom). |
Step 5: Post-Event Content
This content appears on the landing page after the campaign is marked as completed. Useful for event recaps.
| Section | What to Enter |
|---|---|
| Gallery | Upload event photos from Media Library. Each image can have a caption and alt text. |
| Winners | If the campaign involves awards or prizes. Choose a display mode: Flat (equal grid), Ranked (podium-style 1st/2nd/3rd), or Categorized (grouped by category). For each winner: Photo, Name, Award Title, Category, Rank, Description. |
| Recording URL | Link to the event recording (YouTube, Vimeo, etc.) |
| Resources | Downloadable files. For each: Thumbnail, Title, Type (Video/Article/Document), URL, Description. |
Step 6: Incentive
Configure what registrants get when they are approved.
| Field | What to Enter |
|---|---|
| Incentive Type | Choose: "No Incentive", "Free Trial", "Percentage Discount", or "Fixed Discount" |
| Value | How much: trial days (e.g., 30), discount percentage (e.g., 20), or fixed amount (e.g., ₹500) |
| Promo Code Prefix | A short prefix for auto-generated codes (e.g., "STUDENT"). Generated codes will look like "STUDENT-ABCD1234". Max 10 characters. |
| Code Validity (Days) | How many days the generated code remains valid |
| Subscription Plan | (For free trials only) Which subscription plan to auto-grant |
| Incentive Description | Text shown on the landing page explaining what registrants get |
Step 7: Review
The final step shows a summary of everything you configured across all steps. Review all sections carefully, then click "Create Campaign".
Your campaign is saved as a Draft. It is not yet visible to readers — you must publish it first (see next section).
9. Publishing a Campaign and Managing Its Lifecycle
Where to Find It
Admin Console → Marketing → Campaigns → click any campaign name
Campaign Status Lifecycle
Every campaign goes through these stages:
DRAFT → ACTIVE → COMPLETED → ARCHIVED
              ↕
PAUSED| Status | What It Means | Readers Can See? |
|---|---|---|
| Draft | You are still setting up. Not visible to anyone outside the Admin Console. | No |
| Active | The campaign is live. The landing page is publicly accessible and the form accepts submissions. | Yes |
| Paused | Temporarily taken offline. Landing page shows "Campaign Temporarily Unavailable" with a "Get Notified" form. | Partially — they see the paused state |
| Completed | The campaign has ended. Landing page shows a recap view with gallery, winners, and resources (if configured). | Yes — as a recap |
| Archived | Permanently hidden. Landing page returns a 404 (not found). | No |
How to Publish a Campaign
- Open the campaign detail page (click the campaign name in the list)
- Verify the campaign has: a name, a slug, start and end dates, and at least one form field
- Click the green "Publish" button at the top
- The system validates the campaign. If anything is missing, you will see an error message explaining what needs to be fixed.
- Once published, the status changes to Active and a "Live" indicator appears with a pulsing green dot
How to Verify It Published
- On the campaign detail page, look for the Landing Page URL in the Details tab
- Click the URL or click "Preview Landing Page" at the top
- The Reader Portal opens in a new tab showing your campaign landing page
- Verify: the hero image, title, description, and registration form all appear correctly
How to Pause, Complete, or Archive
- Pause: Click "Unpublish" on an active campaign. Readers will see a "Temporarily Unavailable" message.
- Complete: Click "Complete Campaign" on an active campaign. The landing page switches to recap mode.
- Archive: From a completed or paused campaign, use the action menu → "Archive". The landing page becomes inaccessible.
Campaign Detail Page — Tabs
Once you open a campaign, you see 7 tabs:
| Tab | What You Do There |
|---|---|
| Details | View campaign info, landing page URL, form fields, incentive configuration, success/expired messages, promo code usage stats |
| Submissions | Review, approve, reject, or request more info from registrants (see Section 11) |
| Invitations | Create and send email invitations to segments (see Section 12) |
| Layout & Style | Choose and customize the landing page template |
| QR Code | Generate a QR code that links to the campaign landing page. Useful for posters, brochures, or events. Click "Generate QR Code" and then "Download PNG". |
| Statistics | View campaign metrics: total submissions, page views, unique visitors, conversion rate, approval rate, promo codes generated vs. redeemed |
| Social | Create social media posts linked to the campaign. Click "Create Social Campaign" to get started, then "Compose Post" to write a social post pre-filled with the campaign name and URL. |
10. What Readers See — Campaign Landing Pages
Where Readers Find Campaigns
Readers visit campaign landing pages at: yoursite.com/campaigns/{slug}
The landing page automatically adjusts based on the campaign status and timing:
Active Campaign (Within Date Range)
Readers see a full landing page with:
- Hero section — Large banner image with the campaign title, subtitle, status badge ("Happening Now" for events), date range, and venue (if configured)
- About section — Your campaign content/description
- Call to Action — Incentive details ("What You Get") with a registration button
- Registration Form — All the form fields you configured, with validation
- Testimonials — If you added any
- Event sections (for event campaigns only) — Speakers, Schedule, Venue, Partners, Why Attend, Live Stream
After submitting the form, readers see your Success Title and Success Message along with a "Share This Campaign" button and a "Back to Home" link.
Upcoming Campaign (Before Start Date)
Readers see:
- A "Launching Soon" badge
- A real-time countdown timer showing days, hours, minutes, and seconds until launch
- A "Campaign starts [date]" message
- A "Get Notified When We Launch" form where they can enter their name and email. They will be notified automatically when the campaign goes live (if the notification cron job is running).
Expired / Completed Campaign (After End Date)
Readers see:
- An "Event Recap" badge (for events) or a default "This Campaign Has Ended" message
- Post-event content if configured: Gallery, Winners, Resources, Speakers, Testimonials
- A "Get Notified" form for future campaigns
Paused Campaign
Readers see:
- A "Campaign Temporarily Unavailable" message
- A "Get Notified" form so they can be alerted when the campaign resumes
Draft or Archived Campaign
Readers see a 404 Not Found page. These campaigns are not accessible to the public.
Programs Discovery Page
Readers can browse all public campaigns at: yoursite.com/programs
This page shows a filterable grid of past, ongoing, and upcoming campaigns with type badges, status badges, and date ranges. Readers can filter by campaign type, status, institution, city, and country.
11. Reviewing Submissions and Generating Promo Codes
Where to Find It
Campaign Detail Page → "Submissions" tab
What You See
The Submissions tab shows a table of all form submissions for the campaign. Each submission shows the submitter's information, submission date, and status.
Filter tabs at the top let you view: All, Pending Review, Approved, Rejected, Needs Info. Each tab shows a count.
How to Review a Submission
- Click on a submission row to see the full details
- You will see all the form field responses, plus any uploaded files (selfie, ID card, documents)
- Choose one of these actions:
| Action | What Happens |
|---|---|
| Approve | Marks the submission as approved. If the email setting is enabled, sends an approval email to the registrant using the campaign_submission_approved template. |
| Reject | Marks as rejected. You must enter a rejection reason. If the email setting is enabled, sends a rejection email including your reason. |
| Request Info | Marks as "needs info". The registrant needs to provide additional information. |
How to Generate a Promo Code for an Approved Submission
- After approving a submission, click "Generate Promo Code"
- The system creates a unique code using the campaign's promo code prefix (e.g., "STUDENT-XK7R2M9P")
- The code is linked to this specific submission and to the incentive settings you configured (discount type, value, validity days)
- If you send the approval email, the promo code is included in the email
Bulk Actions
Select multiple submissions using the checkboxes, then use:
- Bulk Approve — Approve all selected at once
- Bulk Reject — Reject all selected at once
12. Sending Campaign Invitations
Where to Find It
Campaign Detail Page → "Invitations" tab
What Are Invitations?
Invitations are targeted emails you send to a segment of people, inviting them to participate in a specific campaign. They are different from general email campaigns because they are tied to one outreach campaign and include the campaign's landing page URL.
How to Create and Send an Invitation
- Go to the campaign detail page and click the "Invitations" tab
- Click "New Invitation"
- Select a Segment from the dropdown — this is who will receive the invitation. The member count shows next to each segment name.
- Write the Subject Line — You can use
{{campaign_name}}and it will be replaced with the actual campaign name - Compose the Email Content — Write your invitation message. You can use these variables:
{{user_name}}— The recipient's name{{campaign_name}}— The campaign name{{campaign_url}}— The landing page URL (with tracking parameters automatically added){{incentive_description}}— The incentive details you configured
- Preview the email to see how it will look with sample data
- Choose an action:
- Save as Draft — Save without sending
- Send Now — Send immediately to all segment members
- Schedule — Set a future date and time. The system will send automatically when the time comes.
Tracking Invitation Performance
After sending, you can see delivery metrics for each invitation:
- Recipient Count — How many emails were sent
- Delivered — How many were successfully delivered
- Opened — How many recipients opened the email
- Clicked — How many clicked a link
- Registered — How many went on to register
13. Email Campaigns — Sending to Segments
Where to Find It
Admin Console → Marketing → Email Campaigns
What Are Email Campaigns?
Email campaigns are standalone marketing emails you send to a segment. Unlike campaign invitations (which are tied to one outreach campaign), email campaigns can be about anything — a new issue, a special offer, a seasonal promotion, or a general update.
How to Create an Email Campaign
- Go to Marketing → Email Campaigns
- Click "New Campaign"
- Fill in:
- Name: Internal name for the campaign (e.g., "March Newsletter Push")
- Subject Line: What recipients see in their inbox. Supports
{{variable}}interpolation from the template. - Email Template: Select a template from the dropdown, or provide custom HTML
- Target Segment: Select which segment of people should receive this email
- Save
How to Send
Send Now:
- Open the email campaign
- Click "Send"
- The system resolves the segment members and starts sending
- Status changes: Draft → Sending → Sent
Schedule for Later:
- Open the email campaign
- Click "Schedule"
- Pick a date and time
- Status changes to Scheduled
- The background job will send it automatically when the time arrives
How to Check Delivery
After sending, the email campaign shows engagement metrics in the list view:
- Open Rate — Percentage of recipients who opened
- Click Rate — Percentage who clicked a link
These metrics update automatically via email provider webhooks. If you do not see metrics updating, check that webhooks are configured (see Setup Checklist, item 8).
Other Actions
- Duplicate: Create a copy of a sent campaign as a new draft — useful for recurring emails
- Delete: Only available for draft and scheduled campaigns (you cannot delete sent campaigns)
14. Newsletter Editions — Create, Publish, and Send
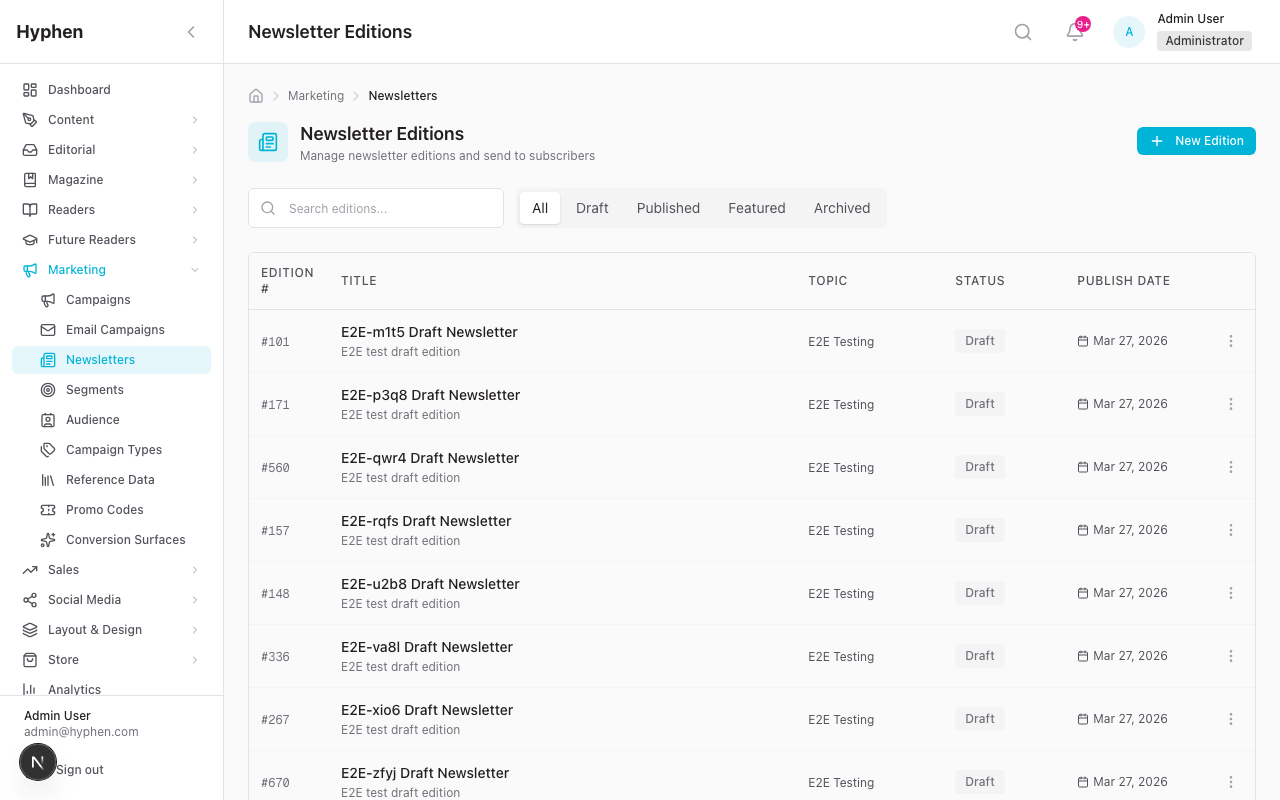
Where to Find It
Admin Console → Marketing → Newsletter Editions
What Is a Newsletter Edition?
A newsletter edition is a single issue of your publication's newsletter. You create the content, optionally publish it to a public archive on your Reader Portal, and can send it as an email campaign to a segment.
Note: Newsletter content is stored in the Strapi CMS. If Strapi is not configured, this feature will show errors.
How to Create a Newsletter Edition
- Go to Marketing → Newsletter Editions
- Click "New Edition"
- Fill in:
- Title: The edition title
- Edition Number: Auto-incremented or set manually
- Topic: A category for archive filtering (e.g., "Poetry", "Fiction", "News")
- Preview Text: A short teaser shown in archive cards
- Publish Date: The publication date
- Cover Image: Select from the Media Library
- HTML Content: The main newsletter content (rich text)
- Plain Text Content: A fallback version for text-only email clients
- External Archive URL: Optional link to an external archive
- Save
How to Publish to the Archive
- Open the newsletter edition
- Click "Publish"
- The edition is now visible in the public newsletter archive at
yoursite.com/newsletters - Readers can browse the archive by topic, see edition cards with previews, and read full editions at
yoursite.com/newsletters/{slug}
How to Send a Newsletter as an Email Campaign
- From the newsletters list, click the "Send as Campaign" action (envelope icon) on the edition row
- A modal appears with:
- Target Segment: Select who should receive it (required)
- Email Subject: Defaults to the edition title (you can customize)
- Schedule: Optionally set a date/time for later delivery
- Click "Create Campaign"
- The system fetches the newsletter content from Strapi and creates an email campaign linked to this edition
- The email campaign appears in your Email Campaigns list where you can track delivery
15. Promo Codes — Creating and Managing Discounts
Where to Find It
Admin Console → Marketing → Promo Codes
Two Kinds of Promo Codes
| Kind | How It Is Created | Typical Use |
|---|---|---|
| Admin-created coupons | You create them manually on the Promo Codes page | Reusable codes for promotions (e.g., WELCOME20, SUMMER2026) |
| Campaign-generated codes | Auto-generated when you approve a campaign submission | One-time codes tied to individual registrants (e.g., STUDENT-XK7R2M9P) |
How to Create a Promo Code
- Go to Marketing → Promo Codes
- Click "New Promo Code" (or the + button)
- Fill in the modal:
| Field | What to Enter |
|---|---|
| Code | The code itself (e.g., "WELCOME20"). Minimum 3 characters, auto-uppercased. |
| Description | What the code is for (e.g., "Welcome discount for new subscribers") |
| Discount Type | "Percent" or "Fixed Amount" |
| Discount Value | The amount (e.g., 20 for 20%, or 500 for ₹500) |
| Max Uses | Total number of times this code can be redeemed (leave empty for unlimited) |
| Max Uses Per User | How many times a single reader can use it |
| Valid From | Start date |
| Valid To | Expiry date (optional — leave empty for no expiry) |
| Plan | Restrict to a specific subscription plan (optional) |
| New Subscribers Only | Check if only first-time subscribers can use it |
| Applies To | "First Payment", "N Cycles", or "All Renewals" |
| Allow Gift / Allow Bulk / Allow Institutional | Whether this code can be used with gift, bulk, or institutional subscriptions |
- Click "Save"
Managing Promo Codes
- Copy: Click the copy icon to copy the code to your clipboard
- Edit: Click the pencil icon to modify the code
- Delete: Click the trash icon to deactivate the code (it is not permanently deleted — analytics are preserved)
- Filter: Use the status tabs (All, Active, Inactive, Expired) to find codes by status
How Promo Codes Connect to Campaigns
When you set up a campaign with an incentive (Free Trial, Percentage Discount, or Fixed Discount):
- You configure the promo code prefix (e.g., "STUDENT")
- When you approve a submission and click "Generate Promo Code", the system creates a unique code like
STUDENT-ABC12345 - That code inherits the incentive type, value, and validity from the campaign settings
- The approval email includes the code
How Readers Use Promo Codes
Readers can enter promo codes during the subscription checkout process. The system validates that:
- The code exists and is active
- The code has not expired
- The usage limit has not been reached
- For "Free Trial" codes: The system automatically creates the reader's account and subscription in one step
How Promo Codes Connect to Conversion Surfaces
Conversion surfaces (pop-ups, banners) can be linked to a promo code (called a "Coupon" in the surface editor). When a reader sees the surface, the coupon code is displayed with a "Copy" button. Clicking it copies the code to the clipboard, and the reader can paste it during checkout.
16. Conversion Surfaces — Pop-ups, Banners, and Notifications
Where to Find It
Admin Console → Marketing → Conversion Surfaces
What Are Conversion Surfaces?
Conversion surfaces are promotional overlays that appear on your Reader Portal to encourage readers to take action — subscribe, register, redeem a coupon, or visit a specific page. You control exactly what the surface looks like, who sees it, when it appears, and how often.
Surface Types
| Type | What It Looks Like |
|---|---|
| Modal | A pop-up overlay that appears in the center of the screen with a backdrop. On mobile, it slides up from the bottom. Only one modal can show at a time. |
| Sticky Notification | A persistent notification bar, typically at the bottom of the screen. Stays visible as the reader scrolls. |
| Slide-in Panel | A small panel that slides in from a corner of the screen. |
| Top Banner | A full-width banner at the very top of the page. Slides down into view. |
| Bottom Banner | A full-width banner at the very bottom of the page. Slides up into view. |
| Inline Embed | Embedded within the page content itself (not an overlay). |
How to Create a Conversion Surface
- Go to Marketing → Conversion Surfaces
- Click "Create Surface" (or the + button)
- Fill in the form, which has several sections:
Section 1: Basics
| Field | What to Enter |
|---|---|
| Name | Internal name (e.g., "Homepage Exit Intent Modal") |
| Surface Type | Modal, Sticky Notification, Slide-in Panel, Top Banner, Bottom Banner, or Inline Embed |
| Placement | Where on the screen it appears (Center, Bottom Right, Top Left, etc.) |
| Goal | What you want readers to do: Register, Login, Subscribe (Paid), Subscribe (Newsletter), View Campaign, View Event, Redeem Coupon, View Product, Visit Pricing, or Custom CTA |
| Priority | A number from 1-100. Lower = higher priority. When multiple surfaces compete for the same slot (e.g., two modals), only the highest-priority one shows. |
| Theme | Light (white background), Dark (dark background), or Brand (your brand color) |
Section 2: Content
| Field | What to Enter |
|---|---|
| Title | The headline readers see |
| Subtitle | A secondary message |
| Body Text | Additional details |
| Image URL | An image to display |
| Background Color | A hex color (e.g., #1a1a2e) |
| Primary CTA Text | The main button text (e.g., "Subscribe Now") |
| Primary CTA URL | Where the button goes (e.g., /subscribe) |
| Secondary CTA Text | An optional second button |
| Secondary CTA URL | Where the second button goes |
Section 3: Entity Links (Optional)
Link the surface to existing entities in the system:
| Field | What It Does |
|---|---|
| Coupon | Links to a promo code. The reader sees the code with a "Copy" button. |
| Subscription Plan | Shows the plan name and price. |
| Campaign | Links to an outreach campaign. |
| Event ID | Links to an event. |
| Product ID | Links to a shop product. |
| Newsletter Slug | Links to a newsletter edition. |
Section 4: Targeting — Who Sees It
| Field | Options |
|---|---|
| Audiences | Anonymous (not logged in), Registered (logged in, not subscriber), Paid Subscriber, Newsletter Subscribed, Newsletter Unsubscribed |
| Page Types | Homepage, Article, Section, Archive, Search, Subscribe, Newsletter, Campaign, Shop, Account |
| Device Types | Desktop, Mobile, Tablet |
| Include URLs | Only show on these specific URLs |
| Exclude URLs | Never show on these URLs |
| Content Types | Fiction, Poetry, Essay, Interview, News |
| Sections | Specific publication sections |
| Tags | Specific content tags |
How targeting works: All selected targeting dimensions must match (AND logic). Within each dimension, any selected value can match (OR logic).
Example: If you select Audiences = "Anonymous" AND Page Types = "Article" AND Device Types = "Desktop", the surface only appears to anonymous desktop visitors reading an article.
Section 5: Trigger — When It Appears
| Trigger | How It Works |
|---|---|
| Page Load | Appears as soon as the page loads (or after an optional delay in seconds) |
| Time on Page | Appears after the reader has been on the page for a certain number of seconds |
| Scroll Depth | Appears after the reader scrolls down to a certain percentage of the page |
| Exit Intent | Appears when the reader moves their mouse toward the browser's close/back button (desktop only) |
| Page View Count | Appears after the reader has viewed a certain number of pages in their session |
| After Article Read | Appears after the reader scrolls to the bottom of an article (100% scroll depth) |
| Manual | Never appears automatically — used only for programmatic triggering |
Section 6: Frequency and Suppression
| Field | What It Does |
|---|---|
| Frequency Limit | How many times to show this surface within the frequency period |
| Frequency Unit | Per Session, Per Day, Per Week, or Per Month |
| Suppress After Dismiss (days) | After a reader dismisses the surface, do not show it again for this many days |
| Suppress After Conversion | If the reader already clicked the CTA, stop showing the surface |
| Suppress If Already Converted | If the reader already completed the goal (e.g., already subscribed), never show it |
Section 7: Scheduling
| Field | What to Enter |
|---|---|
| Status | Draft (not live), Scheduled (will go live at start date), Active (live now), or Paused (temporarily off) |
| Start Date | When the surface should start appearing |
| End Date | When the surface should stop appearing |
- Click "Save as Draft" or "Publish"
How to Verify a Conversion Surface Is Working
- Set the surface status to Active
- Open the Reader Portal in a browser that matches the targeting rules (e.g., if targeting anonymous visitors, use an incognito window)
- Navigate to a page that matches the page type targeting
- Trigger the surface (e.g., wait for the timer, scroll to the depth, or move your mouse to exit)
- The surface should appear
- Check that the text, buttons, and coupon (if any) all display correctly
- Click the CTA and verify it goes to the right URL
- Dismiss the surface and verify it does not reappear (if frequency capping is set)
Viewing Conversion Surface Analytics
On the conversion surfaces list page, each row shows:
- Impressions — How many times the surface was shown
- Clicks — How many CTA clicks
- CTR — Click-through rate (clicks ÷ impressions)
- Conversions — How many completed the goal
Click on a surface to see the full analytics page with time series charts and breakdowns by device, page, and UTM source.
17. How Marketing Features Affect the Reader Portal
This section summarizes every place where marketing features show up on the Reader Portal — the public-facing website your readers visit.
| Reader Portal Location | Marketing Feature | How It Gets There |
|---|---|---|
yoursite.com/campaigns/{slug} | Campaign landing pages | Published via Admin Console → Marketing → Campaigns → Publish |
yoursite.com/programs | Programs discovery page | Automatically lists all active and completed campaigns |
yoursite.com/newsletters | Newsletter archive | Published via Admin Console → Marketing → Newsletter Editions → Publish |
yoursite.com/newsletters/{slug} | Individual newsletter edition | Automatically available once published |
| Every page (global) | Conversion surfaces (modals, banners, etc.) | Created via Admin Console → Marketing → Conversion Surfaces and set to Active |
| Reader's inbox | Email campaigns | Sent via Admin Console → Marketing → Email Campaigns |
| Reader's inbox | Campaign invitations | Sent via Campaign Detail → Invitations tab |
| Reader's inbox | Submission approval/rejection emails | Triggered by approving or rejecting a campaign submission |
| Reader's inbox | Newsletter editions as email | Sent via Newsletter Editions → "Send as Campaign" |
| Checkout / subscribe page | Promo code validation | Reader enters a promo code during checkout |
Key Dependencies to Remember
- Campaign landing pages only work if the Reader Portal is running and connected to the Admin Console
- Email delivery only works if the email provider is configured
- Newsletter features only work if Strapi CMS is configured
- Email engagement metrics only work if webhooks are configured
- Scheduled sends only work if cron jobs are running
- Conversion surface frequency capping for logged-in readers depends on server-side tracking; for anonymous readers, it uses the browser's local storage (clearing cookies resets it)
18. Five Real-World Examples (End to End)
Example 1: Student Outreach Program with Free Trial Incentive
Scenario: You want to recruit university students with a 30-day free trial of your premium subscription.
Step-by-step:
-
Create a segment for the invitations: Go to Marketing → Segments → New Segment. Name it "Imported Student Contacts". Set Contact Source to "Audience Contacts", and add the Audience Tag "students". Save.
-
Import your student contact list: Go to Marketing → Segments → Contacts tab. Click "Upload CSV". Upload your spreadsheet of student emails (columns: email, name, institution). Map the columns. Upload. Tag all imported contacts with "students".
-
Create the campaign: Go to Marketing → Campaigns → New Campaign. Walk through the wizard:
- Step 1 (Basics): Name: "Student Outreach 2026", Slug: "student-outreach-2026", Type: "Student Outreach", Start/End dates
- Step 2 (Form Fields): Add fields — Full Name (text, required), Email (email, required), Phone (phone), Institution (institution_picker, required), Student ID (photo_id_card, required), Selfie (photo_selfie)
- Step 3 (Landing Page): Upload a hero image, write the title "Free 30-Day Premium Access for Students", add a description, write success/expired messages
- Step 4: Skip (not an event)
- Step 5: Skip (no post-event content)
- Step 6 (Incentive): Type: "Free Trial", Value: 30 days, Promo Prefix: "STUDENT", Validity: 60 days, Plan: "Premium Monthly", Description: "Get 30 days of free premium access"
- Step 7: Review and click "Create Campaign"
-
Publish the campaign: Open the campaign detail page. Click "Publish". Copy the landing page URL.
-
Send invitations: Go to the Invitations tab. Click "New Invitation". Select the "Imported Student Contacts" segment. Write a subject: "You're Invited: Free 30-Day Premium Access". Compose the email with
{{campaign_url}}for the landing page link. Click "Send Now". -
Review submissions: As students register, go to the Submissions tab. Review each submission — check the selfie and ID card. Click "Approve" and then "Generate Promo Code". The student receives an email with their unique promo code (e.g., "STUDENT-3KR7M2XP").
-
Verify reader experience: Visit
yoursite.com/campaigns/student-outreach-2026in a browser. Confirm the hero, form, and incentive section all render. Submit a test registration. Check that the success message appears.
Example 2: Newsletter Signup Conversion Flow
Scenario: You want to show a pop-up to anonymous visitors encouraging them to subscribe to your newsletter.
Step-by-step:
-
Create the conversion surface: Go to Marketing → Conversion Surfaces → Create Surface.
- Basics: Name: "Newsletter Signup Exit Intent", Type: Modal, Placement: Center, Goal: Subscribe (Newsletter), Priority: 10, Theme: Brand
- Content: Title: "Don't Miss Our Best Stories", Subtitle: "Join 10,000+ readers who get our weekly picks", Primary CTA Text: "Subscribe to Newsletter", Primary CTA URL: "/subscribe?newsletter=true"
- Targeting: Audiences: "Anonymous" and "Newsletter Unsubscribed", Page Types: "Article" and "Homepage", Device Types: all three
- Trigger: Exit Intent
- Frequency: Limit: 1, Unit: Per Week, Suppress After Dismiss: 7 days, Suppress If Already Converted: checked
- Status: Active
-
Verify it works: Open your Reader Portal in an incognito browser window (to be anonymous). Read an article. Move your mouse toward the top of the page (exit intent). The modal should appear with your title, subtitle, and "Subscribe to Newsletter" button.
-
Monitor performance: Go to Marketing → Conversion Surfaces. Find your surface in the list. Check the Impressions, Clicks, CTR, and Conversions columns. Click the surface name for detailed analytics.
Example 3: Book Launch Promo with Coupon Support
Scenario: You are launching a new book and want to offer a 20% discount to subscribers who visit the product page.
Step-by-step:
-
Create the promo code: Go to Marketing → Promo Codes → "New Promo Code".
- Code: "BOOKLAUNCH20"
- Description: "20% off for book launch"
- Discount Type: Percent
- Discount Value: 20
- Valid From: today
- Valid To: 30 days from now
- Max Uses: 500 Save.
-
Create a bottom banner conversion surface: Go to Marketing → Conversion Surfaces → Create Surface.
- Basics: Name: "Book Launch Discount Banner", Type: Bottom Banner, Goal: Redeem Coupon, Priority: 20, Theme: Dark
- Content: Title: "New Book Launch — 20% Off", Primary CTA Text: "Get the Discount", Primary CTA URL: "/shop/new-book"
- Entity Links: Coupon: select "BOOKLAUNCH20" from the dropdown
- Targeting: Audiences: "Paid Subscriber" and "Registered", Page Types: "Homepage" and "Article", Exclude URLs: "/shop" (don't show on the shop itself)
- Trigger: Page Load (with 3-second delay)
- Frequency: 1 per day, Suppress After Conversion: checked
- Status: Active
-
What the reader sees: After being on any article for 3 seconds, a dark bottom banner slides up showing "New Book Launch — 20% Off" with the coupon code "BOOKLAUNCH20" and a "Copy" button. They can copy the code and use it at checkout.
-
Monitor: Check the conversion surface analytics to see how many readers saw the banner, copied the coupon, and clicked through. Check the promo code page to see how many redemptions have occurred.
Example 4: Literary Event Campaign with Conversion Surfaces
Scenario: You are organizing a two-day literary festival and want to: (a) create a registration landing page, (b) promote it with a pop-up modal on the Reader Portal, and (c) track performance.
Step-by-step:
-
Create the campaign: Go to Marketing → Campaigns → New Campaign.
- Step 1: Name: "Hyphen Literary Festival 2026", Type: "Event Registration", Dates: the event dates
- Step 2: Form Fields: Full Name (text), Email (email), Phone (phone), "Which day(s) will you attend?" (checkbox: Day 1 / Day 2 / Both)
- Step 3: Hero image of the venue, Title: "Hyphen Literary Festival 2026", Content: description of the festival, testimonials from past attendees
- Step 4: Add Speakers (headshots, bios, talk titles), Schedule (Day 1 and Day 2 sessions), Partners (sponsor logos), Venue (name, address, Google Maps link), Why Attend (3-4 benefits)
- Step 5: Skip for now (post-event content will be added later)
- Step 6: Incentive: No Incentive (free event)
- Step 7: Review → Create
-
Publish the campaign: Open the campaign → click "Publish". The landing page is now live.
-
Create a conversion surface to promote it: Go to Marketing → Conversion Surfaces → Create Surface.
- Type: Modal, Goal: View Event, Priority: 5, Theme: Light
- Title: "Join Us at the Hyphen Literary Festival", Body: "Two days of panels, workshops, and readings. Register now — it's free!"
- Primary CTA: "Register Now", URL: "/campaigns/hyphen-literary-festival-2026"
- Link the Campaign entity to this campaign
- Targeting: Audiences: all, Page Types: Homepage and Article, Devices: all
- Trigger: Page View Count = 3 (show after the reader has visited 3 pages)
- Frequency: 1 per session
- Status: Active
-
What readers experience:
- On their 3rd page view, they see a pop-up modal promoting the literary festival with a "Register Now" button
- Clicking the button takes them to the campaign landing page
- They see the full event page: Hero → Why Attend → Speakers → Schedule → Venue → Registration Form → Partners
- After registering, they see the success message
-
After the event:
- Go to the campaign detail → click "Complete Campaign"
- Go to Edit → Step 5 → add Gallery photos, Winners (if any), Recording URL, downloadable Resources
- The landing page now shows the recap view automatically
Example 5: Converting Lapsed Registered Users into Paid Subscribers
Scenario: You have registered users who signed up but never subscribed. You want to target them with a 15% discount offer via both email and on-site conversion surfaces.
Step-by-step:
-
Create a segment of non-subscribing registered users: Go to Marketing → Segments → New Segment.
- Name: "Registered Non-Subscribers"
- Contact Source: Readers
- Account Status: Active
- Subscription Status: (leave empty — this targets users with NO active subscription)
- User Tier: Free Save.
-
Create a promo code: Go to Marketing → Promo Codes → "New Promo Code".
- Code: "UPGRADE15"
- Discount Type: Percent, Value: 15
- New Subscribers Only: checked
- Valid To: 60 days from now
- Max Uses Per User: 1 Save.
-
Create an email campaign: Go to Marketing → Email Campaigns → New Campaign.
- Name: "Re-engagement: 15% Off First Subscription"
- Subject: "We saved you 15% — upgrade to premium today"
- Template: Select a promotional template
- Segment: "Registered Non-Subscribers" Send Now (or schedule for the best time).
-
Create a slide-in conversion surface for on-site reinforcement: Go to Marketing → Conversion Surfaces → Create Surface.
- Type: Slide-in Panel, Placement: Bottom Right, Goal: Subscribe (Paid), Theme: Light
- Title: "Upgrade to Premium", Subtitle: "Get 15% off your first month"
- Entity Links: Coupon → "UPGRADE15", Plan → select your monthly plan
- Primary CTA: "Subscribe Now", URL: "/subscribe"
- Targeting: Audiences: "Registered (non-subscriber)", Page Types: Article, Devices: all
- Trigger: Scroll Depth = 50%
- Frequency: 1 per day, Suppress If Already Converted: checked
- Status: Active
-
What the user experiences:
- They receive your email with the 15% offer
- When they visit the site and scroll halfway through an article, a small slide-in panel appears in the bottom-right corner with "Upgrade to Premium — Get 15% off your first month" and the coupon code "UPGRADE15" with a "Copy" button
- Clicking "Subscribe Now" takes them to the subscribe page
-
Monitor:
- Check email campaign metrics for open/click rates
- Check conversion surface analytics for impression → click → conversion rates
- Check promo code page for redemption count
19. Common Mistakes and How to Fix Them
"I published a campaign but the landing page shows a 404"
Causes:
- The Reader Portal is not running
- The
NEXT_PUBLIC_ADMIN_API_URLenvironment variable in the Reader Portal is not set correctly, so it cannot fetch campaign data from the Admin Console - The campaign slug has a typo — check the URL carefully
Fix: Ask your technical team to verify the Reader Portal is running and connected to the Admin Console API.
"I sent an email campaign but nobody received it"
Causes:
- Email provider is not configured (check Settings → Email → SMTP Status)
- The email templates are missing (check Settings → Email Templates)
- The segment has 0 members (check the segment's member count)
- The campaign was scheduled but the cron job is not running
Fix: Verify email configuration first. Then check the segment member count. Then confirm cron jobs are running.
"My conversion surface is active but it is not appearing on the Reader Portal"
Causes:
- You are logged in as a subscriber but targeting "Anonymous" only
- You are on a page type not in the targeting rules (e.g., surface targets "Article" but you are on the homepage)
- The frequency limit was already reached (try clearing your browser's local storage or using incognito mode)
- A higher-priority surface is taking the same slot
- Exit intent trigger: only works on desktop (not mobile)
Fix: Test in an incognito window to avoid frequency capping. Double-check targeting rules match your test conditions.
"I cannot see the Marketing page / some buttons are missing"
Cause: Your user role does not have the required marketing permissions.
Fix: Ask an admin to go to Settings → Roles & Permissions, find your role, and enable the Marketing permissions.
"Campaign preview shows 'Preview Unavailable'"
Cause: The Layout & Style tab tries to load the Reader Portal in an iframe. If the Reader Portal is not running or is not configured, the preview fails.
Fix: Ensure the Reader Portal is running. Set NEXT_PUBLIC_READER_URL in the Admin Console environment. You can still preview by clicking "Preview Landing Page" which opens the URL in a new tab.
"Email open and click rates show 0% even after sending"
Cause: Email engagement webhooks are not configured. The email provider (SendGrid or Mailchimp) needs to be set up to send engagement events back to your system.
Fix: Ask your technical team to register the webhook URL in the email provider's dashboard.
"Newsletter Editions page shows errors"
Cause: Strapi CMS is not configured or not running.
Fix: Ensure STRAPI_URL and STRAPI_API_TOKEN environment variables are set in the Admin Console. Verify Strapi is running and accessible.
"Scheduled email campaign was never sent"
Cause: The cron job that processes scheduled email campaigns is not running.
Fix: Ask your technical team to verify the cron job scheduler is active and the CRON_SECRET is correctly configured.
"Promo code shows 'invalid' when a reader tries to redeem"
Causes:
- The code has expired (past its "Valid To" date)
- The code has reached its maximum usage limit
- For campaign-generated codes: the submission was not approved yet
- The code was deactivated (deleted from the Promo Codes page)
Fix: Check the code's status, expiry date, and usage count on the Promo Codes page.
"Campaign invitation emails show template variables instead of the actual name"
Cause: This was a known bug that has been fixed. If you still see it, try creating a new invitation rather than resending an old one.
Use this checklist to verify that marketing features are working correctly in your environment.
- Email provider is configured (Settings → Email → SMTP Status = "configured")
- 4 campaign email templates exist (Settings → Email Templates)
- Email branding is configured (Settings → Email Preferences)
- Your user role has all Marketing permissions
- Reader Portal is running and accessible
- Cron jobs are scheduled (ask technical team)
- Create a campaign using the 7-step wizard with all required fields → saves as Draft
- Publish the campaign → status changes to Active, green "Live" indicator appears
- Visit the landing page URL → full campaign page renders correctly
- Submit the registration form → success message appears, submission appears in Submissions tab
- Approve a submission → status changes to "approved", approval email sends (check recipient's inbox)
- Reject a submission → status changes to "rejected", rejection email sends with your reason
- Generate a promo code for an approved submission → unique code appears, linked to submission
- Pause the campaign → landing page shows "Campaign Temporarily Unavailable"
- Complete the campaign → landing page shows event recap view (if post-event content was added)
- Archive the campaign → landing page returns 404
- Create an email campaign with a template and segment → saves as Draft
- Send the campaign → status changes to Sending → Sent
- Verify delivery → recipient receives the email
- Check engagement metrics → open rate and click rate update after recipient interacts (requires webhooks)
- Schedule a campaign → status changes to Scheduled → verify it sends at the scheduled time
- Create a segment with at least 2 filters → member count displays correctly
- Preview members → correct people listed with source labels
- Create a segment with "All" source → both readers and audience contacts included
- Export a segment → CSV downloads with expected data
- Import a CSV → contacts appear in the Contacts tab
- Import a CSV with duplicate emails → updates existing, does not create duplicates
- Submit a campaign form → contact auto-created with "campaign_submission" tag
- Export all contacts → CSV downloads
- Create a modal with exit intent trigger → test in incognito window on desktop → modal appears when mouse exits
- Create a top banner with page load trigger → banner appears on page load
- Test frequency capping → dismiss the surface → revisit → surface does not reappear (within the frequency window)
- Test targeting: anonymous only → log in → surface disappears; log out → surface reappears
- Test coupon copy → click "Copy" on a surface with a linked coupon → code copied to clipboard
- Verify analytics → impressions, clicks, CTR, and conversions update on the list page
- Create an edition → saves as Draft
- Publish an edition → visible in the newsletter archive at /newsletters
- Send as email campaign → email campaign created and sent
- Verify archive page → topic filter works, pagination works, cards render correctly
- Create a promo code → appears in the list
- Copy the code → copies to clipboard
- Delete (deactivate) a code → code becomes inactive
- Verify campaign-generated codes → approve a submission → generate code → code appears in Promo Codes list
- Create an invitation for a segment → saves
- Send the invitation → emails delivered to segment members
- Verify the email → campaign name resolved (not showing
{{campaign_name}}), link includes UTM parameters
- Campaign form submission → creates audience contact automatically
- Newsletter signup on Reader Portal → creates audience contact automatically
- Conversion surface with coupon → coupon code displays and copies correctly
- Promo code redemption → creates subscription (for trial_days type)
These are known limitations of the current implementation. They are not bugs — they are features that are planned but not yet built.
| Limitation | Impact | Workaround |
|---|---|---|
| No A/B testing for conversion surfaces | Cannot test two versions of a surface against each other | Create two surfaces targeting different page types and compare analytics manually |
| No geographic targeting | Cannot target conversion surfaces by country or region | Use UTM parameters or specific page URL targeting as a proxy |
| No admin preview for conversion surfaces | Cannot see exactly how a surface will look before making it live | Set status to Active, test in an incognito browser window, then pause or archive if not right |
| No conditional form field logic | Cannot show/hide form fields based on other field values | Use radio or select fields with clear options instead of conditional logic |
| Newsletter authoring requires Strapi CMS | Cannot write newsletter content in the Admin Console directly | Use Strapi for content editing; the Admin Console handles publishing and email distribution |
| No automatic retry for failed email campaigns | If an email campaign fails, you must fix the issue and resend manually | Duplicate the failed campaign as a new draft and resend |
| Segment member counts are dynamic | Large segments may take a moment to recalculate | The count refreshes automatically; wait for the spinner to finish |
| Conversion surface expiration is not automated | Surfaces with end dates do not automatically transition to "expired" status | Manually pause or archive surfaces after their end date, or ask your technical team to enable the expiration cron job |
| Exit intent trigger only works on desktop | Mobile browsers do not support mouse exit detection | Use "scroll depth" or "time on page" triggers for mobile users |