Editorial & Content System
Complete guide to creating, reviewing, approving, and publishing content on the Hyphen platform
1. Simple Feature Overview
The Editorial & Content System is where your team creates, reviews, approves, and publishes all written and multimedia content on the Hyphen platform. It covers the full journey of content — from an author's first draft all the way to a live article on the Reader Portal.
What You Can Do
| Capability | What It Means |
|---|---|
| Create Articles | Write fiction, poetry, essays, interviews, and news using a rich text editor with images, audio, and video |
| Manage Authors | Set up author profiles with bios, photos, social links, and specializations |
| Editorial Workflow | Move content through a structured review process — draft → triage → sub-editor review → author revision → final review → publish |
| Media Library | Upload, organize, and reuse images, audio files, video, and documents across all content |
| Magazine Issues | Group articles into themed issues with cover images, editor notes, and structured table of contents |
| Collections | Curate themed reading lists like "Best of 2025" or "Summer Fiction" |
| Newsletters | Create and manage newsletter editions with content and subscriber information |
| Events | Set up literary events, workshops, and webinars with dates, locations, and RSVP tracking |
| Podcasts | Manage podcast shows and episodes with audio files, show notes, and platform links |
| Scheduling | Set content to publish automatically at a future date and time |
| Version History | Track every change made to an article and roll back to a previous version if needed |
| Access Control | Set articles as free, restricted, premium, or subscriber-only |
How Content Reaches Readers
Author creates content in Admin Console
    ↓
Content goes through Editorial Workflow (review, approval)
    ↓
Editor publishes or schedules the content
    ↓
Content syncs to the Reader Portal (within ~60 seconds)
    ↓
Readers see it on article pages, section pages, homepage, and search
2. Who Should Use This Feature
| Role | What You'll Do |
|---|---|
| Author | Submit content, respond to revision requests, view your submissions and their status |
| Sub-Editor | Review assigned submissions, leave feedback, send to author for revision or forward to chief editor |
| Chief Editor | Triage incoming submissions, assign sub-editors, approve or reject content for publication |
| Publishing Team | Manage the publishing queue — typeset, schedule, and publish approved content |
| Content Manager | Create and manage articles directly, organize media, manage taxonomy (sections/tags) |
| Operations / Admin | Set up authors, configure sections, manage permissions, oversee the full content lifecycle |
3. Before You Begin
Before your team can start creating and publishing content, make sure the following are in place:
Prerequisites Checklist
| Step | What to Check | Where to Check |
|---|---|---|
| 1. Admin account | You have an Admin Console login with the right role (Author, Sub-Editor, Chief Editor, Publishing, or Admin) | Ask your Admin to create your account under Settings → Admin Users |
| 2. Sections exist | At least one content section is set up (e.g., Fiction, Poetry, Essays, Interviews, News) | Content → Sections in Admin Console |
| 3. Tags exist | Common tags are created for categorizing content (e.g., "short story", "memoir", "translation") | Content → Tags in Admin Console |
| 4. Authors exist | Author profiles are created for anyone whose content will be published | Authors in the Admin Console sidebar |
| 5. Media storage | Media library is connected and working (S3/CDN configured) | Media Library — try uploading a test image |
| 6. Strapi CMS | Strapi is running and connected (this is the backend that serves content to readers) | Ask your DevOps team to confirm |
| 7. Reader Portal | The Reader Portal is deployed and accessible | Visit your Reader Portal URL to confirm |
| 8. Page templates | Homepage and section pages have templates configured | See the Page Template System User Guide |
| 9. Email/SMTP | If you want workflow notification emails, SMTP must be configured | Settings → Email Settings |
Tip: If you're setting up the platform for the first time, work through these in order. Authors and sections should be created before articles.
4. Key Terms in Simple Language
| Term | What It Means |
|---|---|
| Article | Any piece of content — a story, poem, essay, interview, or news item |
| Content Type | The category of writing: Fiction, Poetry, Essay, Interview, or News |
| Section | A major division of the magazine (e.g., Fiction, Poetry, Essays). Each article belongs to one section |
| Tag | A keyword or topic label attached to articles for discovery (e.g., "memoir", "translation", "debut") |
| Access Level | Who can read the article: Free (everyone), Restricted Free (registered users), Premium Limited (limited preview for non-subscribers), or Subscriber Only (full paywall) |
| Draft | An article that is being written or edited. Not visible to readers |
| Pending Review | An article submitted for editorial review. Not visible to readers |
| Published | An article that is live and visible to readers on the Reader Portal |
| Archived | An article removed from active display but still stored in the system |
| Scheduled | An article set to publish automatically at a future date/time |
| Submission | An article entered into the editorial workflow for formal review |
| Triage | The first step in editorial workflow where the chief editor decides what to do with a new submission |
| Sub-Editor | A reviewer assigned to evaluate and improve a submission before it reaches the chief editor |
| Revision | When an article is sent back to the author for changes based on editorial feedback |
| Featured Image | The main image displayed with an article — appears in listings, cards, and at the top of the article page |
| Slug | The URL-friendly version of a title (e.g., "the-summer-garden" for an article titled "The Summer Garden") |
| Version | A saved snapshot of an article at a point in time. You can view past versions and roll back |
| Collection | A curated group of articles organized around a theme |
| Issue | A magazine issue that groups articles together with a cover, editor's note, and structured layout |
| Hero Section | The large, prominent area at the top of a page that showcases featured content |
| Strapi | The content management system (CMS) that stores and serves published content to the Reader Portal |
5. Step-by-Step Setup Guide
5.1 Set Up Authors
Every article needs an author. Set up author profiles before creating articles.
To create a new author:
-
In the Admin Console sidebar, click Authors.
-
Click the New Author button in the top-right corner.
-
Fill in the author profile:
Field Required? What to Enter Name Yes The author's full display name Email Yes The author's email address Photo Recommended Upload or paste URL for the author's profile photo Short Bio Recommended A 1-2 sentence bio that appears next to articles Long Bio Optional A detailed biography for the author's profile page Location Optional City or country Website Optional Author's personal website URL Social Links Optional Twitter, Instagram, LinkedIn, Facebook handles Languages Recommended Languages the author writes in (select all that apply) Specializations Recommended Check all applicable types: Fiction, Poetry, Essay, etc. Status Yes Toggle Active (default) or Inactive -
Click Save to create the author profile.
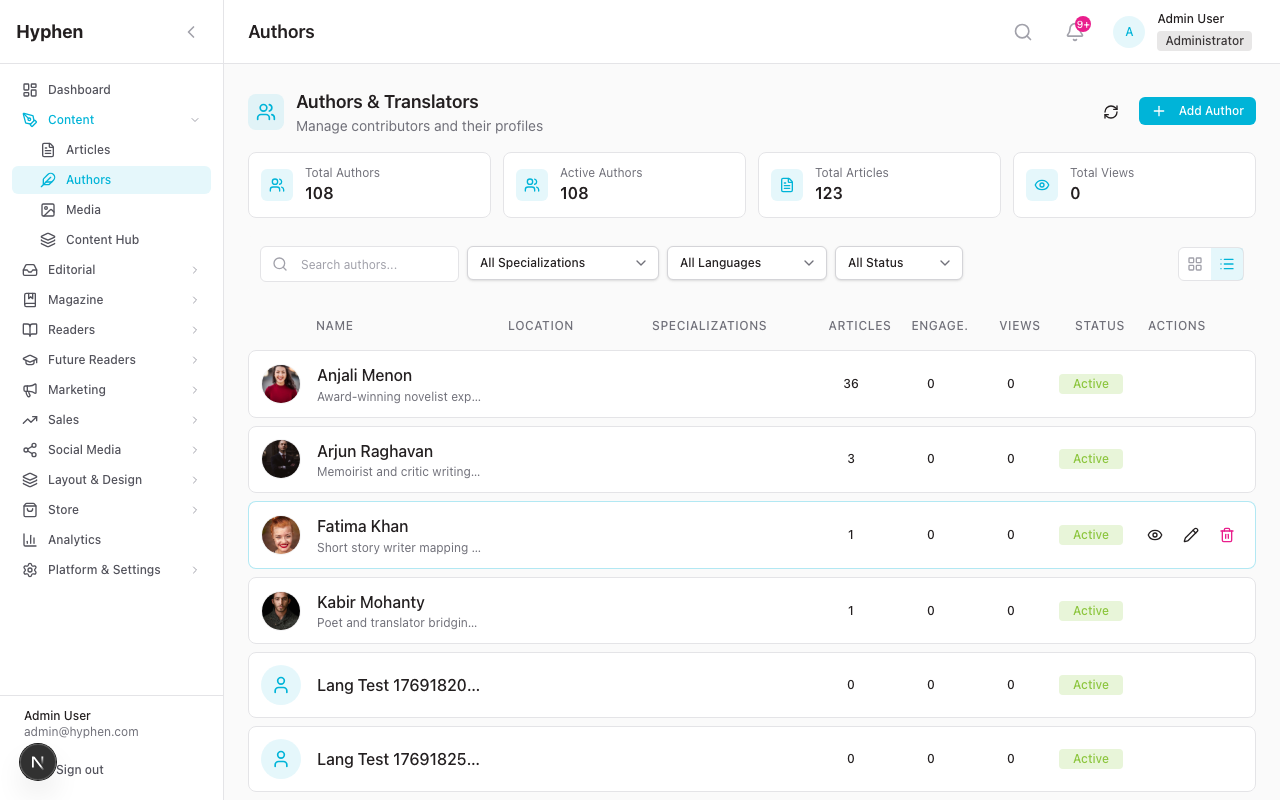
To view an author's profile and published works:
- Go to Authors and click on any author's name or card.
- The author profile page has three tabs:
- Overview — Statistics (total articles, translations, views, comments)
- Timeline — Activity history showing recent actions
- Works — All published works with filters for "All", "As Author", and "As Translator"
To edit or deactivate an author:
- Go to Authors and click Edit on the author's card or row.
- Make your changes and click Save.
- To deactivate an author (e.g., if they are no longer contributing), toggle the Status to Inactive. Their existing articles remain published.
5.2 Set Up Sections and Tags
Sections and tags organize your content so readers can browse by category and topic.
Sections
Sections are the main divisions of your magazine. Typical sections include:
- Fiction
- Poetry
- Essays
- Interviews
- News
Sections are set up in Content → Sections (or through Strapi if managed there). Each article belongs to exactly one section.
Tags
Tags are flexible labels applied to articles for additional categorization. Examples: "short story", "memoir", "debut author", "translation", "award winner".
To manage tags:
- Go to Content → Tags in the Admin Console.
- Click New Tag to create a tag.
- Enter a Name and an optional Description.
- Click Save.
Tip: You can also create new tags on the fly when editing an article — the tag field supports "create new" directly.
5.3 Upload Media to the Media Library
The Media Library stores all images, audio files, videos, and documents used across your content.
To upload files:
- In the Admin Console sidebar, click Media Library.
- Click the Upload Files button.
- Either:
- Drag and drop files into the upload area, or
- Click Browse to select files from your computer
- For each uploaded file, fill in:
- Alt Text — A description for accessibility (important for images)
- Caption — Optional caption displayed below the image
- Credit — Photographer or source credit
- Tags — Keywords for finding the file later
- Folder — Select a folder to organize the file
- Click Upload to save.
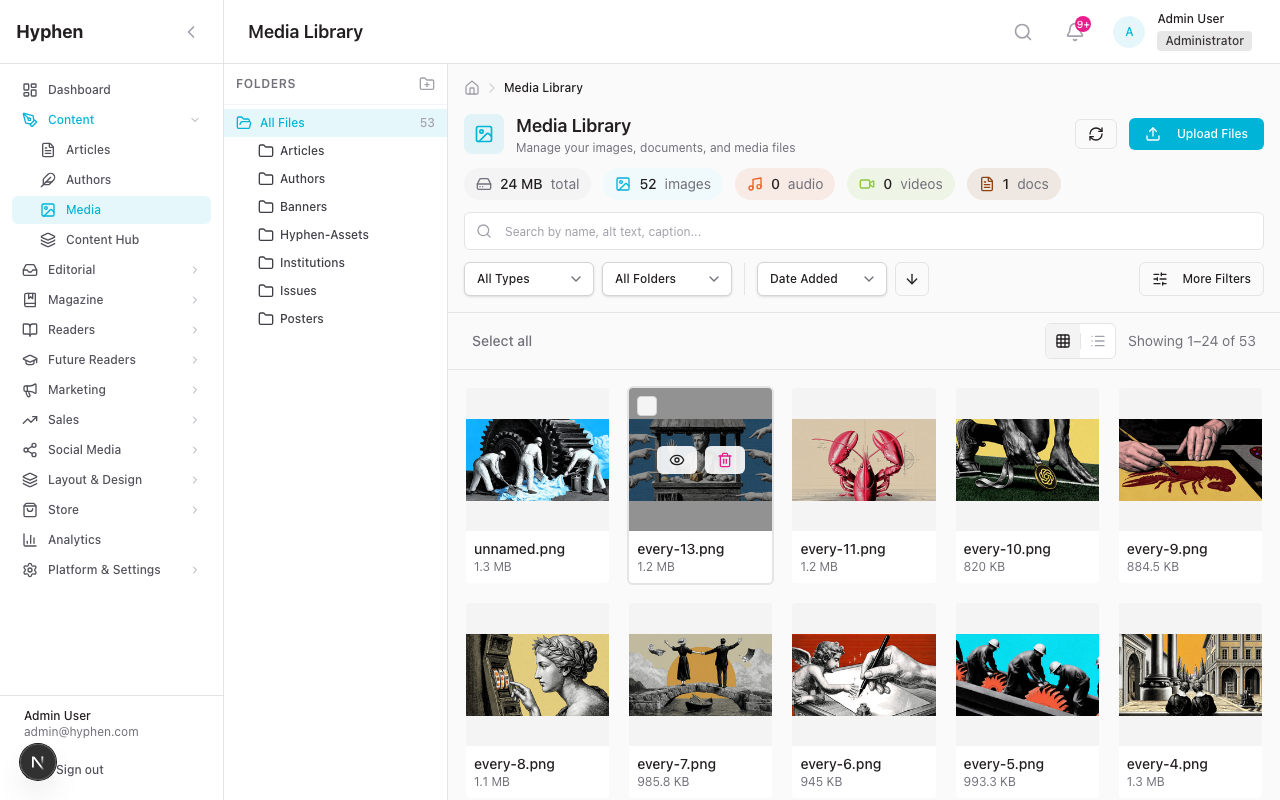
To organize your media:
- Create folders: Click the folder icon and name your new folder (e.g., "Issue 12 Covers", "Author Photos")
- Filter by type: Use the filter pills at the top — Images, Audio, Video, Documents
- Search: Use the search bar to find files by name
- Sort: Sort by date, filename, or file size
- Bulk select: Check multiple files to delete them together
To use media in an article:
When creating or editing an article, click the Featured Image picker. This opens the Media Library where you can:
- Select an existing image
- Upload a new image directly
- Set alt text and caption for the selected image
5.4 Create and Edit an Article
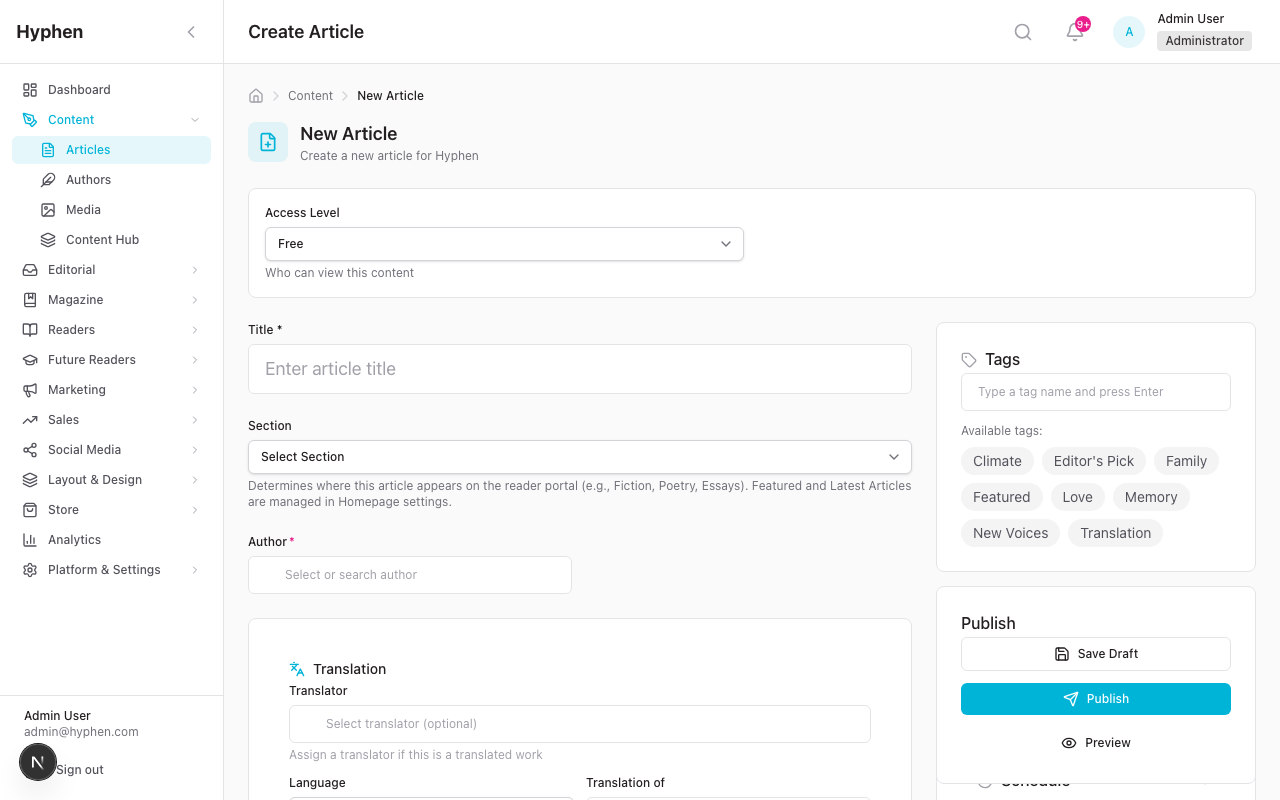
To create a new article:
- In the Admin Console sidebar, click Content.
- Click the New Article button in the top-right corner.
- Fill in the article form. The form has several sections:
Basic Information:
| Field | Required? | What to Enter |
|---|---|---|
| Title | Yes | The article's headline |
| Excerpt | Recommended | A short summary (1-3 sentences) shown in article cards and listings |
| Content Type | Yes | Select one: Fiction, Poetry, Essay, Interview, or News |
| Content | Yes | The full article text. Use the rich text editor for formatting — bold, italic, headings, block quotes, links, embedded images, etc. |
Featured Image:
| Field | Required? | What to Enter |
|---|---|---|
| Image | Recommended | Click to open the Media Picker and select or upload an image |
| Alt Text | Recommended | Describe the image for accessibility |
| Caption | Optional | Caption displayed below the featured image |
Author & Translator:
| Field | Required? | What to Enter |
|---|---|---|
| Author | Yes | Use the Author Picker to search and select the author |
| Translator | Optional | If this is a translation, select the translator |
Publishing Settings:
| Field | Required? | What to Enter |
|---|---|---|
| Status | Yes | Draft (default) — save without publishing. Pending Review — submit for editorial review. Published — publish immediately (if you have permission) |
| Access Level | Yes | Free (default), Restricted Free, Premium Limited, or Subscriber Only |
| Section | Yes | Select the section this article belongs to (e.g., Fiction, Poetry) |
| Tags | Recommended | Select existing tags or type to create new ones |
| Scheduled Publish Date | Optional | Set a future date/time for automatic publication |
Conditional Media (shown based on content type):
| Field | When Shown | What to Enter |
|---|---|---|
| YouTube Video URL | Video content | Paste the YouTube video URL |
| Audio File URL | Audio/Podcast content | URL to the audio file |
| Episode Number | Podcast content | Podcast episode number |
| Season | Podcast content | Podcast season number |
| Duration | Audio/Video content | Length of the recording |
SEO (collapsible section):
| Field | Required? | What to Enter |
|---|---|---|
| Meta Title | Optional | Custom page title for search engines (defaults to article title) |
| Meta Description | Optional | Custom description for search engine results |
- Click Save to save the article.
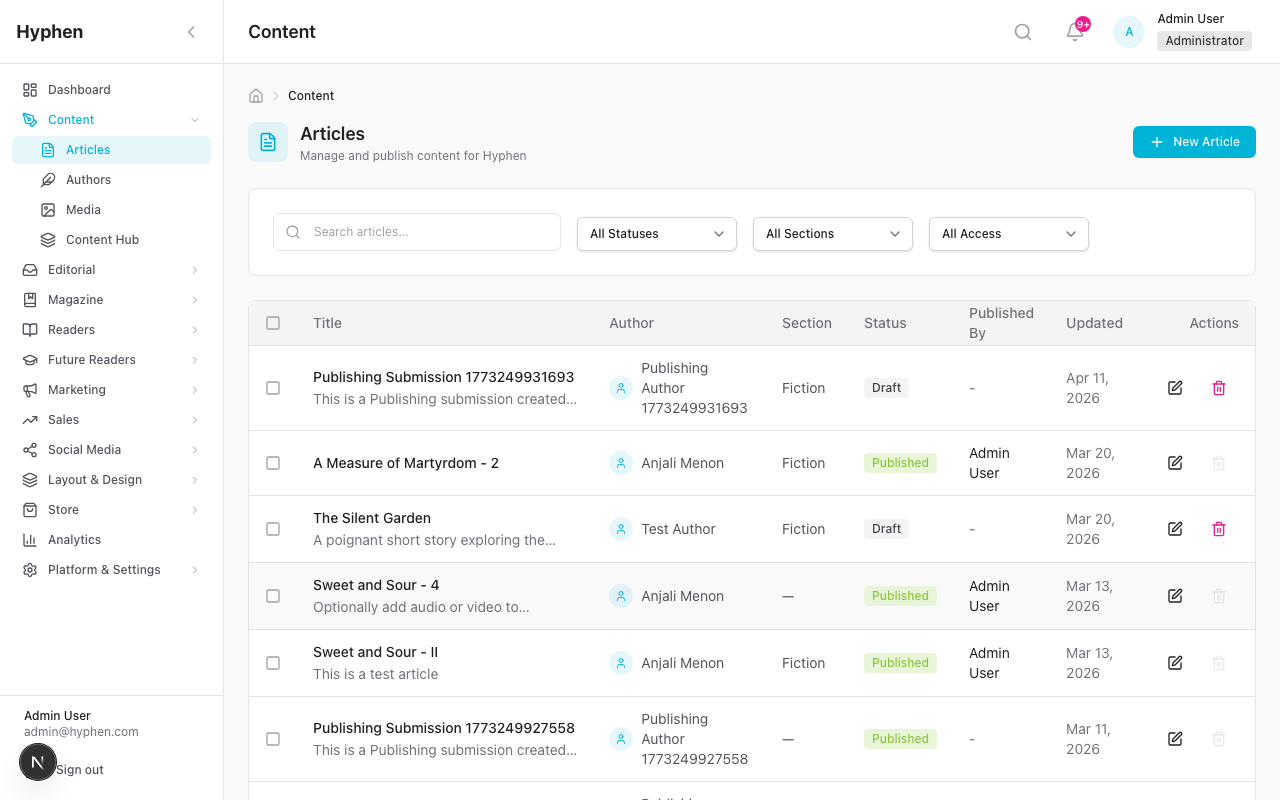
To edit an existing article:
- Go to Content to see the articles list.
- Find your article using:
- Search — Type a title keyword
- Filters — Filter by status, content type, section, access level, author, or date range
- Click on the article title or the Edit action to open it.
- Make your changes and click Save.
To preview an article before publishing:
- While editing, click the Preview button to see how the article will look on the Reader Portal.
To view version history:
- While editing an article, look for the Version History section.
- You can see all saved versions with timestamps and change notes.
- Click on any version to view it, or click Rollback to restore that version.
5.5 Submit an Article for Review (Editorial Workflow)
The Editorial Workflow is a structured process for reviewing and approving content before publication. It ensures quality and editorial standards are met.
Understanding the Workflow Stages
The editorial workflow has these stages, in order:
Invited (optional) → Awaiting Triage → Assigned to Sub-Editor → Sub-Editor Review
    → Awaiting Author Review → Author Revision (if needed)
    → Awaiting Final Review → Ready for Publishing
    → Publishing in Progress → Scheduled or Published
Here's what each stage means:
| Stage | Code | What's Happening | Who Acts |
|---|---|---|---|
| Invited | S0 | An author has been invited to submit but hasn't yet | Author |
| Awaiting Triage | S1 | A new submission is waiting for the chief editor to review and assign it | Chief Editor |
| Assigned to Sub-Editor | S2 | The submission has been assigned to a sub-editor but review hasn't started | Sub-Editor |
| Sub-Editor Review | S3 | The sub-editor is actively reviewing and editing the submission | Sub-Editor |
| Awaiting Author Review | S4 | The sub-editor has sent feedback — waiting for the author to respond | Author |
| Author Revision | S5 | The author is making requested changes | Author |
| Awaiting Final Review | S6 | The submission is with the chief editor for final approval | Chief Editor |
| Ready for Publishing | S7 | Approved and waiting in the publishing queue | Publishing Team |
| Publishing in Progress | S8 | The publishing team is typesetting and preparing for publication | Publishing Team |
| Scheduled | S9 | Set to publish automatically at a scheduled date/time | System (automatic) |
| Published | S10 | Live on the Reader Portal | — |
| Rejected/Withdrawn | SX | The submission was rejected or withdrawn | — |
| Cancelled | SX | The submission was cancelled | — |
| Retracted | SX | A published article was pulled from circulation | Chief Editor |
To access the Editorial Workflow:
- In the Admin Console sidebar, click Editorial.
- You'll be automatically directed to the right queue based on your role:
- Chief Editor → Triage Queue (incoming submissions)
- Publishing Team → Publishing Queue (approved content)
- Sub-Editor → My Work (your assigned reviews)
- Author → Submissions (your submitted articles)
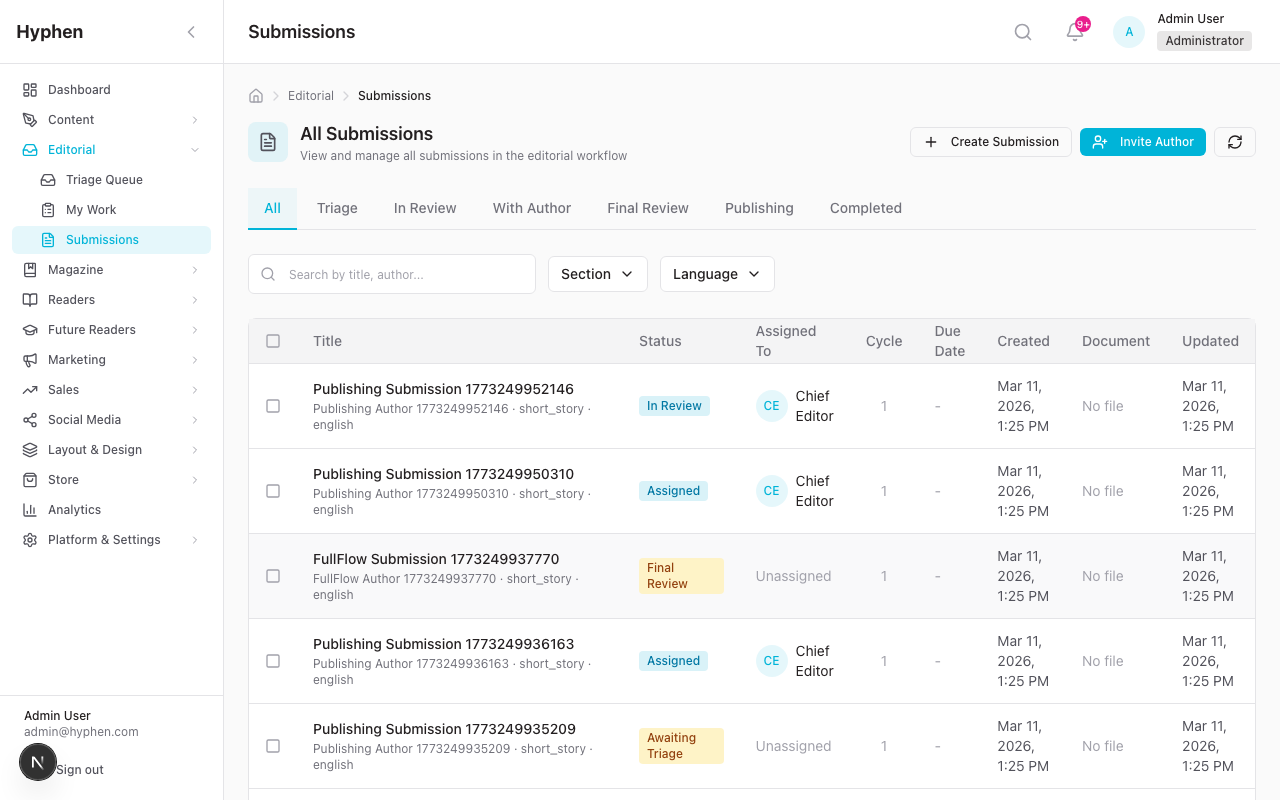
To create a new submission:
- Go to Editorial → Submissions.
- Click New Submission.
- Fill in the submission details (title, content, content type, language, etc.).
- Click Submit. The submission enters "Awaiting Triage" status.
To invite an author to submit:
- Go to Editorial → Submissions.
- Click Invite Author.
- Enter the author's details and a message.
- The author receives an invitation and can submit directly.
To filter and find submissions:
- Use the status tabs at the top:
- All | Triage | In Review | With Author | Final Review | Publishing | Completed
- Use Search to find by title or author name
- Use Content Type filter (Article, Poem, Essay, Interview, Short Story, Translation)
- Use Language filter (English, Hindi, Tamil, Telugu, Kannada, Malayalam, Bengali, Marathi, Gujarati, Other)
5.6 Review, Approve, or Reject an Article
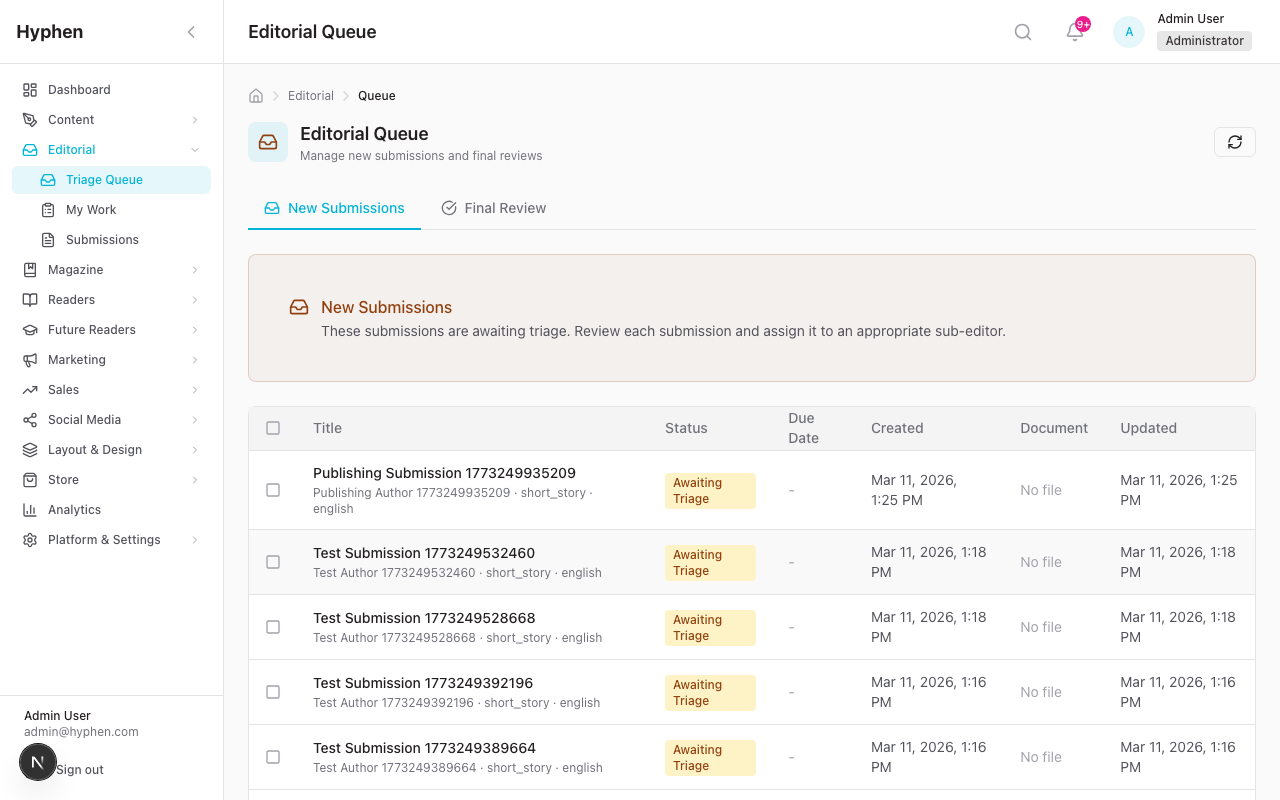
For Chief Editors — Triaging new submissions:
- Go to Editorial → Queue (or click the "Triage" tab in Submissions).
- Click on a submission in "Awaiting Triage" status.
- Review the content.
- Choose an action:
- Assign to Sub-Editor — Select a sub-editor from the dropdown and click confirm. The submission moves to "Assigned to Sub-Editor".
- Reject — Provide a reason and click reject. The submission moves to "Rejected/Withdrawn".
For Sub-Editors — Reviewing submissions:
- Go to Editorial → My Work to see your assigned submissions.
- Click on a submission to open it.
- Review the content using the editor view.
- Choose an action:
- Send to Author for Review — Write your feedback/comments and send. The submission moves to "Awaiting Author Review". The author is notified.
- Submit to Chief Editor — If the content is ready, forward it for final review. The submission moves to "Awaiting Final Review".
- Request Changes — Ask for specific revisions with detailed notes.
For Authors — Responding to revision requests:
- Go to Editorial → Submissions to see your articles.
- Look for articles in "Awaiting Author Review" or "Author Revision" status.
- Click to open, read the editorial feedback.
- Make the requested changes in the editor.
- Click Resubmit to send the revised version back. The submission moves back to "Sub-Editor Review".
For Chief Editors — Final review:
- Go to Editorial → Queue and click the "Final Review" tab.
- Open a submission in "Awaiting Final Review" status.
- Review the content and all editorial feedback.
- Choose an action:
- Approve for Publishing — The submission moves to "Ready for Publishing".
- Request Changes — Send back to the sub-editor for more revisions.
- Reject — Provide a reason. The submission moves to "Rejected/Withdrawn".
Note: Every workflow transition triggers a notification to the relevant person. Authors receive notifications when their work needs attention, editors receive notifications when content is ready for review.
5.7 Publish or Schedule an Article
Publishing from the Editorial Workflow:
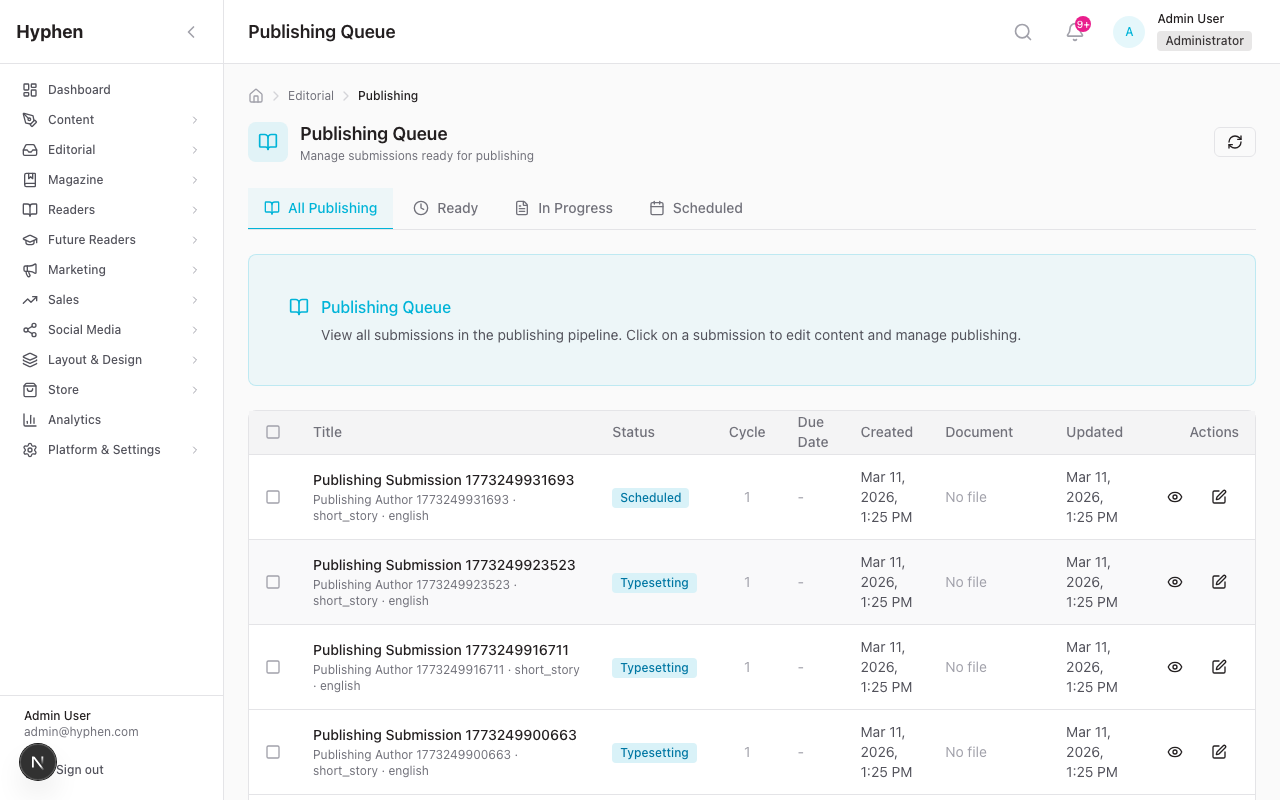
- Go to Editorial → Publishing (or the "Publishing" tab in Submissions).
- You'll see three sub-tabs:
- Ready — Approved articles waiting to be published
- In Progress — Articles being prepared for publication
- Scheduled — Articles set to publish at a future date
- Click on an article in the "Ready" queue.
- Review and make any final edits (typesetting, formatting, featured image, etc.).
- Choose an action:
- Publish Now — The article goes live immediately on the Reader Portal.
- Schedule — Set a future date and time. The article will publish automatically when that time arrives.
Publishing directly from the Content page:
If you have the right permissions, you can also publish directly:
- Go to Content and open the article.
- Change the Status dropdown to Published.
- Click Save. The article goes live.
Or to schedule:
- Open the Scheduling section in the article form.
- Set the Scheduled Publish Date to a future date/time.
- Save the article. It will publish automatically at the scheduled time.
What happens when you publish:
- The article's status changes to "Published" in the Admin Console.
- The article syncs to Strapi CMS (the content backend).
- The Reader Portal picks up the new content within approximately 60 seconds.
- The article appears on:
- Its own article page (e.g.,
/article/the-summer-garden) - The relevant section page (e.g.,
/section/fiction) - Search results
- The homepage (if the section or tags match a homepage section's filters)
- Any collection or issue it's part of
- Its own article page (e.g.,
5.8 Archive or Retract an Article
To archive an article:
Archiving removes an article from active display but keeps it in the system.
- Go to Content and find the article.
- Click the More menu (three dots) on the article row.
- Select Archive.
- Confirm the action.
Or, open the article and change the Status to Archived, then save.
What happens: The article is removed from the Reader Portal. It remains in the Admin Console with "Archived" status and can be restored later.
To retract a published article (Editorial Workflow):
Retraction is for published articles that need to be pulled from circulation for editorial or legal reasons.
- Open the published submission in the Editorial Workflow.
- Click Retract.
- Provide a reason for retraction (required).
- Confirm. The article is unpublished from Strapi and marked as "Retracted" in the workflow.
Important: Retraction is a serious action. It unpublishes the article from the Reader Portal and logs the action with the actor, timestamp, and reason for audit purposes.
To restore an archived article:
- Go to Content and filter by "Archived" status.
- Find the article and use the More menu or Bulk Actions to select Restore.
- The article returns to "Draft" status for re-editing and re-publishing.
5.9 Work with Magazine Issues
Magazine issues let you group articles into a structured publication with a cover, editor's note, and table of contents.
To create a new issue:
-
In the Admin Console sidebar, click Content Entities → Issues.
-
Click Create Issue.
-
Fill in the issue details:
Field Required? What to Enter Title Yes The issue title (e.g., "Spring 2026 Issue") Issue Number Yes A unique number (e.g., 12) Description Recommended Brief description of the issue's theme or contents Cover Image Recommended Upload or select a cover image from the Media Library Hero Image Optional A large hero banner image for the issue page Editor's Note Optional A message from the editor introducing the issue Volume Optional Volume number Theme Optional The issue's theme (e.g., "Migration", "Memory") Cover Date Label Optional Display label for the cover date (e.g., "Spring 2026") Frequency Optional Weekly, Monthly, Quarterly, Half-Yearly, Yearly, or Special Access Level Yes Free or Subscriber Only Reader Mode Optional Article List (default), Flipbook, or Dual Spread -
Click Save. The issue is created in "Draft" status.
Issue workflow stages:
Issues follow their own workflow:
Draft → Building → Under Review → Approved → Scheduled or Published → Archived| Stage | What's Happening |
|---|---|
| Draft | Initial creation — details being entered |
| Building | Adding and organizing articles within the issue |
| Under Review | Submitted for editorial review |
| Approved | Ready to be published or scheduled |
| Scheduled | Set to publish automatically at a future date |
| Published | Live on the Reader Portal |
| Archived | Removed from active display |
To add articles to an issue:
- Open the issue and go to the Articles or Episodes tab.
- Click Add Article.
- Search for and select articles to include.
- Reorder articles by dragging them into the desired order — this controls the table of contents.
- Click Save.
To publish an issue:
- Move the issue through the workflow stages: Draft → Building → Under Review → Approved.
- From the "Approved" stage, choose:
- Publish Now — The issue goes live immediately.
- Schedule — Set a future date/time for automatic publication.
- When published:
- The issue syncs to Strapi CMS.
- It appears on the Reader Portal at
/issue/[slug]. - Subscribers receive email notifications about the new issue.
Tip: Before publishing, use the Publish Validation check to make sure the issue has enough articles, proper access levels, and required images.
5.10 Work with Collections
Collections are curated groups of articles around a theme — like "Best of 2025" or "Summer Reading".
To create a collection:
-
Go to Content Entities → Collections.
-
Click Create Collection.
-
Fill in:
Field Required? What to Enter Title Yes The collection name (e.g., "Best Fiction of 2025") Description Recommended What this collection is about Cover Image Recommended A cover image for the collection card Theme Optional A thematic label Access Level Yes Free or Subscriber Status Yes Draft, Published, Featured, or Archived Featured Optional Toggle on to feature this collection prominently Articles Yes Select and order the articles in this collection Tags Optional Tags for discoverability -
Click Save.
To publish a collection:
- Change the Status to Published (or Featured if you want it highlighted).
- Click Save. The collection appears on the Reader Portal.
5.11 Work with Newsletters
Newsletter editions are email-style content that can be archived and displayed on the Reader Portal.
To create a newsletter edition:
-
Go to Content Entities → Newsletters.
-
Click Create Edition.
-
Fill in:
Field Required? What to Enter Title Yes The newsletter title (e.g., "Weekly Digest — March 16") Edition Number Yes A unique edition number Preview Text Recommended Short preview shown in newsletter listings Content Yes The full newsletter HTML content Topic Optional A topic or theme label Publish Date Recommended The date this edition is published External Archive URL Optional Link to the newsletter in Mailchimp/SendGrid if applicable Status Yes Draft, Published, Featured, or Archived -
Click Save.
To publish a newsletter edition:
- Change the Status to Published and click Save.
- The newsletter appears on the Reader Portal at
/newsletters/[slug]. - It also appears in the Newsletter Archive page at
/newsletters.
5.12 Work with Events
Events cover literary events, workshops, webinars, and meetups.
To create an event:
-
Go to Content Entities → Events.
-
Click Create Event.
-
Fill in:
Field Required? What to Enter Title Yes Event name Description Yes Short description Content Optional Detailed event information Event Type Yes Conference, Workshop, Webinar, Meetup, or Other Start Date/Time Yes When the event begins End Date/Time Yes When the event ends Timezone Yes Event timezone Venue Name For in-person Name of the venue Address / City For in-person Location details Is Online Toggle Whether the event is virtual Online URL For online events Meeting/webinar link Cover Image Recommended Event poster or banner image Speakers Optional Add speaker names, bios, photos, and roles Schedule Optional Add time slots with titles and descriptions RSVP Enabled Optional Toggle to enable registration RSVP Capacity Optional Maximum number of attendees Registration URL Optional External registration link Status Yes Draft, Published, Featured, or Archived -
Click Save.
5.13 Work with Podcasts
Manage podcast shows and their individual episodes.
To create a podcast show:
-
Go to Content Entities → Podcasts.
-
Click Create Show.
-
Fill in the show details:
Field Required? What to Enter Title Yes Podcast show name Description Yes What the podcast is about Cover Art Recommended Podcast cover image Host Name Yes Name of the host Host Bio Optional Brief bio of the host RSS Feed URL Optional Link to the podcast RSS feed Apple Podcasts URL Optional Apple Podcasts link Spotify URL Optional Spotify link Status Yes Draft, Published, Featured, or Archived -
Click Save.
To add episodes:
- Open a podcast show and go to the Episodes tab.
- Click Add Episode.
- Fill in episode details (title, description, audio URL, show notes, season/episode number, duration, guests, transcript).
- Set the Status and Publish Date.
- Click Save.
5.14 Feature Content on the Homepage or Section Pages
To control which content appears prominently on the homepage or section pages, you use the Page Template System. Here's a quick overview of how it connects to editorial content:
How content appears on pages:
Each page on the Reader Portal (homepage, section pages, etc.) is built from sections — blocks like hero banners, article grids, and featured article cards. Each section is configured with:
- Data Source — What type of content to show (articles, events, podcasts, etc.)
- Selection Mode — How content is chosen:
- Dynamic — Automatically pulls the latest or most popular content matching your filters
- Manual — You hand-pick specific articles by ID (curated selection)
- Mixed — Pin specific articles in certain positions, fill the rest dynamically
- Contextual — Shows related content based on the current page (e.g., same section, same author)
- Filters — Narrow by section, tags, content type, etc.
- Sort — Latest, popular, trending, etc.
To feature specific content on the homepage:
- Go to Homepage in the Admin Console sidebar.
- Find the hero section or featured section you want to update.
- Change the Selection Mode to Manual.
- Search for and select the specific articles you want to feature.
- Set the order (first article = most prominent position).
- Click Publish to update the homepage.
Hero exclusivity:
When an article is featured in a hero section, it is automatically removed from other listing sections on the same page. This prevents the same article from appearing twice — once in the hero and again in the grid below.
For section pages (e.g., Fiction, Poetry):
Section pages automatically display articles from that section, sorted by the most recent. The first article typically appears as the featured article. To customize:
- Go to Layout → Pages and find the section page.
- Edit the template sections to control layout and content selection.
- See the Page Template System User Guide for detailed instructions.
Important: For content to appear on any reader-facing page, it must be Published in the Admin Console. Draft or pending review articles are never shown to readers.
5.15 Work with FAQ Items
FAQ items are frequently asked questions that appear on specific pages of the Reader Portal. Unlike a single FAQ page, the Hyphen platform supports page-level FAQs — each page can display its own relevant set of questions.
Navigate to FAQ Items
- In the Admin Console sidebar, click FAQ Items under the Content group.
- You'll see a list of all FAQ items with their question, category, page scopes, status, and last updated date.
Create a New FAQ Item
- Click Create FAQ Item in the top right.
- Fill in the FAQ Details (left column):
- Title — Internal name for organizing (e.g., "Cancel subscription FAQ"). Auto-generates the slug.
- Slug — URL-friendly identifier. Auto-generated from the title; you can customize it.
- Question — The question as it will appear to readers (e.g., "How do I cancel my subscription?").
- Answer — The answer text. Keep it clear and concise.
- Configure Settings (right column):
- Category — Choose a topic category (General, Subscription, Account, Content, Billing, Technical). Categories group FAQs within a page's FAQ section.
- Page Scopes — Type the URL paths where this FAQ should appear (e.g.,
subscribe,about,homepage). Press Enter or comma to add each scope. Leave empty to show the FAQ on all pages (global).- As you type, existing scopes from the database are suggested for consistency.
- You can assign a FAQ to multiple pages (e.g., both
subscribeandabout).
- Sort Order — Lower numbers appear first within a page's FAQ section.
- Active — Toggle to show or hide this FAQ on the Reader Portal.
- Click Create FAQ Item.
Edit an Existing FAQ Item
- From the FAQ items list, click on any FAQ item to open it.
- Click Edit in the top right.
- Make your changes (question, answer, category, page scopes, sort order, active status).
- Click Save Changes.
Filter and Find FAQ Items
- Search — Use the search bar to find FAQs by question, answer, title, or slug.
- Category filter — Click category tabs (All, General, Subscription, Account, etc.) to filter by topic.
- Page scope filter — Use the "All Pages" dropdown to filter by which page a FAQ appears on.
Understanding Page Scopes
Page scopes control which Reader Portal pages show each FAQ:
| Scope Value | Where It Appears |
|---|---|
subscribe | The subscription/pricing page |
about | The about page |
homepage | The homepage |
faq | The dedicated FAQ page |
terms | The terms and conditions page |
| (empty) | All pages — the FAQ is global |
Scopes are free-form text — you can use any URL path slug. The system auto-suggests values already in use to keep things consistent.
How FAQs Appear on the Reader Portal
- Each page that has an FAQ section in its template will show only the FAQs scoped to that page, plus any global FAQs (those with no page scopes).
- FAQs are grouped by category within the section, with an accordion-style expand/collapse interface.
- The FAQ section can be toggled on or off for any page via the Page Template Editor (Layout > Pages > select page > toggle the FAQ section's "Active" checkbox).
- Each page's FAQ section also generates structured data (
FAQPageschema) for search engine optimization.
Delete a FAQ Item
- From the FAQ items list, click the three-dot menu on any row.
- Click Delete.
- Confirm the deletion. This is permanent.
6. How to Verify It Worked
After creating, editing, or publishing content, here's how to confirm everything is working correctly.
Verify an Article is Published
| What to Check | How to Check | Expected Result |
|---|---|---|
| Article page | Visit your Reader Portal at /article/[slug] | The full article is displayed with title, author, featured image, content, and social sharing buttons |
| Section page | Visit /section/[section-slug] (e.g., /section/fiction) | The article appears in the section's article grid, sorted by publish date |
| Homepage | Visit the Reader Portal homepage | The article appears in relevant homepage sections if it matches the section/tag filters |
| Search | Use the Reader Portal search bar to search for the article title | The article appears in search results |
| Author page | Visit /author/[author-slug] | The article appears in the author's works list |
| Admin Console status | Go to Content in the Admin Console | The article shows "Published" status badge |
Verify an Author is Set Up
| What to Check | How to Check | Expected Result |
|---|---|---|
| Author page | Visit /author/[slug] on the Reader Portal | The author's bio, photo, and published works are displayed |
| Authors listing | Visit /authors on the Reader Portal | The author appears in the full authors listing |
| Article attribution | Open any article by this author on the Reader Portal | The author's name and bio appear correctly |
Verify a Magazine Issue is Published
| What to Check | How to Check | Expected Result |
|---|---|---|
| Issue page | Visit /issue/[slug] on the Reader Portal | The issue displays with cover, editor's note, and article table of contents |
| Archive page | Visit /archive on the Reader Portal | The issue appears in the archive timeline |
| Subscriber notification | Check the notification logs in Admin Console | Subscribers received email notifications about the new issue |
Verify a Collection is Published
| What to Check | How to Check | Expected Result |
|---|---|---|
| Collection page | Navigate to the collection via the Reader Portal | All selected articles appear in the correct order |
| Admin listing | Check Content Entities → Collections | Shows "Published" or "Featured" status |
Verify Scheduled Publishing
| What to Check | How to Check | Expected Result |
|---|---|---|
| Before schedule time | Visit the article URL on Reader Portal | The article should NOT be visible |
| After schedule time | Wait for the scheduled time, then refresh the article URL | The article should now be live |
| Admin status | Check the article/issue in Admin Console after the scheduled time | Status should change from "Scheduled" to "Published" |
7. Worked Examples
7.1 Example 1: Creating and Publishing a New Article from Draft to Live
Scenario: You're a content manager who needs to publish a new short story called "The River's Memory" by author Priya Sharma in the Fiction section.
Step-by-step:
-
Check the author exists:
- Go to Authors in the sidebar.
- Search for "Priya Sharma".
- If she doesn't exist, click New Author and create her profile (name, email, short bio, photo, set specialization to Fiction, toggle Active).
-
Upload the featured image:
- Go to Media Library.
- Click Upload Files.
- Upload the story's cover image.
- Add alt text: "A misty river at dawn".
- Save to the "Fiction Covers" folder.
-
Create the article:
- Go to Content and click New Article.
- Title: "The River's Memory"
- Content Type: Fiction
- Content: Paste or type the full story in the rich text editor. Format with headings, italics for thoughts, block quotes for dialogue.
- Excerpt: "In the village where rivers remembered everything, Meera discovered that some memories are better left undisturbed."
- Featured Image: Click the picker and select the image you uploaded.
- Author: Search and select "Priya Sharma".
- Section: Select "Fiction".
- Tags: Select "short story", "debut" (or create new tags).
- Access Level: Free.
- Status: Draft.
- Click Save.
-
Preview the article:
- Click Preview to see how it will look on the Reader Portal.
- Check the formatting, image placement, and excerpt.
-
Publish the article:
- Change the Status dropdown from "Draft" to "Published".
- Click Save.
-
Verify on the Reader Portal:
- Visit
/article/the-rivers-memory— the full article should be live. - Visit
/section/fiction— the article should appear in the fiction grid. - Visit
/author/priya-sharma— the article should appear in her works list. - Search for "River's Memory" — the article should appear in results.
- Visit
7.2 Example 2: Sending an Article Back for Revision and Then Approving It
Scenario: You're a chief editor. A new poem called "Fragments" has been submitted and needs revision before it can be published.
Step-by-step:
-
Triage the submission:
- Go to Editorial (you'll land on the Triage Queue as a chief editor).
- Find "Fragments" in the "Awaiting Triage" list.
- Click on it to review.
- Click Assign to Sub-Editor and select "Ravi Kumar" from the dropdown.
- The submission moves to "Assigned to Sub-Editor". Ravi receives a notification.
-
Sub-editor reviews (Ravi's perspective):
- Ravi goes to Editorial → My Work and finds "Fragments".
- He reads the poem and finds the third stanza needs work.
- He clicks Send to Author for Review and writes:
"The third stanza breaks the rhythm established in the first two. Consider revising the line breaks and the closing image. The rest is strong."
- The submission moves to "Awaiting Author Review". The author is notified.
-
Author revises (Author's perspective):
- The author goes to Editorial → Submissions and sees "Fragments" in "Awaiting Author Review".
- She reads Ravi's feedback, revises the third stanza in the editor.
- She clicks Resubmit.
- The submission moves back to "Sub-Editor Review". Ravi is notified.
-
Sub-editor approves:
- Ravi reviews the revision. The third stanza is now much better.
- He clicks Submit to Chief Editor for final review.
- The submission moves to "Awaiting Final Review". The chief editor is notified.
-
Chief editor gives final approval:
- You open "Fragments" from the "Final Review" tab.
- You read the revised version and are satisfied.
- Click Approve for Publishing.
- The submission moves to "Ready for Publishing".
-
Publishing team publishes:
- The publishing team sees "Fragments" in Editorial → Publishing → Ready.
- They open it, make final formatting adjustments.
- Click Publish Now.
- The poem is live on the Reader Portal.
7.3 Example 3: Creating a New Author and Mapping Content
Scenario: A new writer, Amit Desai, is joining your publication. You need to set up his profile and assign his first two articles.
Step-by-step:
-
Create the author profile:
- Go to Authors and click New Author.
- Name: Amit Desai
- Email: amit.desai@email.com
- Photo: Upload his headshot from the Media Library.
- Short Bio: "Amit Desai is a Mumbai-based writer whose work explores urban solitude and the spaces between languages."
- Long Bio: Add a more detailed biography.
- Location: Mumbai, India
- Website: https://amitdesai.com
- Social Links: Twitter: @amitdesai, Instagram: @amit.writes
- Languages: English, Hindi, Marathi
- Specializations: Check Fiction, Essay
- Status: Active
- Click Save.
-
Create and assign his first article:
- Go to Content and click New Article.
- Title: "The Quiet Between Trains"
- Content Type: Fiction
- Content: Paste the story.
- Author: Search and select "Amit Desai".
- Section: Fiction
- Tags: "short story", "urban"
- Access Level: Free
- Status: Published (or Draft if it needs review first)
- Click Save.
-
Create his second article:
- Repeat the above for his essay "Notes on Forgetting".
- Content Type: Essay
- Section: Essays
- Author: Amit Desai
- Tags: "memoir", "language"
-
Verify the author profile:
- Go to Authors and click on "Amit Desai".
- The Overview tab should show 2 articles.
- The Works tab should list both articles.
- On the Reader Portal, visit
/author/amit-desai— his profile, bio, and both articles should appear.
7.4 Example 4: Featuring Content on a Curated Homepage Section
Scenario: You want the homepage hero section to showcase three specific articles for the week: a new fiction piece, a featured interview, and an award-winning poem.
Step-by-step:
-
Identify the articles:
- Go to Content and note the titles (or IDs) of the three articles you want to feature:
- "The River's Memory" (Fiction)
- "In Conversation with Arundhati Roy" (Interview)
- "Monsoon Ghazal" (Poetry)
- Make sure all three are Published.
- Go to Content and note the titles (or IDs) of the three articles you want to feature:
-
Edit the homepage hero section:
- Go to Homepage in the Admin Console sidebar.
- Find the Hero section (usually the first section — "Hero Full-Width" or "Hero Carousel").
- Click Edit on the hero section.
- Change the Selection Mode to Manual.
- Remove any existing selections.
- Search for and add:
- "The River's Memory" (this will be the primary hero item)
- "In Conversation with Arundhati Roy"
- "Monsoon Ghazal"
- Arrange them in the desired order (first = most prominent).
-
Publish the homepage:
- Click Publish to save and push the changes.
-
Verify on the Reader Portal:
- Visit the Reader Portal homepage.
- The hero section should display the three selected articles in order.
- The rest of the homepage sections (article grids, etc.) should NOT duplicate these hero articles (hero exclusivity ensures this).
- Click each hero article to confirm it links to the correct article page.
Tip: If you want the hero to go back to showing the latest content automatically, change the Selection Mode back to Dynamic with filters like "all sections, sort by latest".
7.5 Example 5: Publishing a Themed Collection
Scenario: You want to create a "Best of 2025" collection that curates the top 10 articles from the past year.
Step-by-step:
-
Identify the articles:
- Go to Content and filter by date range (January 2025 – December 2025).
- Sort by views, shares, or manually select your editorial picks.
- Note the 10 articles you want to include.
-
Create the collection:
- Go to Content Entities → Collections.
- Click Create Collection.
- Title: "Best of 2025"
- Description: "Our editors' selection of the finest fiction, poetry, and essays published in 2025."
- Cover Image: Upload or select a curated cover image.
- Theme: "Year in Review"
- Access Level: Free (to reach the widest audience)
- Articles: Search and add the 10 articles in the desired reading order:
- "The River's Memory" by Priya Sharma
- "Monsoon Ghazal" by Kavita Rao
- ... (continue for all 10)
- Tags: "best of", "2025", "editors pick"
- Status: Published
- Featured: Toggle ON to give it prominent placement
- Click Save.
-
Feature the collection on the homepage (optional):
- Go to Homepage and find or add a "Collections" section.
- Configure it to show Featured collections.
- Publish the homepage.
-
Verify on the Reader Portal:
- Navigate to the collection page — all 10 articles should be listed in order.
- Each article link should open the full article.
- The collection should appear in any homepage section configured to show collections.
- If featured, it should be highlighted prominently.
8. Common Mistakes and How to Fix Them
| Mistake | What Happens | How to Fix |
|---|---|---|
| Article not showing on Reader Portal | You published the article but it doesn't appear on the website | 1. Wait 60 seconds (the Reader Portal refreshes on a 60-second cycle). 2. Check that the article status is "Published" in the Admin Console. 3. Make sure the article has a Section assigned — articles without sections don't appear on section pages. 4. Check Strapi is running and connected. |
| Featured image not showing | The article card shows a placeholder instead of the image | Make sure the featured image is set in the article form. Check that the image URL is valid and accessible. Re-upload from the Media Library if needed. |
| Wrong author on article | The article shows the wrong author name | Open the article, use the Author Picker to change the author, and save. The Reader Portal updates within 60 seconds. |
| Article stuck in workflow | A submission seems stuck and no one can act on it | Check the current status in the Submissions list. Make sure the right person has been notified. The chief editor can reassign or route the submission to a different stage. |
| Published article has a typo | A mistake was found after publishing | Open the article in Content, fix the typo, and save. The change syncs to the Reader Portal within 60 seconds. No need to unpublish. |
| Scheduled article didn't publish | The scheduled time passed but the article isn't live | Check the Admin Console — does the status still say "Scheduled"? The cron job may not have run yet. Check with your DevOps team that the scheduled publishing cron is active. You can also manually change the status to "Published". |
| Duplicate article in hero and grid | The same article appears in both the hero section and the article grid below | This shouldn't happen if hero exclusivity is working. Check that the hero section has heroExclusive enabled in the template settings. |
| Collection shows 0 articles | The collection page loads but no articles are listed | Make sure the articles in the collection are all Published. Draft articles are not displayed on the Reader Portal. |
| Issue publishing fails validation | You tried to publish an issue but got validation errors | Run the Publish Validation check. Common issues: too few articles, missing cover image, articles not in Published status. Fix the flagged items and try again. |
| Version history shows unexpected changes | The article's version history shows changes you didn't make | Check the "Updated By" field. Another editor may have made changes. Use the version history to compare and roll back if needed. |
| Tags not appearing on Reader Portal | You added tags to an article but they don't show on the article page | Tags sync with Strapi. Verify the tags exist in both the Admin Console and Strapi. If they're newly created, the sync may take a few minutes. |
| Cannot publish — permission denied | You get an error when trying to publish or change article status | Your role may not have publishing permissions. Contact your Admin to check your role's permissions under Settings → Roles & Permissions. |
| Newsletter not visible on Reader Portal | Published newsletter edition doesn't appear | Check the status is "Published". Visit /newsletters on the Reader Portal to check the archive listing. Ensure the newsletter template section is configured on the newsletters page. |
Use this checklist when testing the Editorial & Content system. Each item should be verified as working.
- Can create a new article with all required fields (title, content type, content, author, section)
- Rich text editor formats correctly (bold, italic, headings, links, block quotes, images)
- Can upload and set a featured image with alt text and caption
- Can assign an author and (optionally) a translator using the Author Picker
- Can save an article as Draft without publishing
- Can change article status from Draft → Pending Review
- Can change article status from Pending Review → Published (with correct permissions)
- Published article appears on Reader Portal article page within 60 seconds
- Published article appears on the correct section page
- Published article appears in search results
- Published article appears on the author's profile page
- Can set Access Level (free, restricted_free, premium_limited, subscriber_only) and paywall behaves correctly
- Can schedule an article for future publication and it publishes at the correct time
- Can archive a published article and it disappears from the Reader Portal
- Can restore an archived article
- Version history saves correctly and rollback works
- Chief editor can view submissions in the Triage Queue
- Chief editor can assign a submission to a sub-editor
- Sub-editor sees assigned submissions in My Work
- Sub-editor can send a submission to the author for revision with feedback
- Author receives notification and can view feedback
- Author can revise and resubmit
- Sub-editor can forward to chief editor for final review
- Chief editor can approve for publishing
- Chief editor can reject with a reason
- Publishing team can see approved submissions in the Publishing Queue
- Publishing team can publish immediately or schedule
- Retraction works and unpublishes from Reader Portal
- Cancellation works from appropriate stages
- Every workflow transition sends a notification to the relevant person
- Workflow respects role permissions (authors can't approve, sub-editors can't publish, etc.)
- Can create a new author with all profile fields
- Author profile page shows correct statistics
- Author's Works tab lists all their published content
- Can edit and update an author profile
- Can deactivate an author (their articles remain published)
- Author page on Reader Portal shows bio, photo, and works correctly
- Can upload single and multiple files
- Can organize files into folders
- Can add and edit alt text, caption, credit, and tags
- Can filter by type (images, audio, video, documents)
- Can search by filename
- Can delete a file (with usage warning if in use)
- Can bulk select and delete files
- Media Picker works when selecting featured images in the article form
- Can create, edit, publish, and archive a Magazine Issue
- Can add and reorder articles within an issue
- Issue workflow transitions work (draft → building → under review → approved → published)
- Scheduled issue publishes at the correct time via cron
- Published issue appears on Reader Portal with cover, editor's note, and article list
- Subscribers receive notification when issue is published
- Can create, edit, publish, and archive a Collection
- Collection displays the correct articles in the right order
- Can create, edit, publish, and archive a Newsletter Edition
- Newsletter edition appears in the newsletter archive on Reader Portal
- Can create, edit, publish, and archive an Event
- Event displays correctly with date, location, and RSVP information
- Can create, edit, publish, and archive a Podcast Show
- Can add episodes to a podcast show
- Episodes display with audio player, show notes, and metadata
- Can manually feature specific articles in the homepage hero section
- Hero exclusivity works — hero articles don't duplicate in other sections
- Dynamic sections pull the latest content matching their filters
- Homepage updates on the Reader Portal within 60 seconds of publishing changes
- Section pages display articles from the correct section
- Authors can only see and edit their own submissions
- Sub-editors can only see submissions assigned to them
- Chief editors can see all submissions
- Publishing team can only act on approved content
- Status changes respect role permissions
- Paywall correctly restricts content based on access level
The following features work automatically when you publish content. No manual setup is required.
| Feature | What It Does | How It Helps |
|---|---|---|
Sitemap (/sitemap.xml) | Automatically lists all published articles, sections, authors, and tags | Search engines discover your content faster |
RSS Feed (/feed.xml) | Generates a live feed of the 50 most recent articles | Readers can subscribe via RSS readers (Feedly, etc.); also used by content aggregators |
| Structured Data (JSON-LD) | Adds machine-readable article metadata (author, date, section, paywall status) to every page | Enables rich search results in Google (author name, publish date, article section) |
| Open Graph & Twitter Cards | Adds social sharing metadata to every article | Articles display properly when shared on Facebook, Twitter/X, LinkedIn, and WhatsApp |
| Canonical URLs | Sets the definitive URL for each page | Prevents duplicate content issues in search rankings |
| Paywall Markup | Tells Google which articles are free vs. subscriber-only | Google can show paywalled articles in search results with appropriate labelling |
| robots.txt | Controls which pages search engines can and cannot index | Keeps private pages (account, login, API) out of search results |
You don't need to configure any of these -- they are generated from the article metadata you already enter (title, excerpt, featured image, author, section, access level, SEO fields).
Tip: For the best search engine results, always fill in the Meta Title and Meta Description fields in the article's SEO section. If left blank, the article title and excerpt are used as defaults.
Based on the current implementation as of March 2026:
| Area | Limitation | Workaround |
|---|---|---|
| Social Login | OAuth link API exists but NextAuth provider configuration is not yet complete for Reader Portal social login | Users must register with email/phone and OTP |
| Email Service Provider | Full Mailchimp/SendGrid integration is partial — webhook handlers for open/click/bounce metrics exist but full integration is incomplete | Transactional emails work via SMTP; marketing email analytics are limited |
| Content Analytics | Individual article performance tracking is partial | Use Google Analytics 4 for detailed article analytics |
| Advanced Search | Basic full-text search works; advanced NLP-based typo correction is pending | Users may need exact or near-exact search terms |
| Translation Workflow | Multilingual translation fields (language, translationOfId) are synced to Strapi, but there is no dedicated translation management UI | Translations are managed as separate articles linked by translationOfId |
| Collection Ordering | Collections store article order as a JSON field | Ordering works but there is no drag-and-drop reordering UI within the collection editor |
| Real-time Collaboration | Only one editor should edit an article at a time | There is no real-time collaboration or locking mechanism — coordinate with your team to avoid conflicts |
| Bulk Scheduling | You can schedule individual articles but there is no bulk scheduling feature | Schedule articles one at a time, or use Issue scheduling to publish a group of articles together |
| Podcast Audio Hosting | The platform stores audio file URLs but does not host audio files directly | Upload audio to a podcast hosting service (e.g., Anchor, Libsyn) and paste the URL |
| Reader Portal Cache | Changes to published content take up to 60 seconds to appear on the Reader Portal due to ISR (Incremental Static Regeneration) | Wait 60 seconds after publishing, then hard-refresh the Reader Portal page |
Note: These limitations reflect the current state of implementation. Features listed as partial or pending may be completed in future updates. If you encounter issues not covered here, contact your platform admin or file a support request.
This guide is based on the actual platform implementation as of March 2026. For questions about page templates and layout design, see the Page Template System User Guide. For marketing features, see the Marketing Features User Manual.